

Creating a decal area
Creating a new decal area
Once your decal document is created and placed in the current scene, you will want to create your first decal area by clicking on the "Create a new decal area" button at the bottom of the area list. A new area will appear in your list.
To define this new decal area using some curve points, you need to :
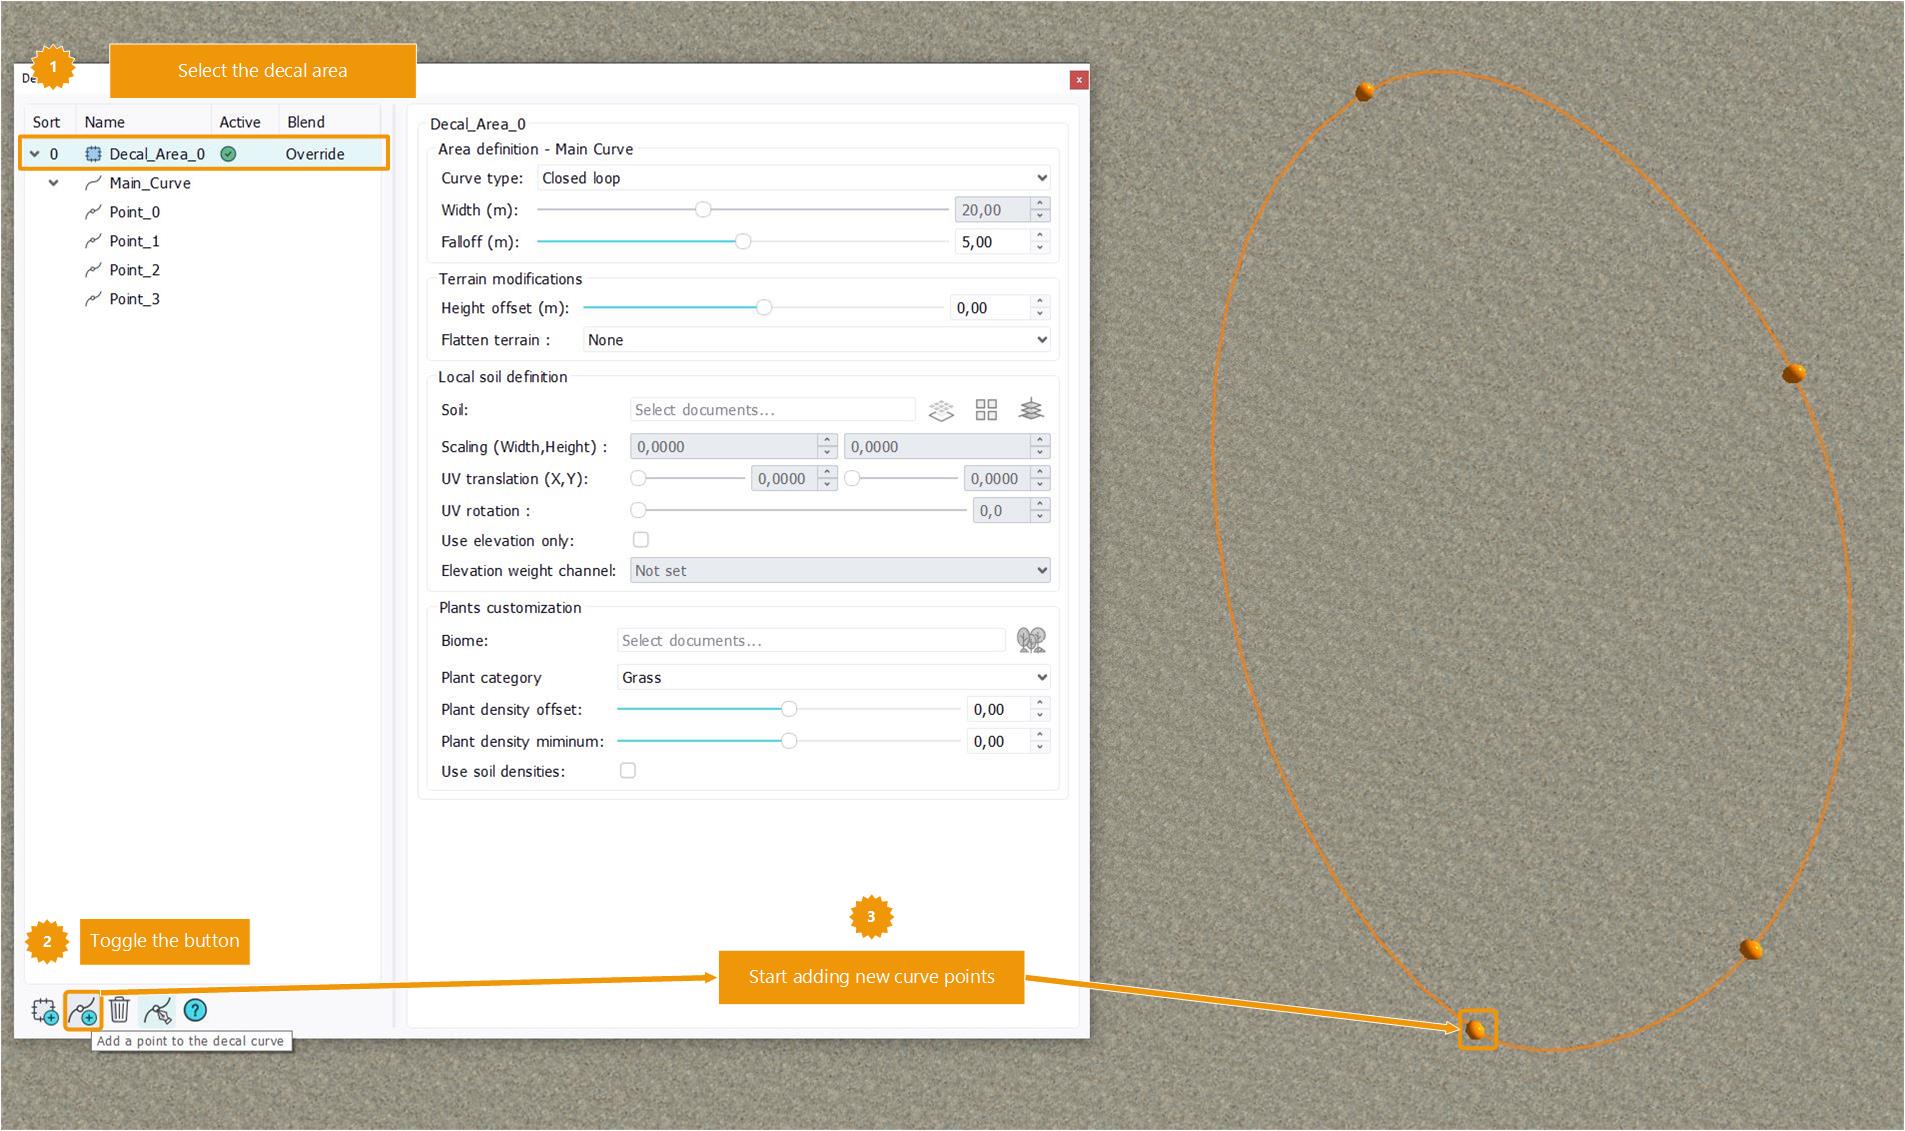
- Select this decal area in the list. It will be highlighted in a light blue color.
- Toggle the "Add new points" button.
- Start adding new points to the decal area by left clicking, in the viewport, on the ground. A new curve will be created with your points.
- To stop adding new points, click again on the "Add new points" button to untoggle it.
You can delete decal areas or curves points using the trash bin button. Select the object that you want to delete in the decal areas list view or in the viewport, then click on the delete button.
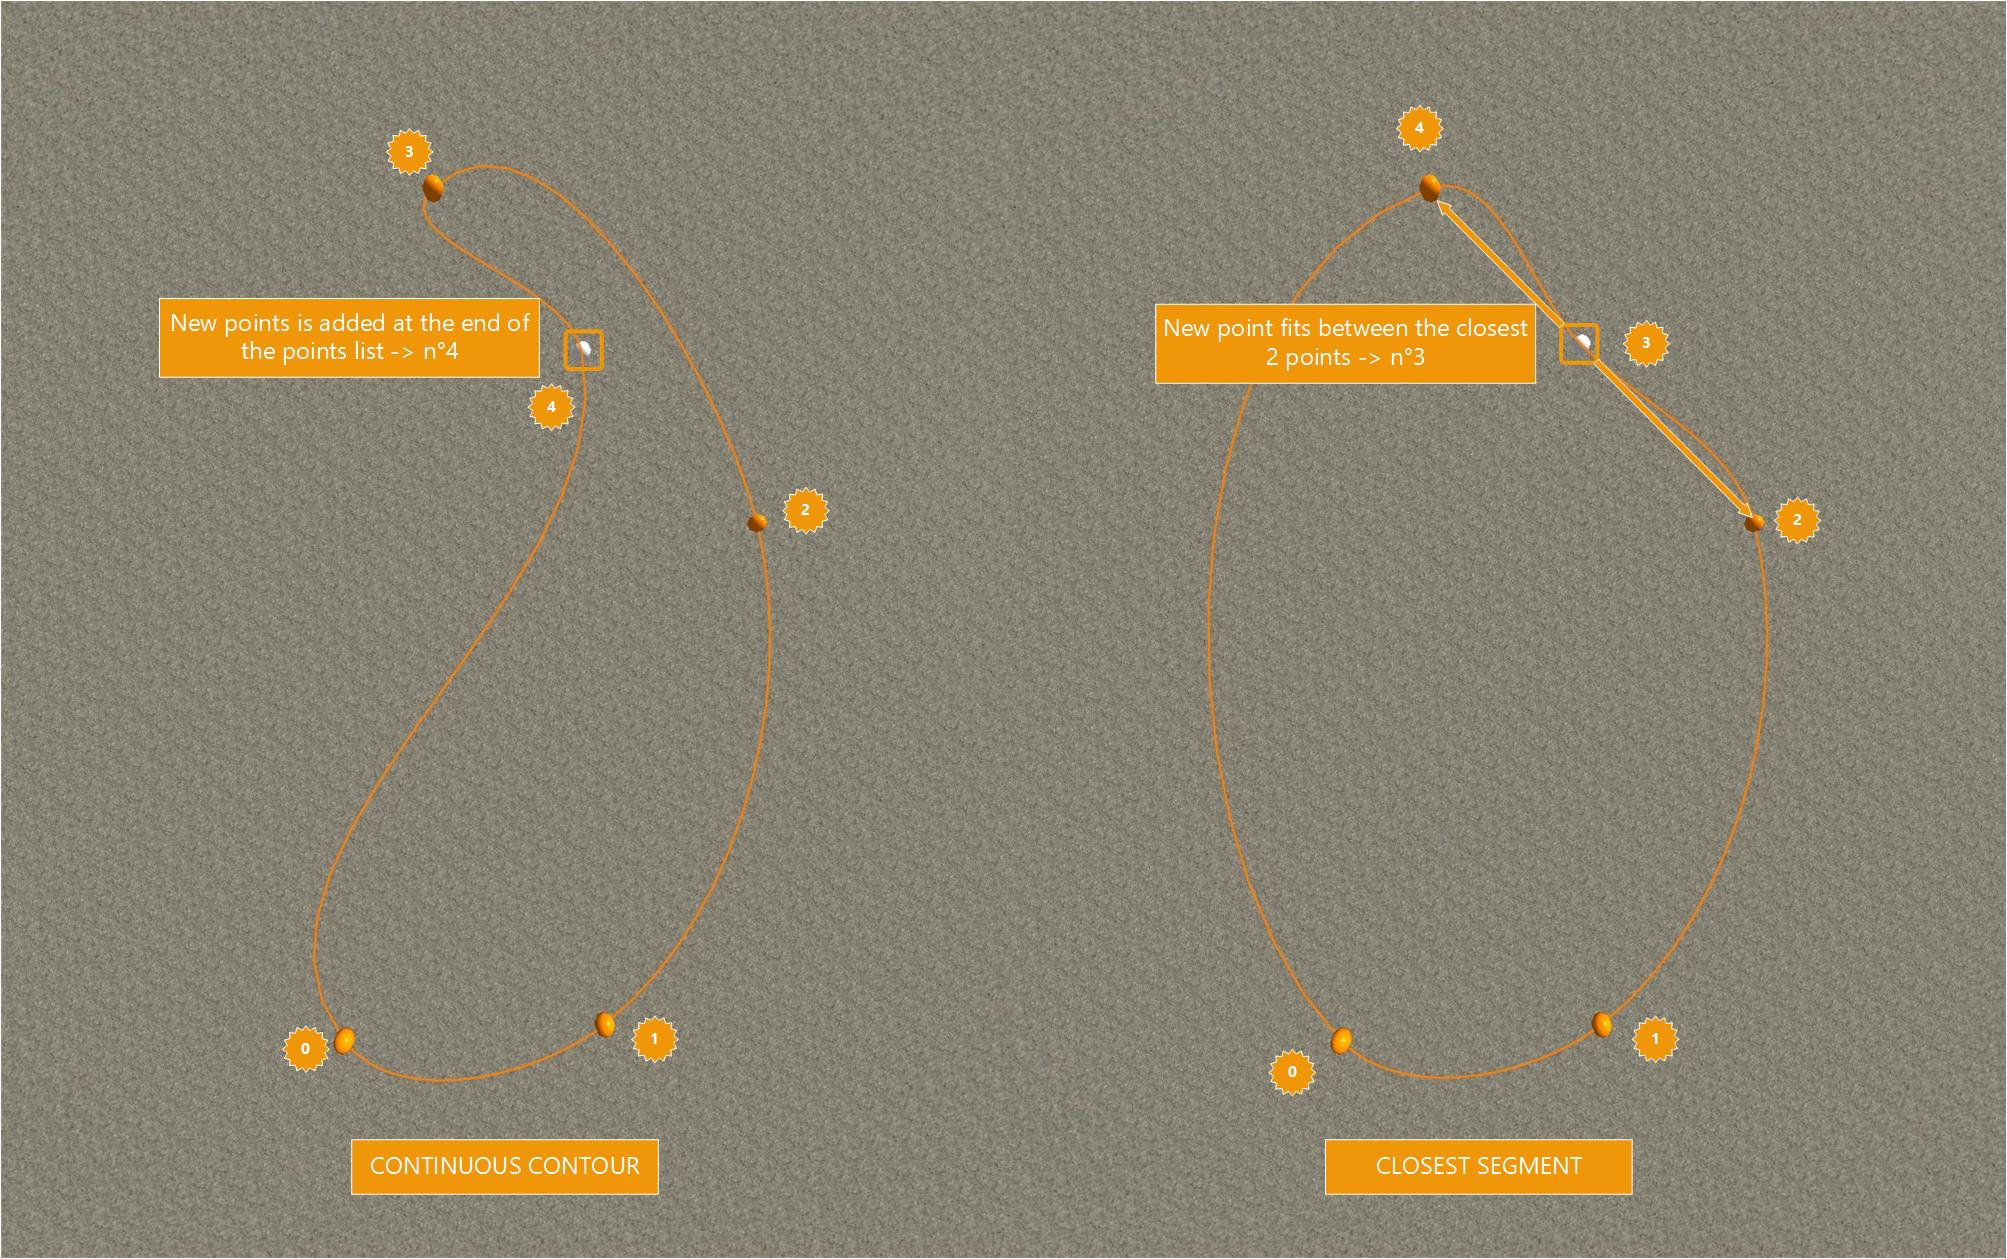
You can change the way points are added to an existing decal area curve. We have two modes defining how a new point is added to the existing curve : "Continuous contours" and "Closest Segment". You can switch between the two modes using the button next to the trash bin.
- Continuous contours : the new curve point is added at the end of the points list. The curve contours follows the points list in the order they were added. This is the best mode to create a new decal area curve, especially if you are trying to follow some contours from an overlay, the terrain or anything else.
- Closest segment: the new curve point is inserted in the points list between the two closest existing points. This is the best mode to refine an existing curve contour.
Refining the area
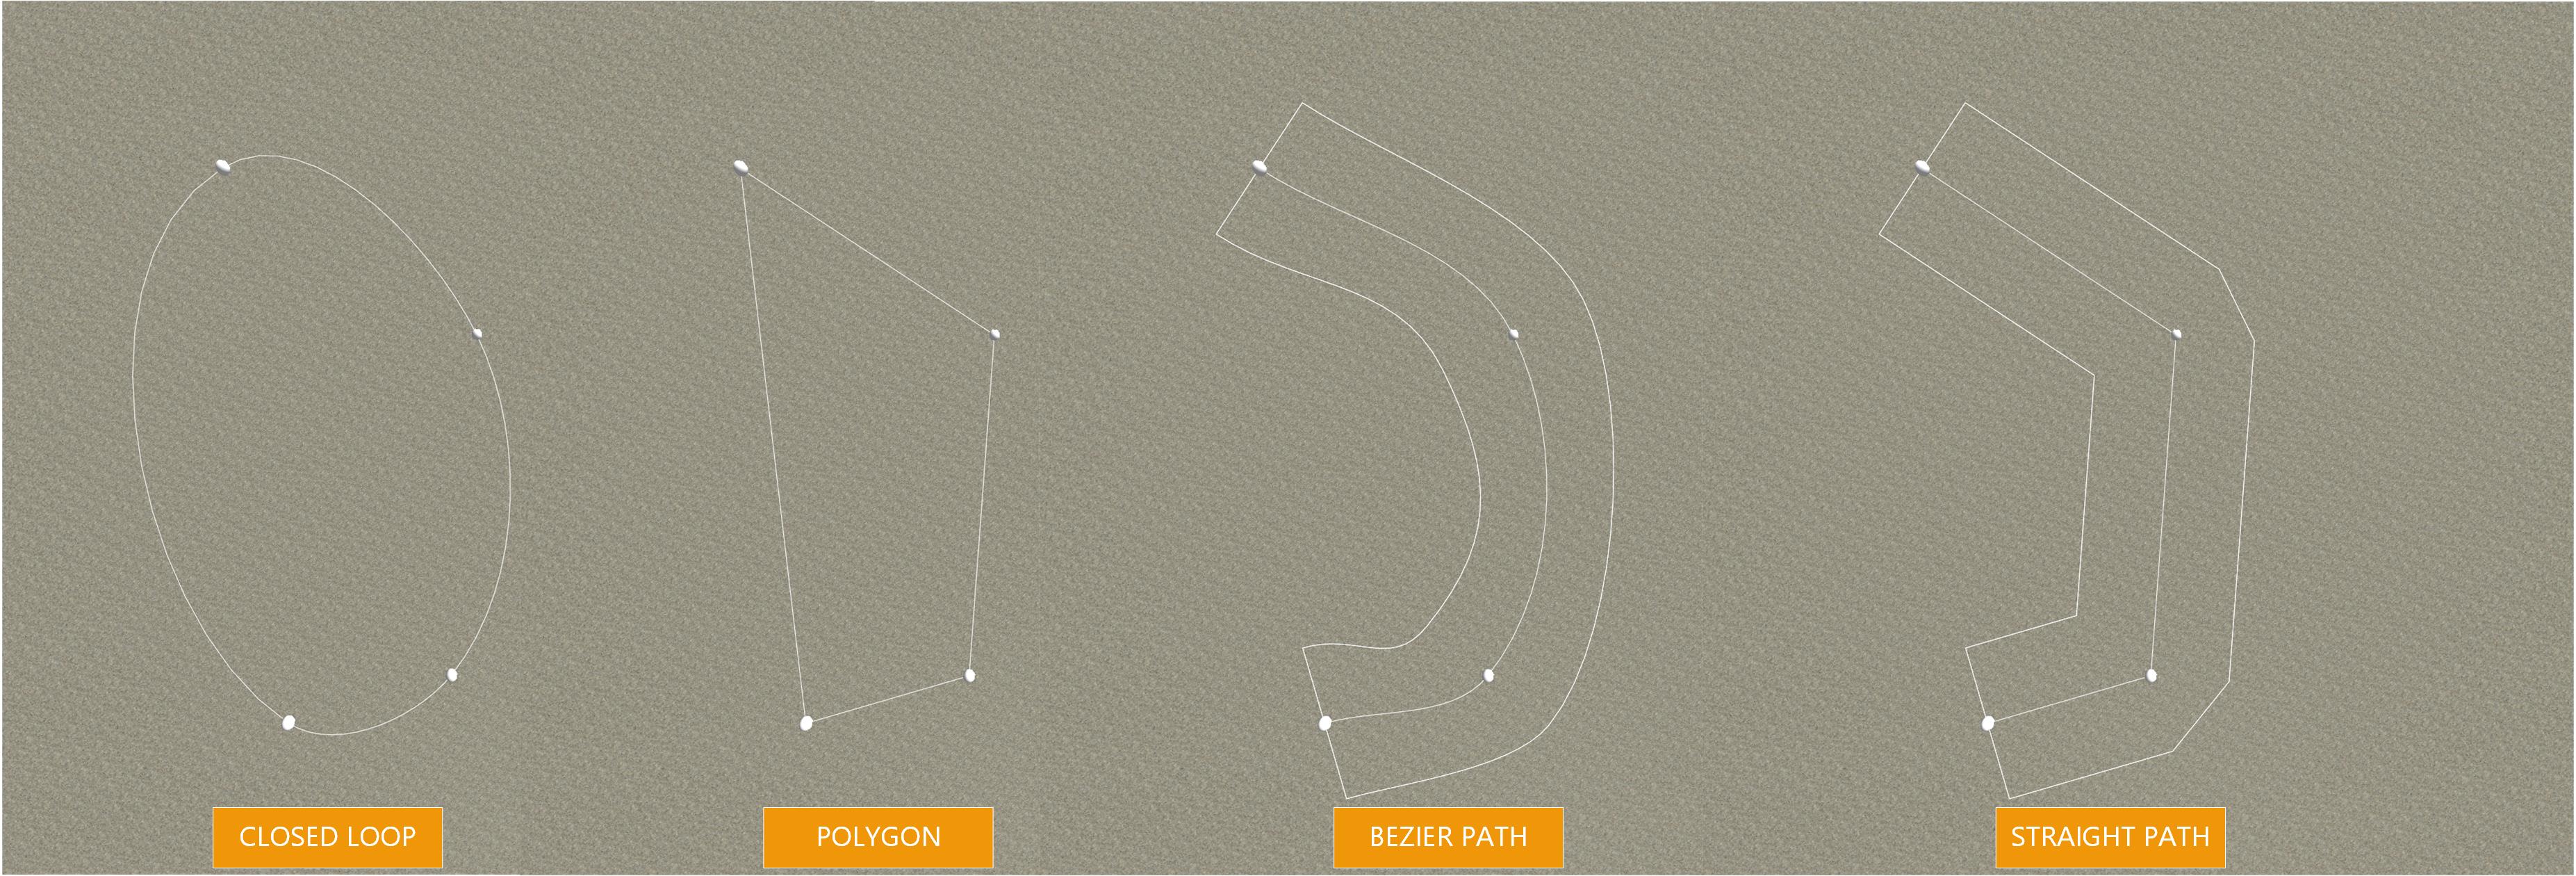
Once you have your curve points placed, you can change the shape of the global curve. You have 4 options :
- Closed loop : a closed shape formed with smooth Bezier curve contours.
- Polygon : a closed shape formed with straight segments contours.
- Bezier Path : a line path formed with a smooth Bezier curve.
- Straight Path : a line path formed with a broken line of straight segments.
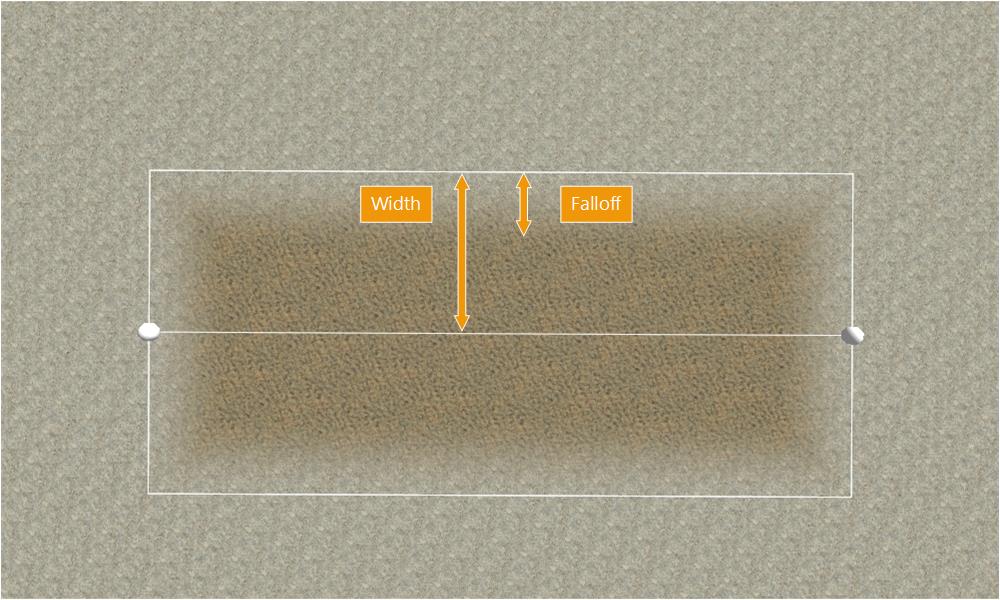
For "Bezier path" and "Straight path" curves, you can choose the width of the path using the width slider. It is expressed in meters and is the total width of the path (not the half width).
Finally, you can setup your falloff width for all shapes. The falloff width defines a border inside the decal area where all the modifications (soil, plant densities..) will be blended smoothly with what was defined outside of the decal.
 Creating a decal document Creating a decal document | Creating a hole |
