


 Controlling the camera
Mouse gestures at a glance
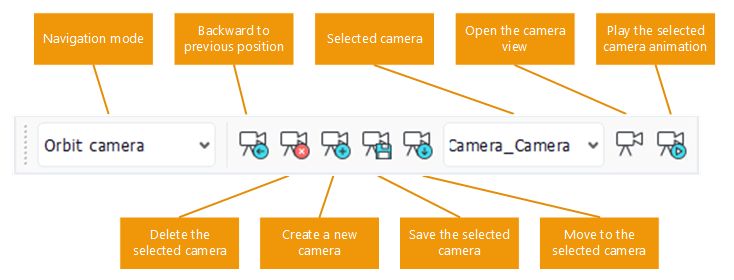
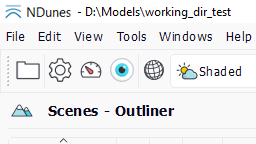
The camera toolbar
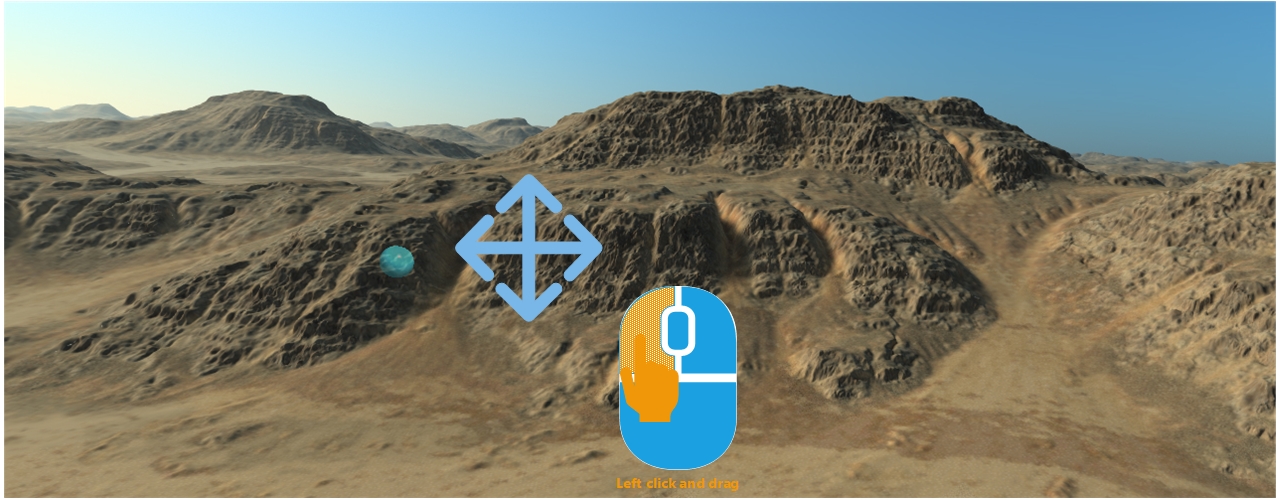
Using default settings (which is set to the Camera Orbit mode), left clicking the mouse and dragging it in any direction will translate the view according to the mouse movement made, using the focus point found under the mouse at the time of the click:
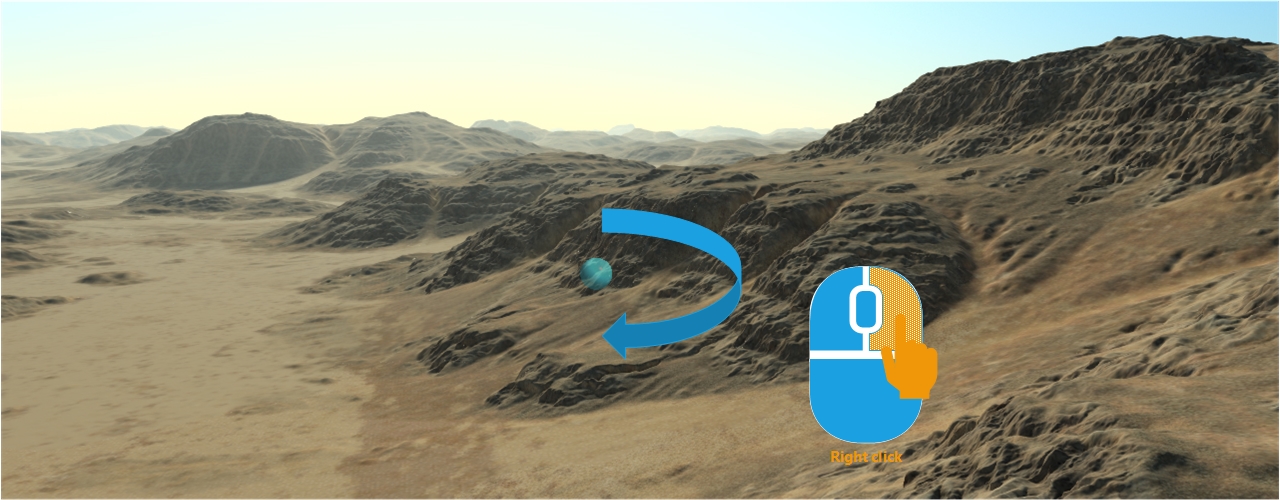
Right clicking the mouse and dragging it will rotate the view around the focus point following the vertical direction:
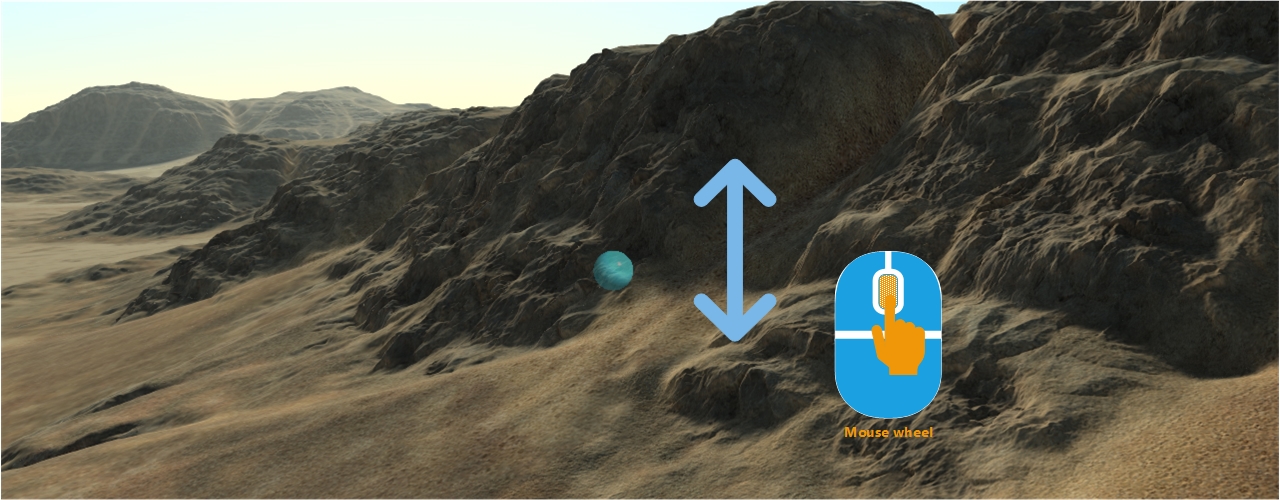
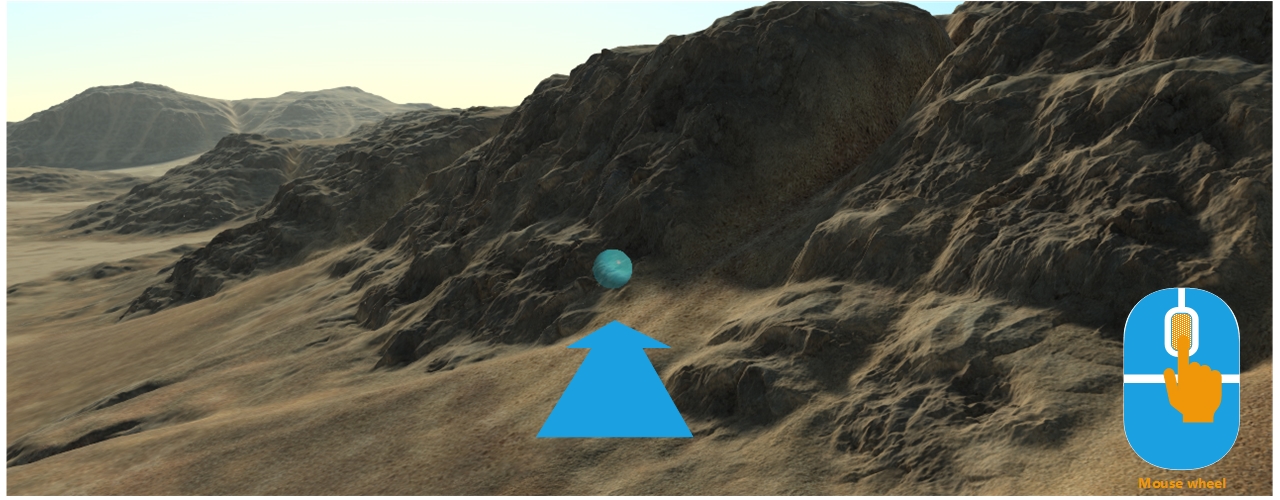
Using the mouse wheel will zoom in or zoom out the image, from the focus point defined by the found point under the mouse:
The default camera is an orbiting camera and the control system uses an auto focus setup dynamically, using the found hit position which is under the mouse at the time of the manipulation. A camera has several navigation modes:
Cameras can be saved into scenes, set, reloaded as other documents:
And last if you do a mistake don't forget to:
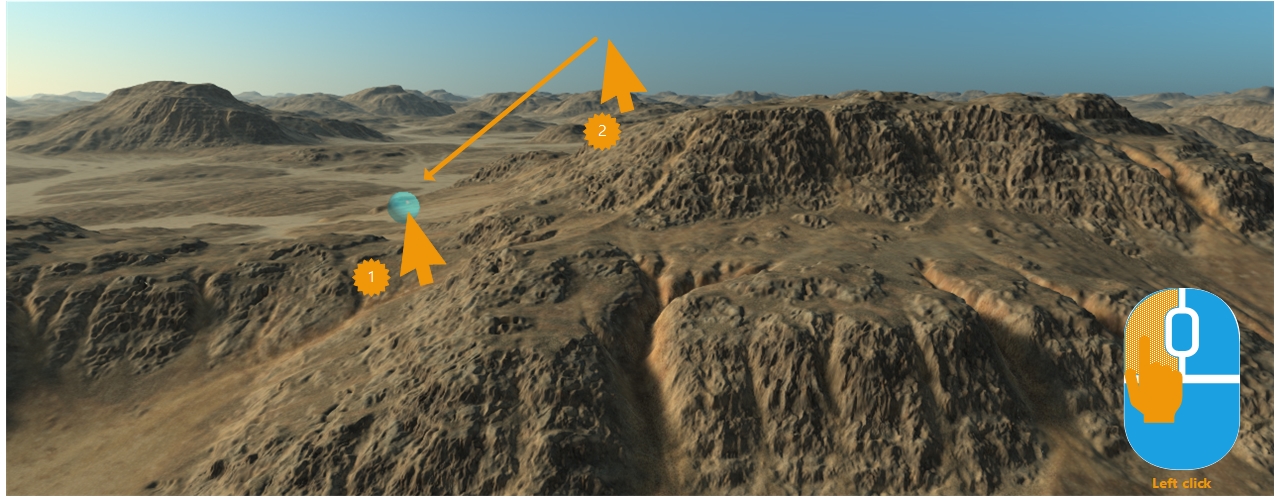
Translating the view
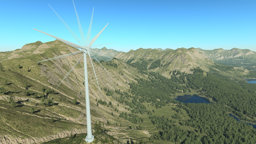
The view is translated by a left mouse button click followed by a dragging operation. If the mouse is over some geometry or over a landscape element (as illustrated by arrow 1 below), then the camera focus is set that element position. From this position, the translation gets defined. If the mouse is flying over the sky at the time of the operation (as illustrated by arrow 2), then the last focus point will be used.
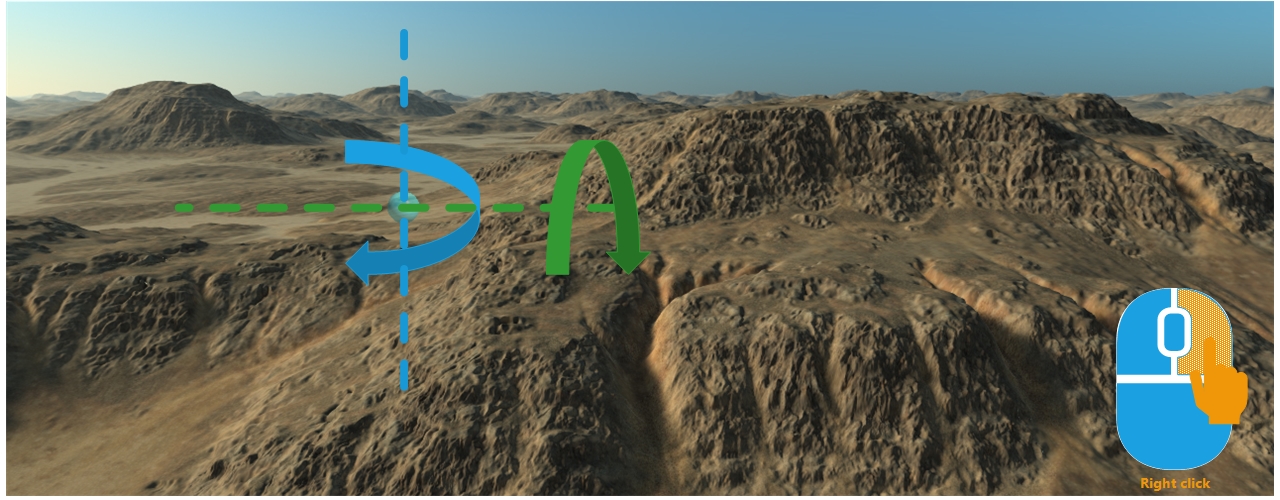
Rotating the view
The view is rotated by a right mouse button click followed by a dragging operation. The focus definition mechanism is identical as the one illustrated above for translations. If the camera is an ORBIT camera, then the rotation occurs around the pitch and yaw axis defined at the focus point position:
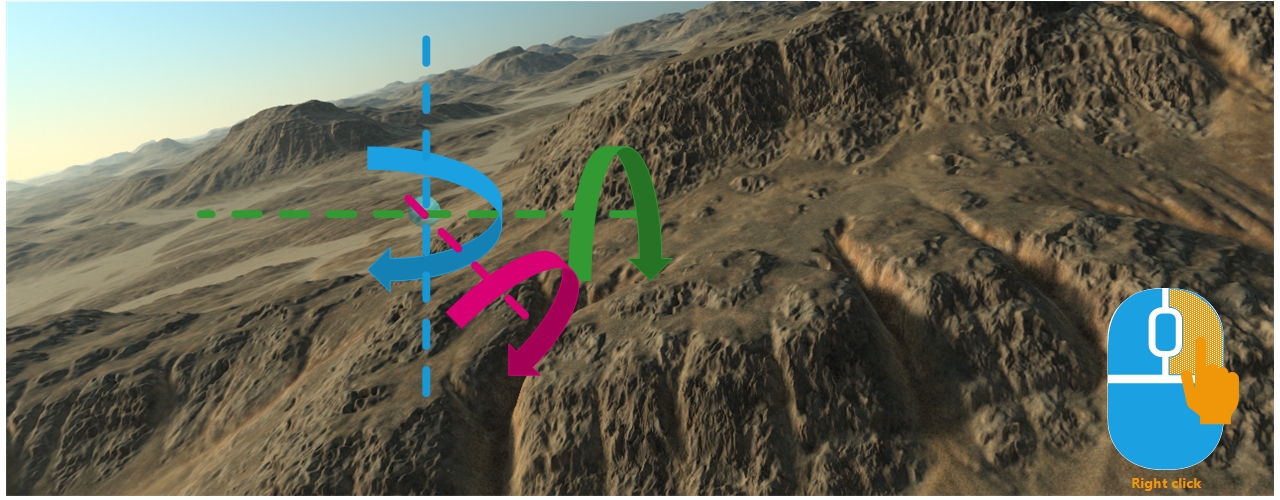
If the view is using an EXAMINE camera, then we add a roll axis combination that is coupled with the two other axises:
If the view is using a FLY camera, then a left mouse click will enter a head rotation mode driven by mouse movements. Exiting that mode is done by left clicking again.
Zooming the view
The zooming behavior is triggered by operating the mouse wheel. It's active in the Examine and Orbit camera modes. FLY mode cameras don't have a zoom. Operating the mouse wheel will move the camera closer to or farther from the focus point:
Camera Examine mode
The camera Examine mode is a free rotation mode, intended to allow all viewing angles to freely Examine an object. The only difference between the Examine and the Orbit modes is that the Examine mode does not keep the head up aligned to the vertical direction. Examine mode is good for close geometry inspection or for planetary level reviews, due to the fact that Orbit modes don't work well when looking at an entire planet.
Camera Orbit mode
The camera Orbit mode is similar to the Examine mode, so free rotations, translations and zoom, except that the head will remain vertical. The upper part of the screen will always be pointing toward the sky.
Camera Fly mode
The Fly mode uses the keyboard and mouse:
- Left mouse button click in the viewport to enter Fly mode or to exit it.
- WASD key controls to move the camera.
- SHIFT / CRTL key controls to go up or down.
- The mouse wheel to accelerate or to decelerate.
- The mouse or the arrow keys to rotate the view.
In Fly mode, the head is keeping the vertical up. A camera roll can be added with the Q and E keys and reset with the R key.
Note:
all the keyboard keys can be changed in the Tools / Options panel.
Camera top-down mode
The camera Top-down mode places the view to look at the ground. Only one rotation is enabled around the up axis, left click pans the camera and the mouse wheel is used to move the camera backward or forward following the vertical up axis.
Get back to the previous camera
A must have. Press the corresponding button in the camera toolbar (see the image at the top of this page) or press "B" to get back.
Creating and managing cameras
Press the "plus" button in the camera toolbar to create a new camera (marker 1 in image below). Rename it in the toolbar or in the current scene where it's now listed (marker 2):

Create a camera
Several operations are possible then:
- Set the stored camera position as the current viewpoint (right arrow button in toolbar): this'll change the current view to match the one that was saved earlier
- Save the current view position to become the camera position.
- Delete the current camera (cross button in toolbar).
Cameras are saved in scenes when these scenes get saved. Please remind that the default scene is NOT saved unless renamed, so cameras created in the default scene will be lost if that default scene is not renamed into something else before the application being closed.
Camera parameters
By pressing the right side icon of the camera toolbar or by double clicking on the camera item we can open the camera view.
The topmost group Camera Info displays read-only properties of the current viewport:
- the computed nearest and farthest displayed distance for landscape, geometries, clouds and gizmos. Oustside of this interval, nothing is displayed in the central viewport.
- the current camera speed: changed when moving the camera. Useful information when moving in fly mode (Camera Fly mode).
- the current focus distance at which the shadows are the most accurate.

The camera view
You can set some properties in the second group Parameters:
- Field of view: the horizontal angular extent of what is observable in the central viewport, associated with the 35mm equivalent focale length;
- Custom near and far distances: if the automatically computed near and far distances (seen in the first group) does not suit a specific need, it is possible to override them by these custom values. Similarly, the focus distance can also be overridden.
- Custom shadow focus distance: like the custom near and far distances, focus distance can be overridden.
The GPS coordinates group controls the camera position on the planet.
The last group called Overlay provides a file input for loading an overlay image, a 360° environment map or a panoramic image that is displayed in the viewport on top of the view. This is particularly useful in a photomontage workflow to align the source image with the landscape.
Note:
For cylindrical panoramic images, the horizontal field of view must be specified.
Opacity and edge highlighting are options designed to help align the overlay image with the view during the photomontage workflow. See Photomontage workflow.
When pressed, the geometry and plant buttons in the bottom toolbar apply their respective masks to the displayed overlay. The next two button are used to align the environment map overlay with NDunes. The lock button freezes the overlay's rotation so the camera can be oriented to match the environment map. The second is to reset the overlay's transform.
Animating the camera
A camera can be animated to follow a curve path and used to export a movie. For more details about animation see:
