

Buildings
Buildings are parts of cities and can be used to represent manufactured structures like houses, stores, warehouses, etc. Like all city parts, they're defined by a curve:
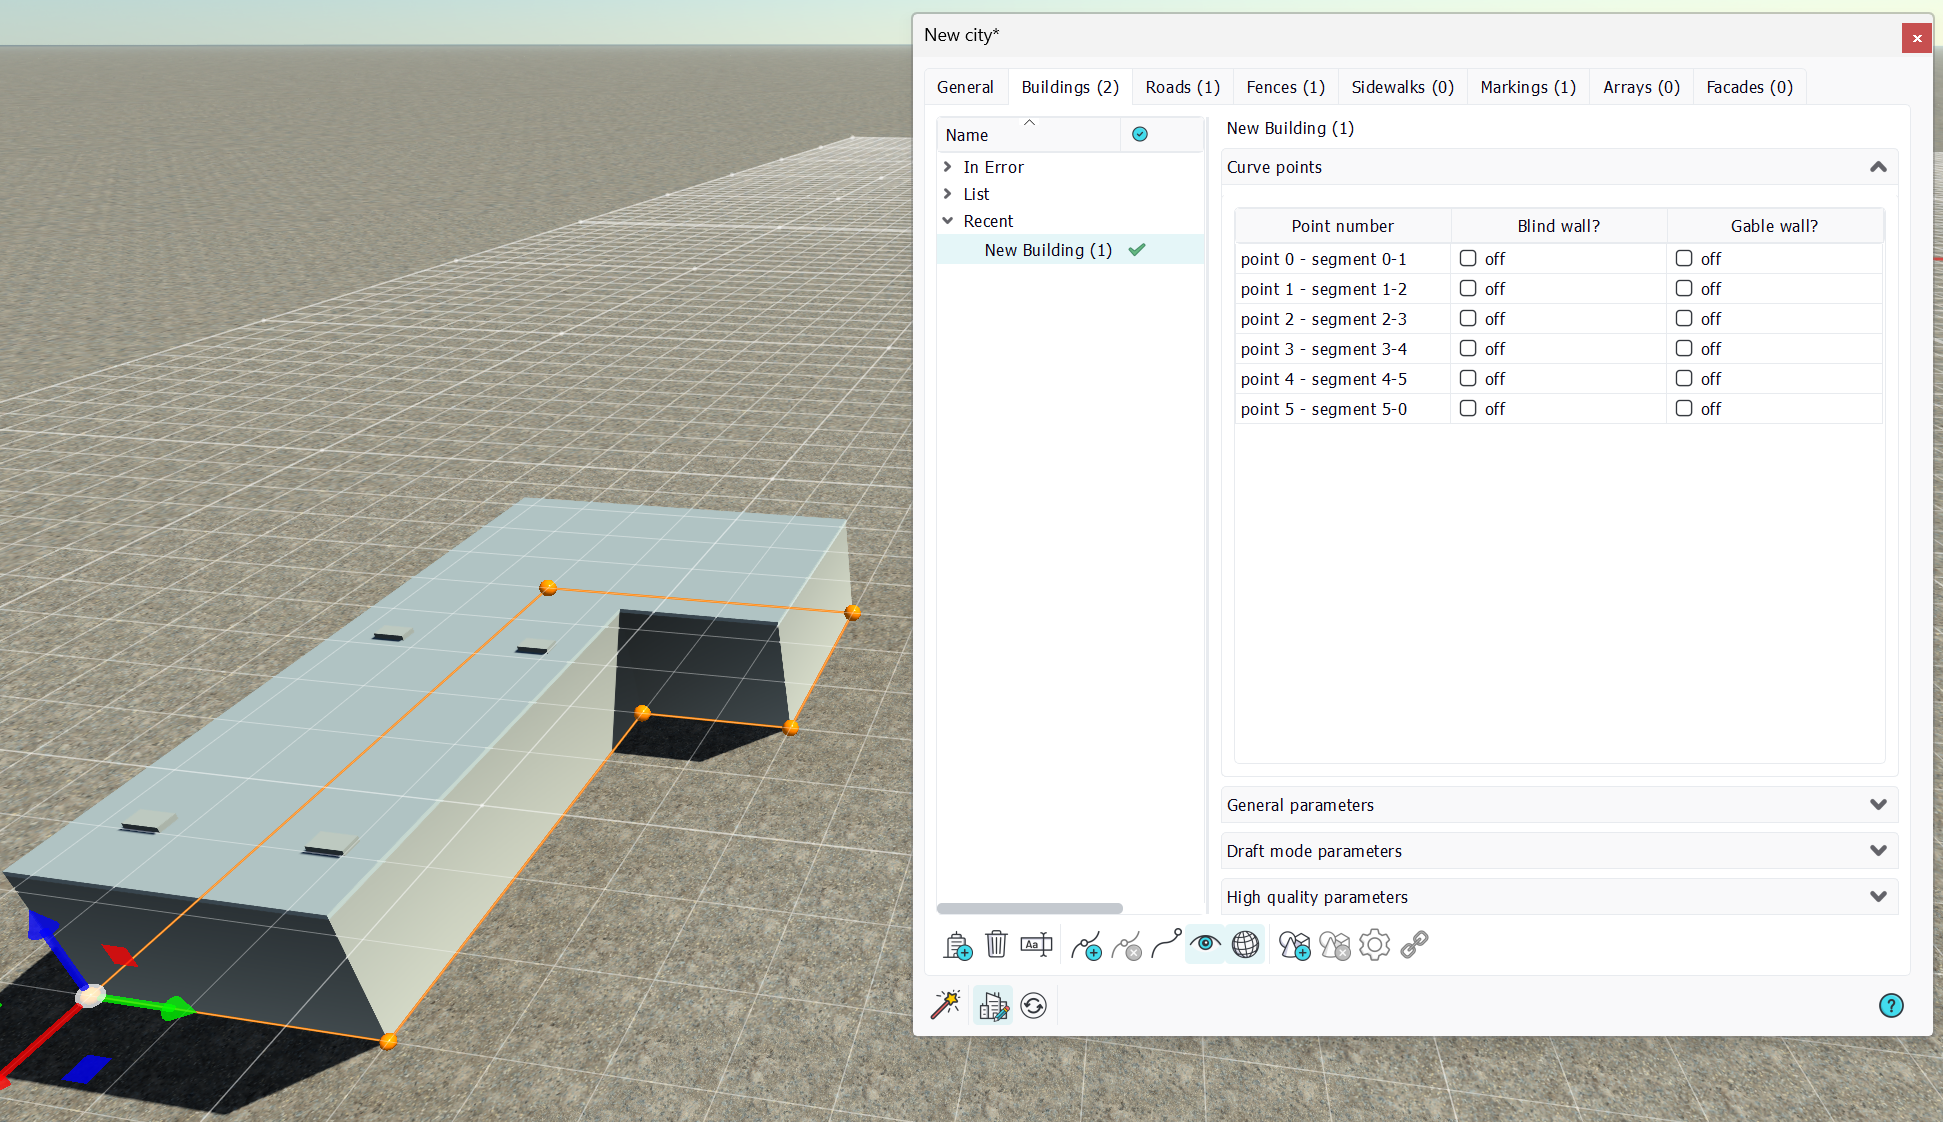
In the image above, we see a building curve made of 6 points, that were drawn snapped onto the grid.
General parameters
In the general parameters of the building, we have control over...all general key visual elements of the building: the slope of its roof, its elevation, etc...
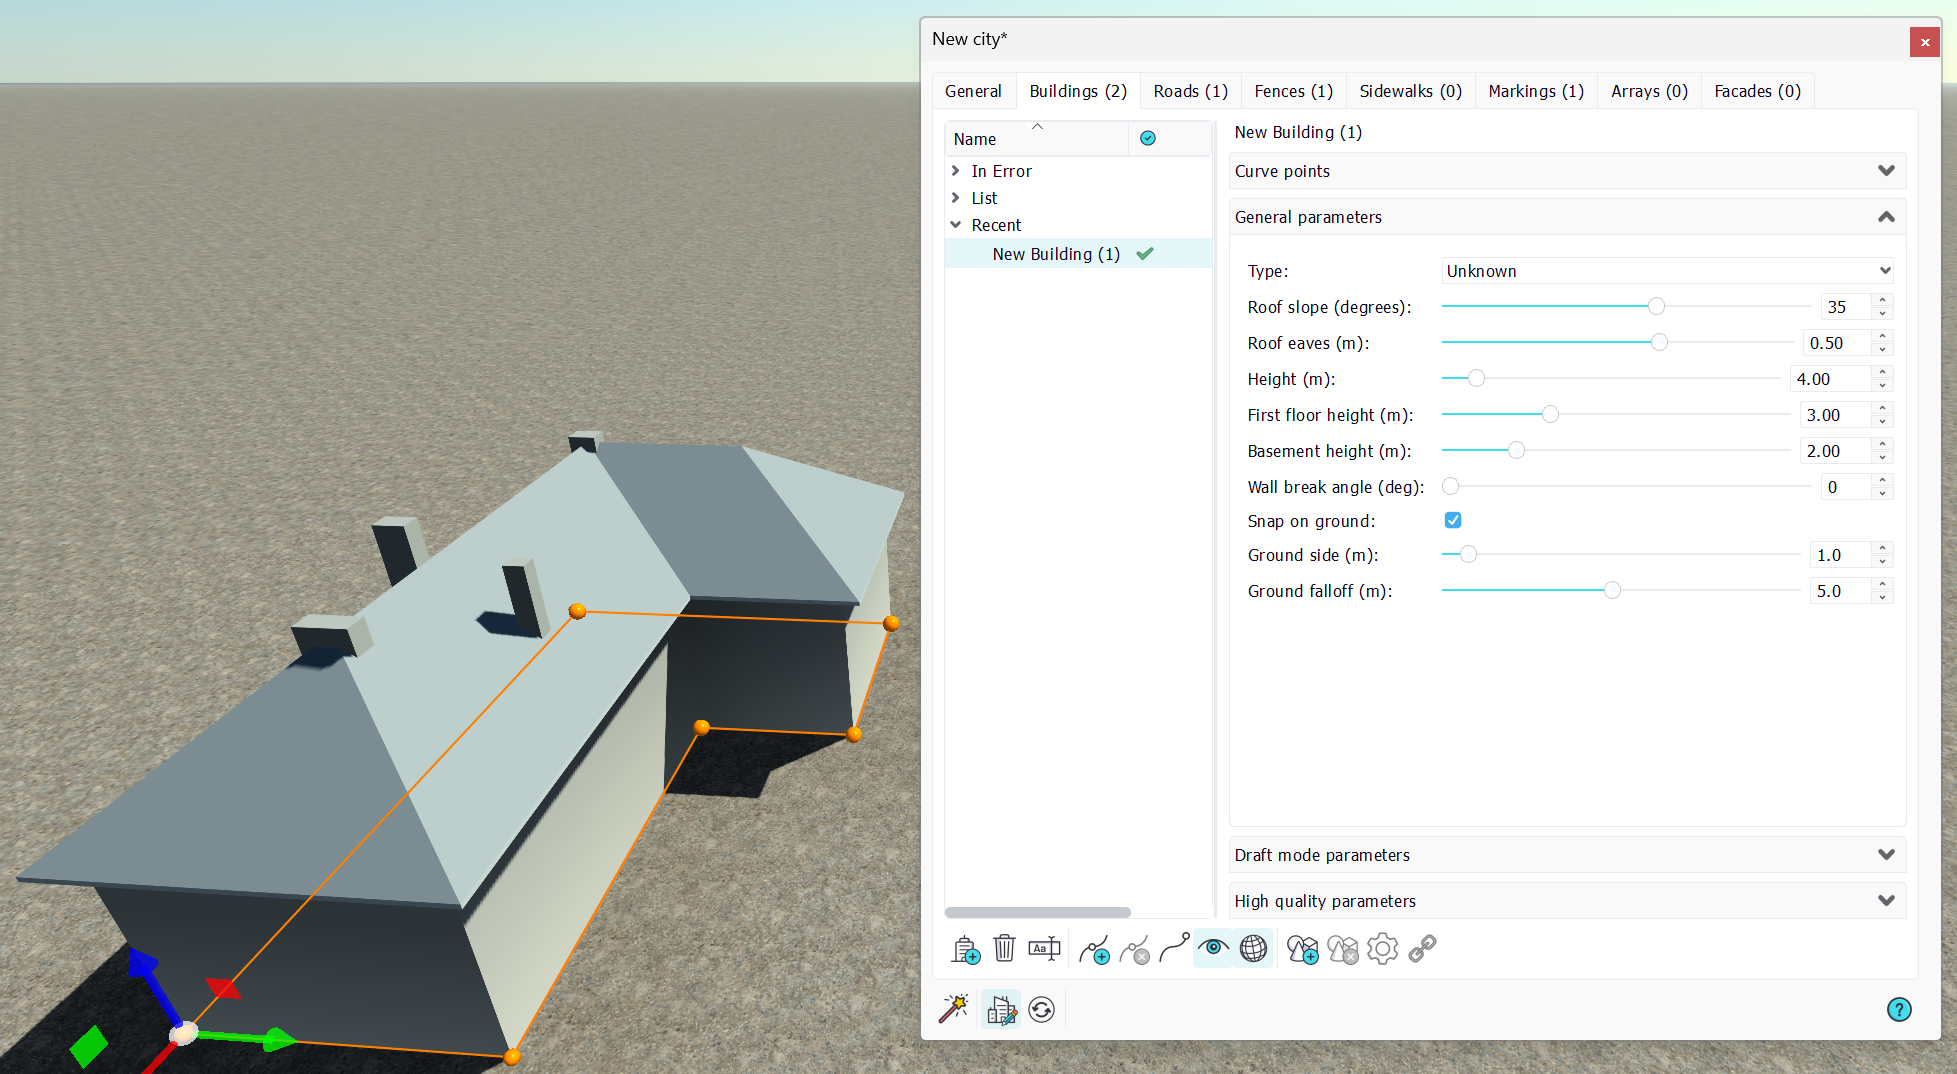
Here's a quick breakdown of all these controls:
- Type: This is the kind of building we have. This is used by the wizard, and that information often comes from Blueprints, and guides the wizard in selecting the right facades, setting up the proper roof and the like. It can be manually changed, and lets you pick up the facade you wish.
- Roof slope & roof eaves: define the shape of the roof. Is influenced by gable and blind walls described below.
- Height: Total height of the building in meters, roof excluded.
- First floor height: Height of the first floor of the building, influences facades application, and also the high quality building definition.
- Basement height: Is the height below the ground of the building. The curve of the building is set at the ground level.
- Wall break angle: When set to a positive value, indicates the angle below a wall with several points will be considered as a single wall. This allows making round walls.
- Snap on ground: When off, the building curve may be moved freely upward & downward so that this shifts the building up or down.
- Ground side & falloff: Defines the smoothing of the ground around the building curve.
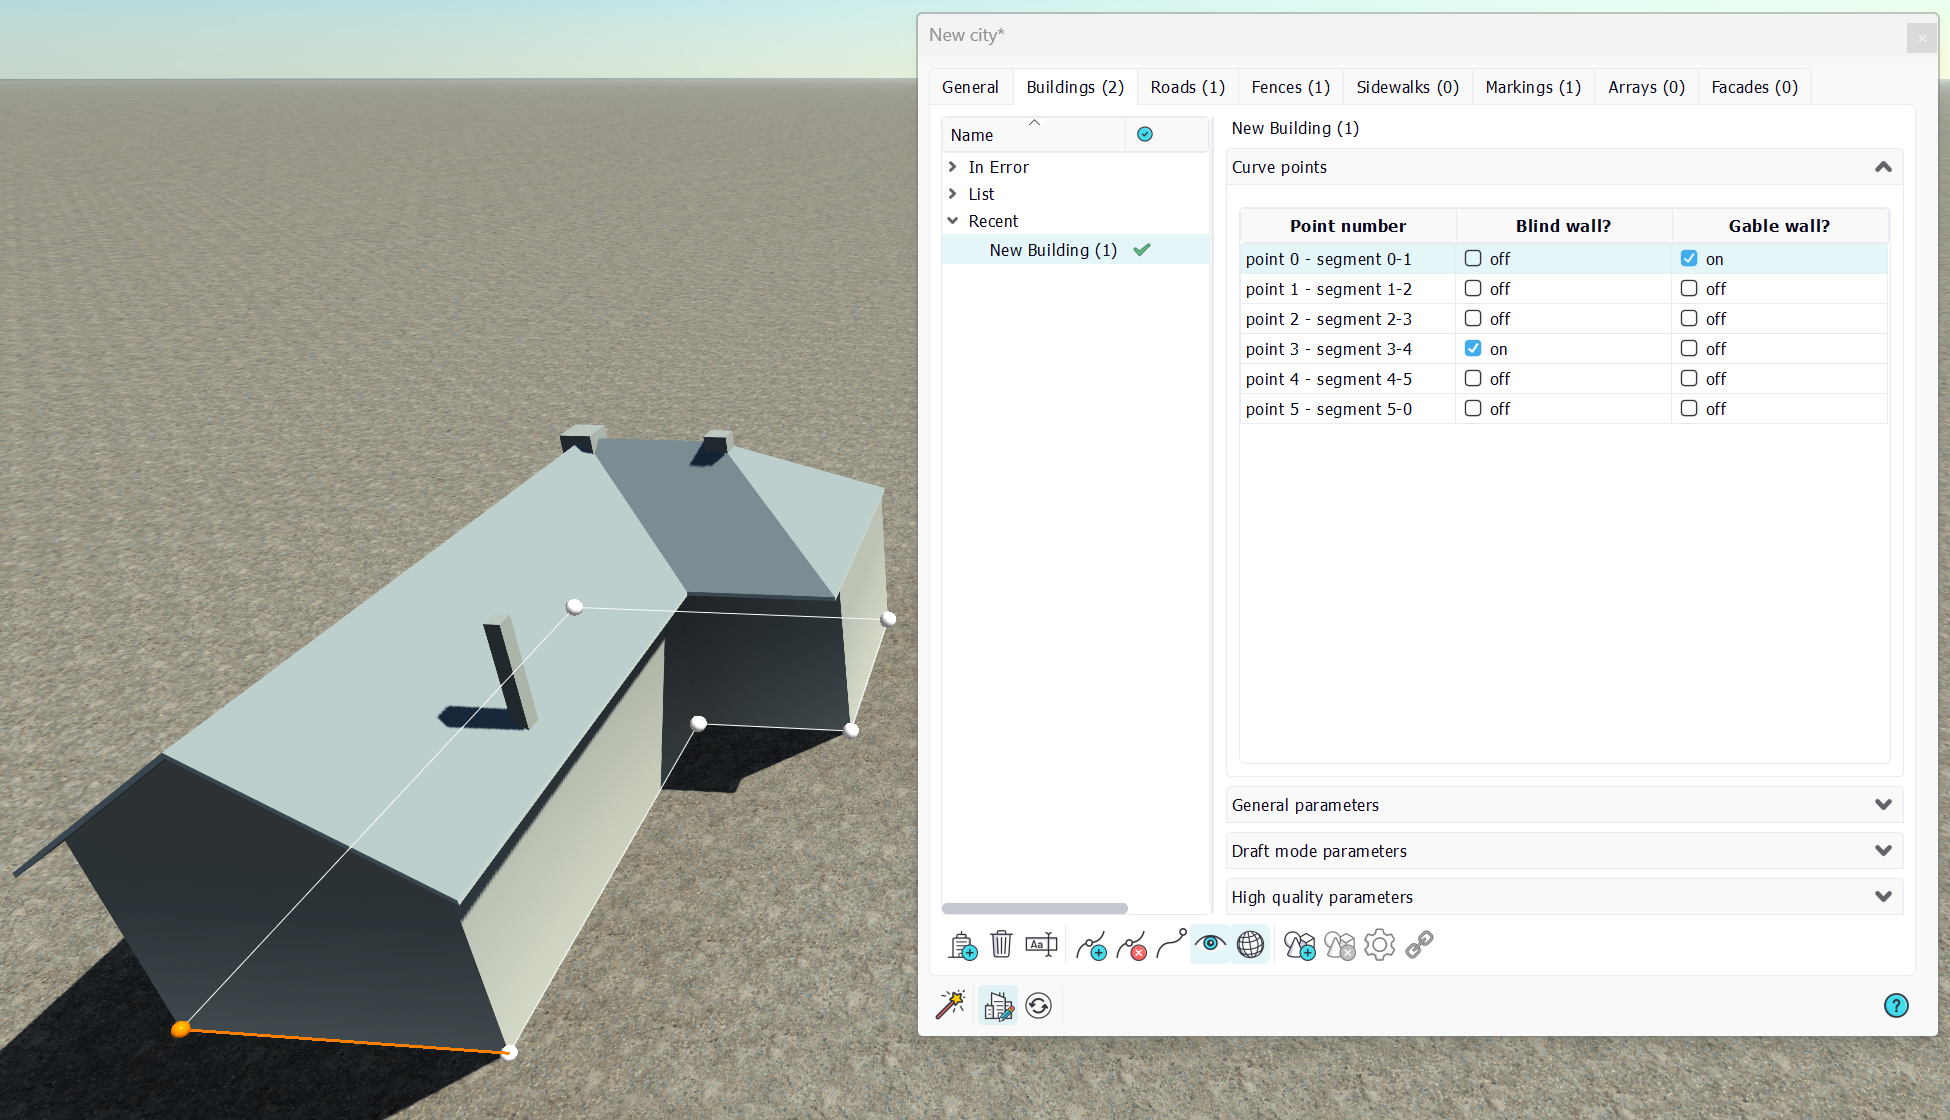
Gable and blind walls
A gable wall has a tent roof shape while a blind wall has nothing applied to it. Eaves are reduced to zero for blind walls. This is illustrated below:
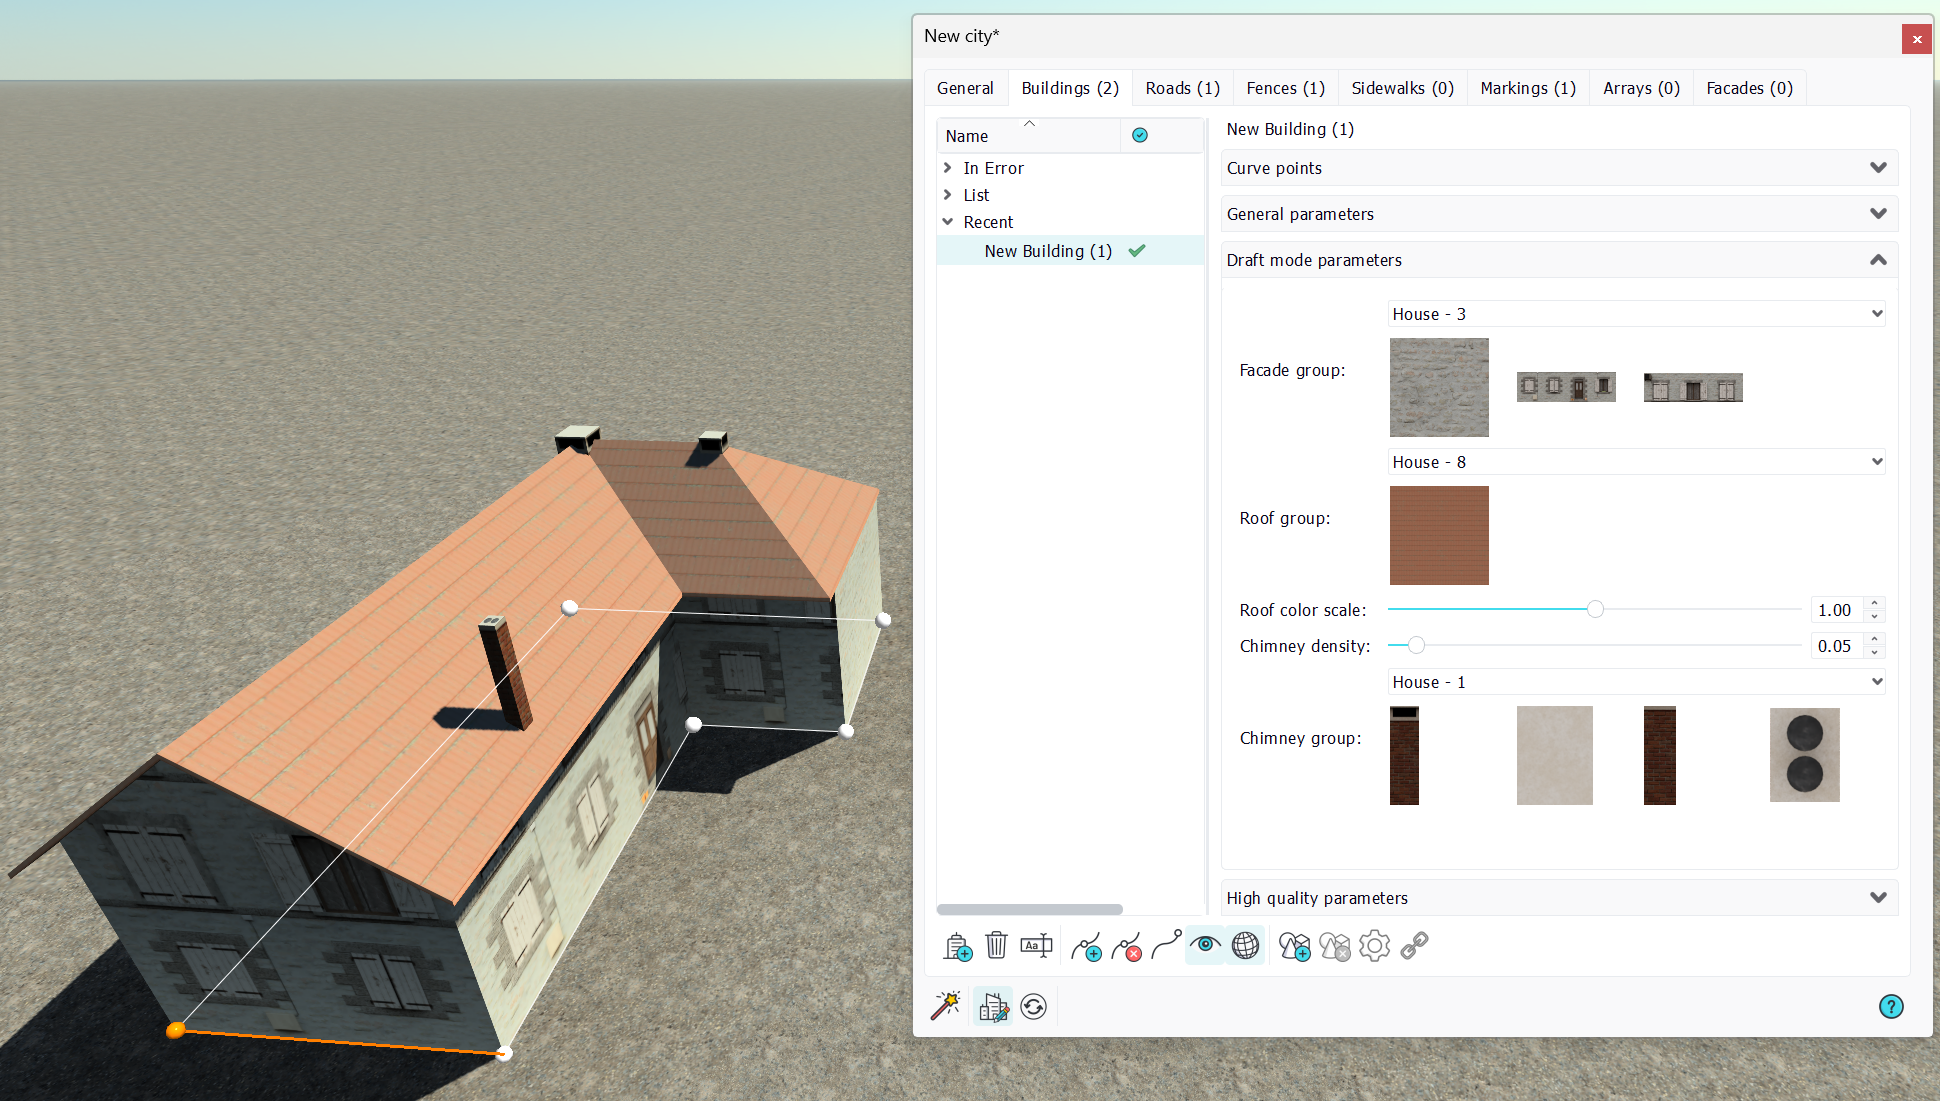
Draft mode parameters
Draft mode facade selections require some facades to be selected in the Facades tab. Then, select the right facade and refresh the city to get it:
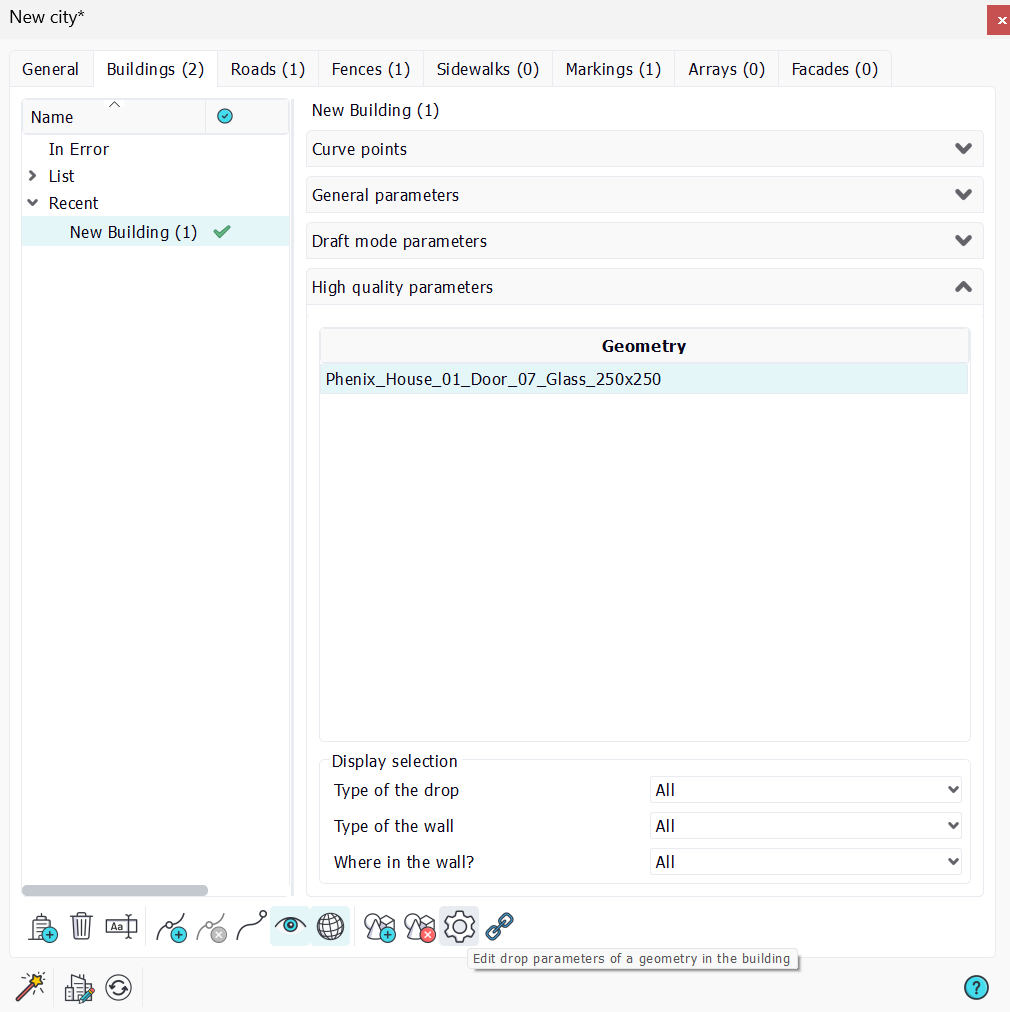
High quality parameters
High quality parameters are a set of Geometries that are dropped onto (or added manually using the '+' button in the toolbar) the building. On dropping a geometry onto the building, there's a first question being asked which is about whether you wish to simply add a geometry to the scene, but somewhere on the building, or to add a high quality geometry to the building. Select 'no' to add a geometry to the building.
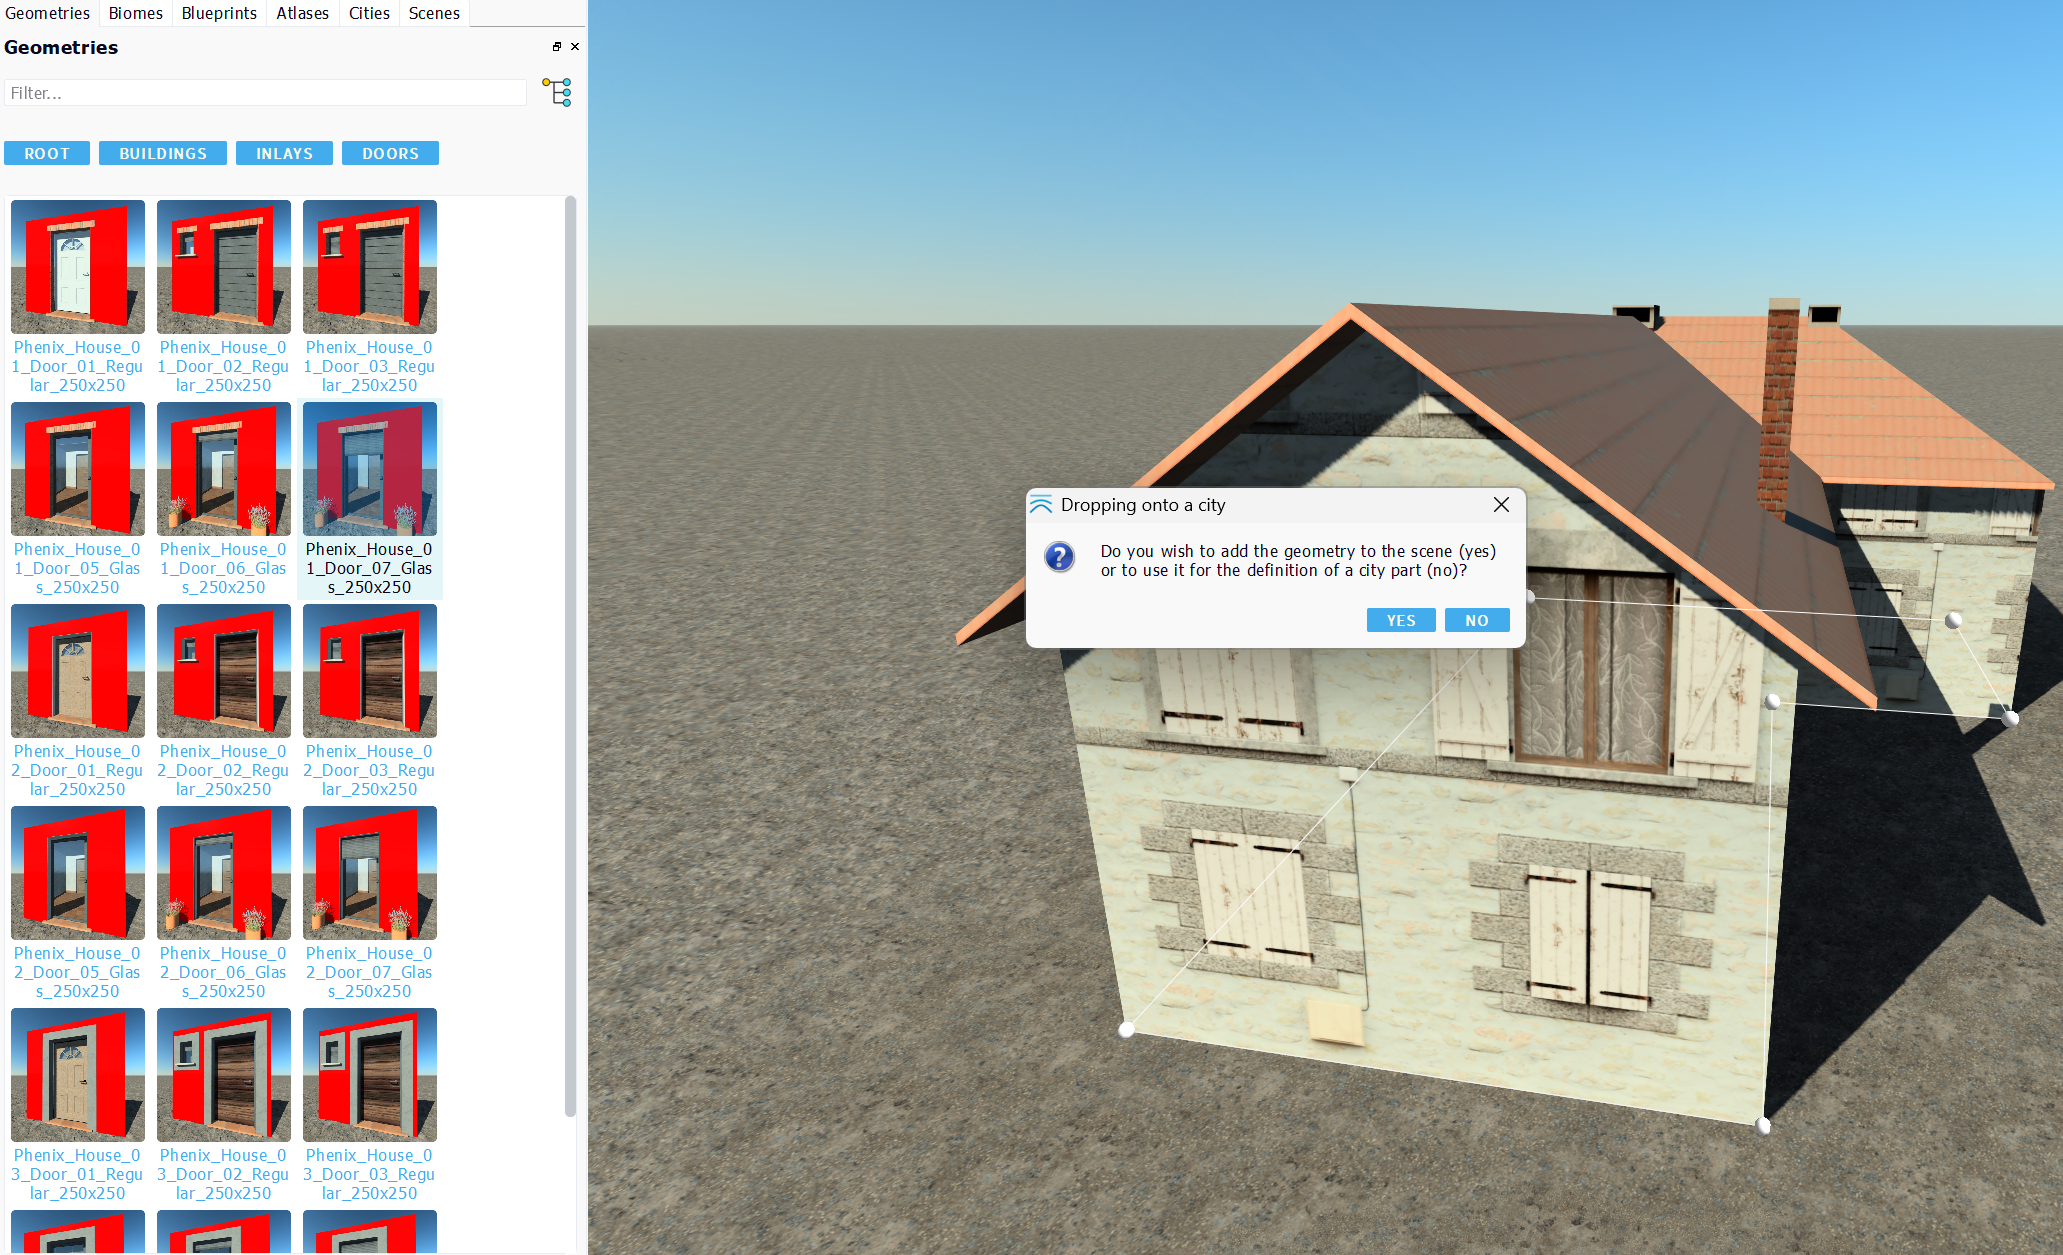
You'll see the geometry drop panel, which can be used to specify where to drop the geometry:
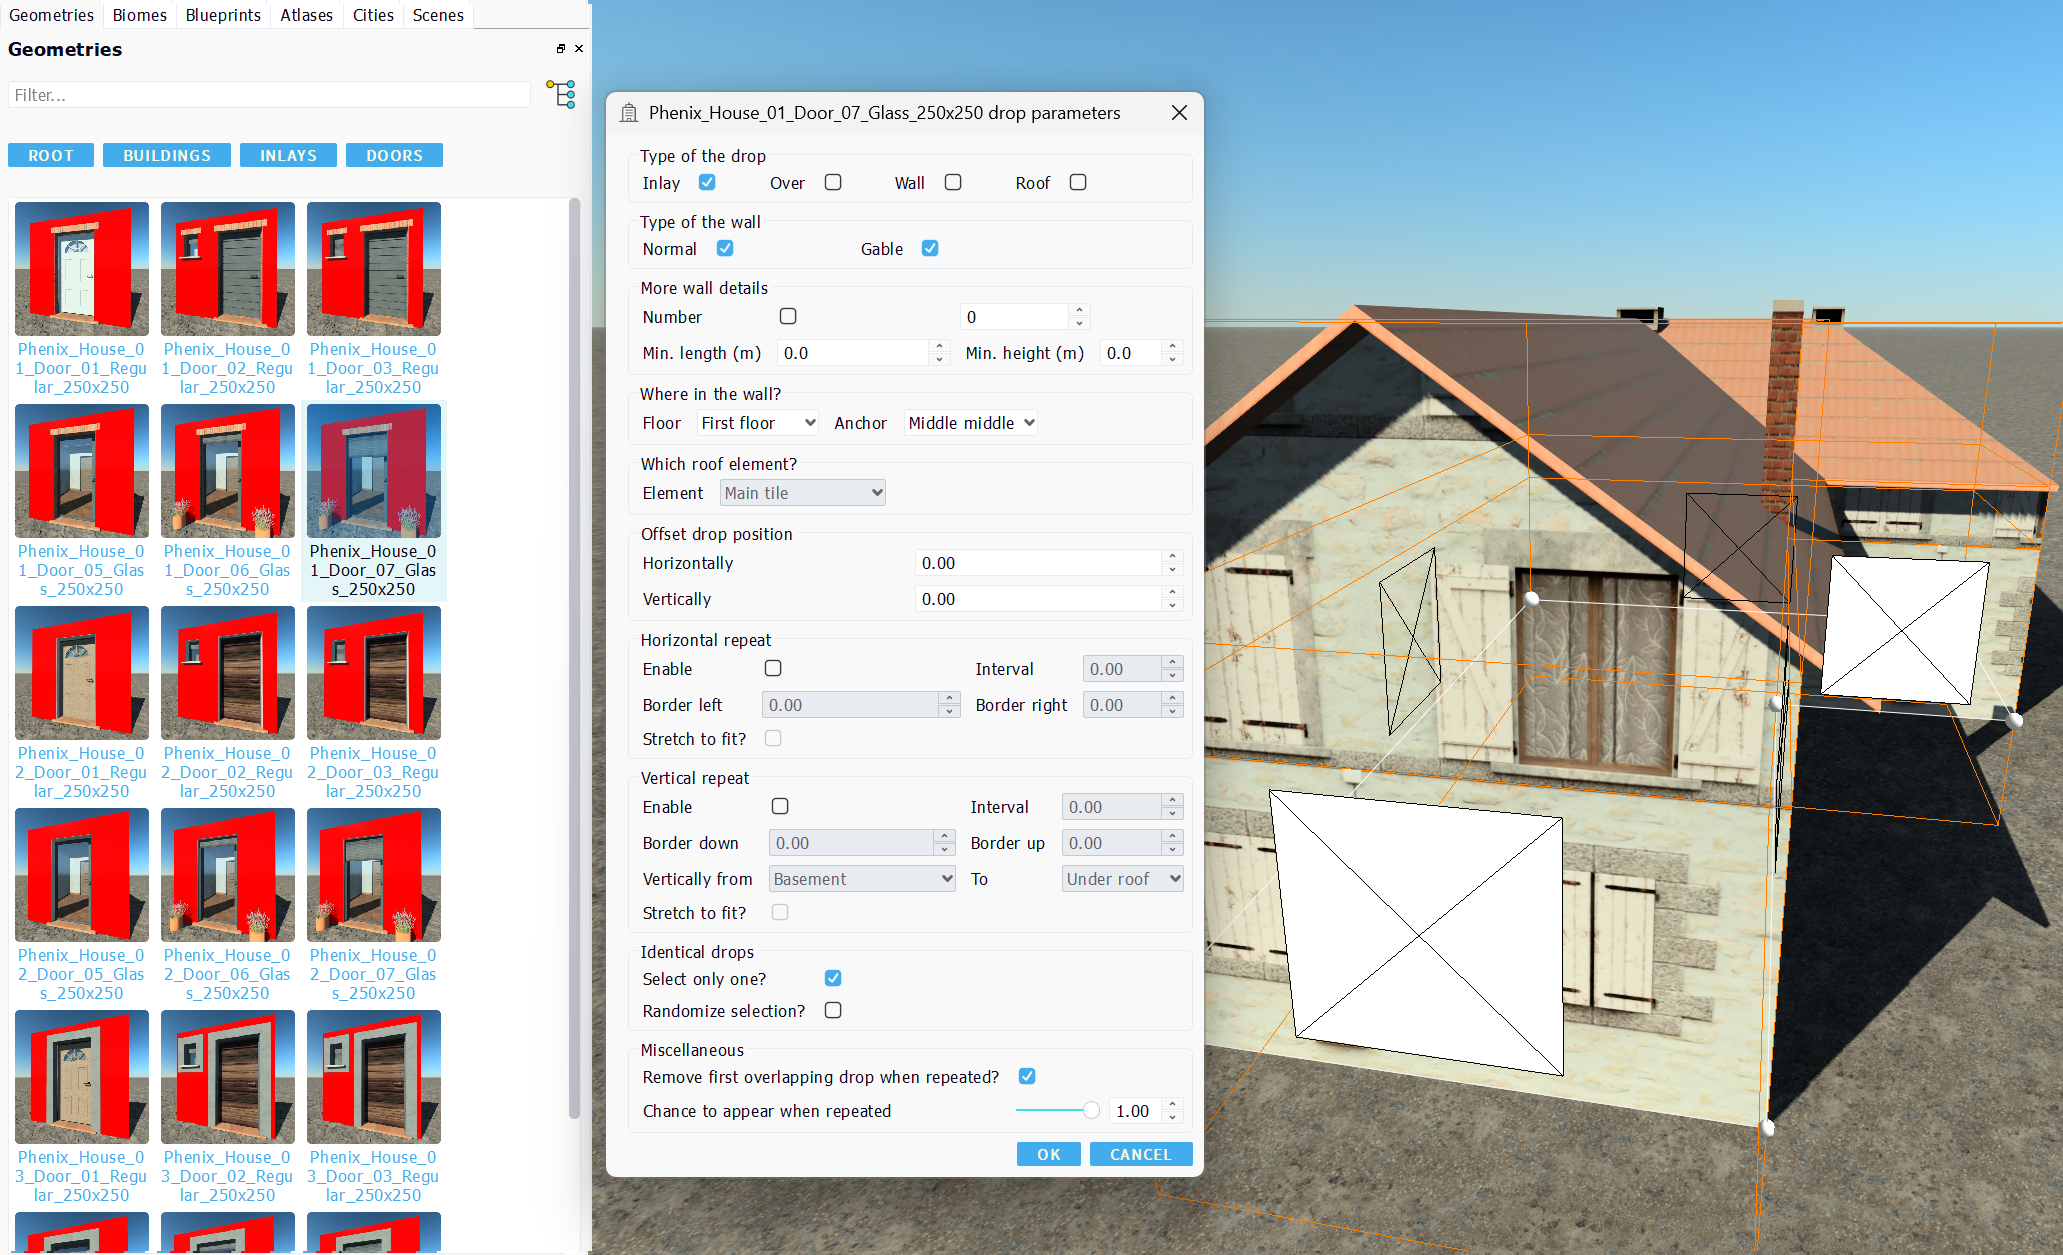
The white rectangles indicate where the geometry will appear. This also shows where the dropped geometry is to be replicated on the building surface. Backfacing rectangles are also visible by their lines contour. You can also notice this red contour in the thumbnails of geometries to drop. This indicates the presence of a wall, meaning that in the result, the reddish part of the mesh will be replaced by the wall of the building. We'll detail this later on.
A geometry drop onto a building has a lot of configurable parameters:
- The type of the drop: Define the nature of the drop operation. We have several possibilities here. "Inlays" are carving the house surface. They make holes in walls. "Over" geometries are added on top of walls. They do not carve walls, they do not interfere with the house, they're just added over it. "Walls" is a special type of drop used to define 3D wall surfaces for the building, while "Roof" is a roof part obviously.
- The type of the wall: Normal walls or gable walls can be targeted. Note that blind walls are not accepting geometry drops.
- More wall details: This section allows you to select the wall number you wish to see the geometry on. This is useful for some specific elements such as doors that you wish to see once. You can also specify the minimal length and width of a wall for the drop to be effective. This, for instance, allows dropping a window which is 2 meters wide on walls that are at least 2.5 meters. This is used to reduce inconsistencies and avoid stretching geometries being dropped.
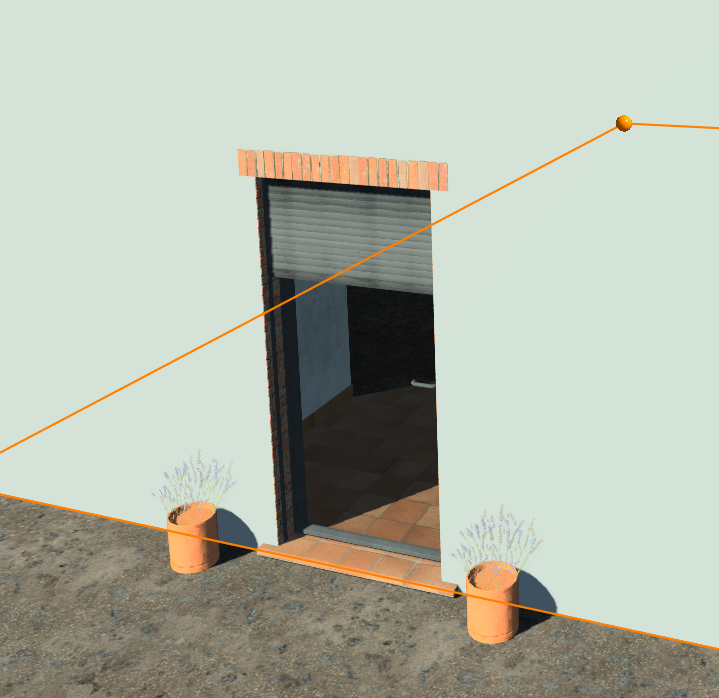
After we drop our door in the example above, we exit the draft mode and get that result:
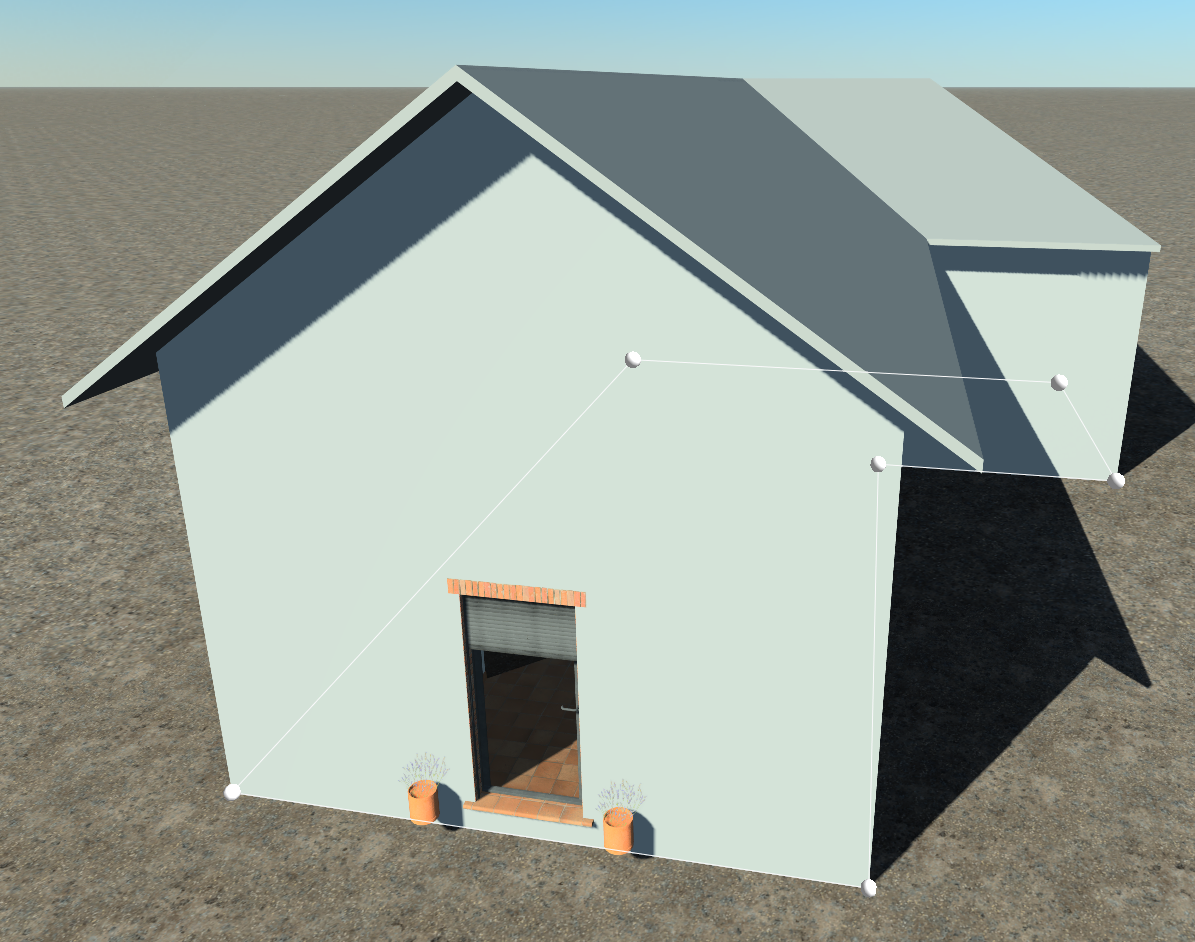
The door is mapped onto wall number 0. The following parameters help anchoring the drop:
- Where in the wall: There are different levels in a building: basement, first floor, upper floors and under roof. Then we have nine anchoring positions in each level (lower left, lower middle, etc...) that can be used to specify where the drop will get anchored. Here, we're first floor, middle middle. We can see that our flower pots are well, flying a bit above the ground so we'll change the anchoring position to lower middle to fix that. Click on the edition button there:
And voila:
We then have some other placement parameters:
- Offset drop position: Can be used to move the drop from its anchoring position.
And some repetition parameters:
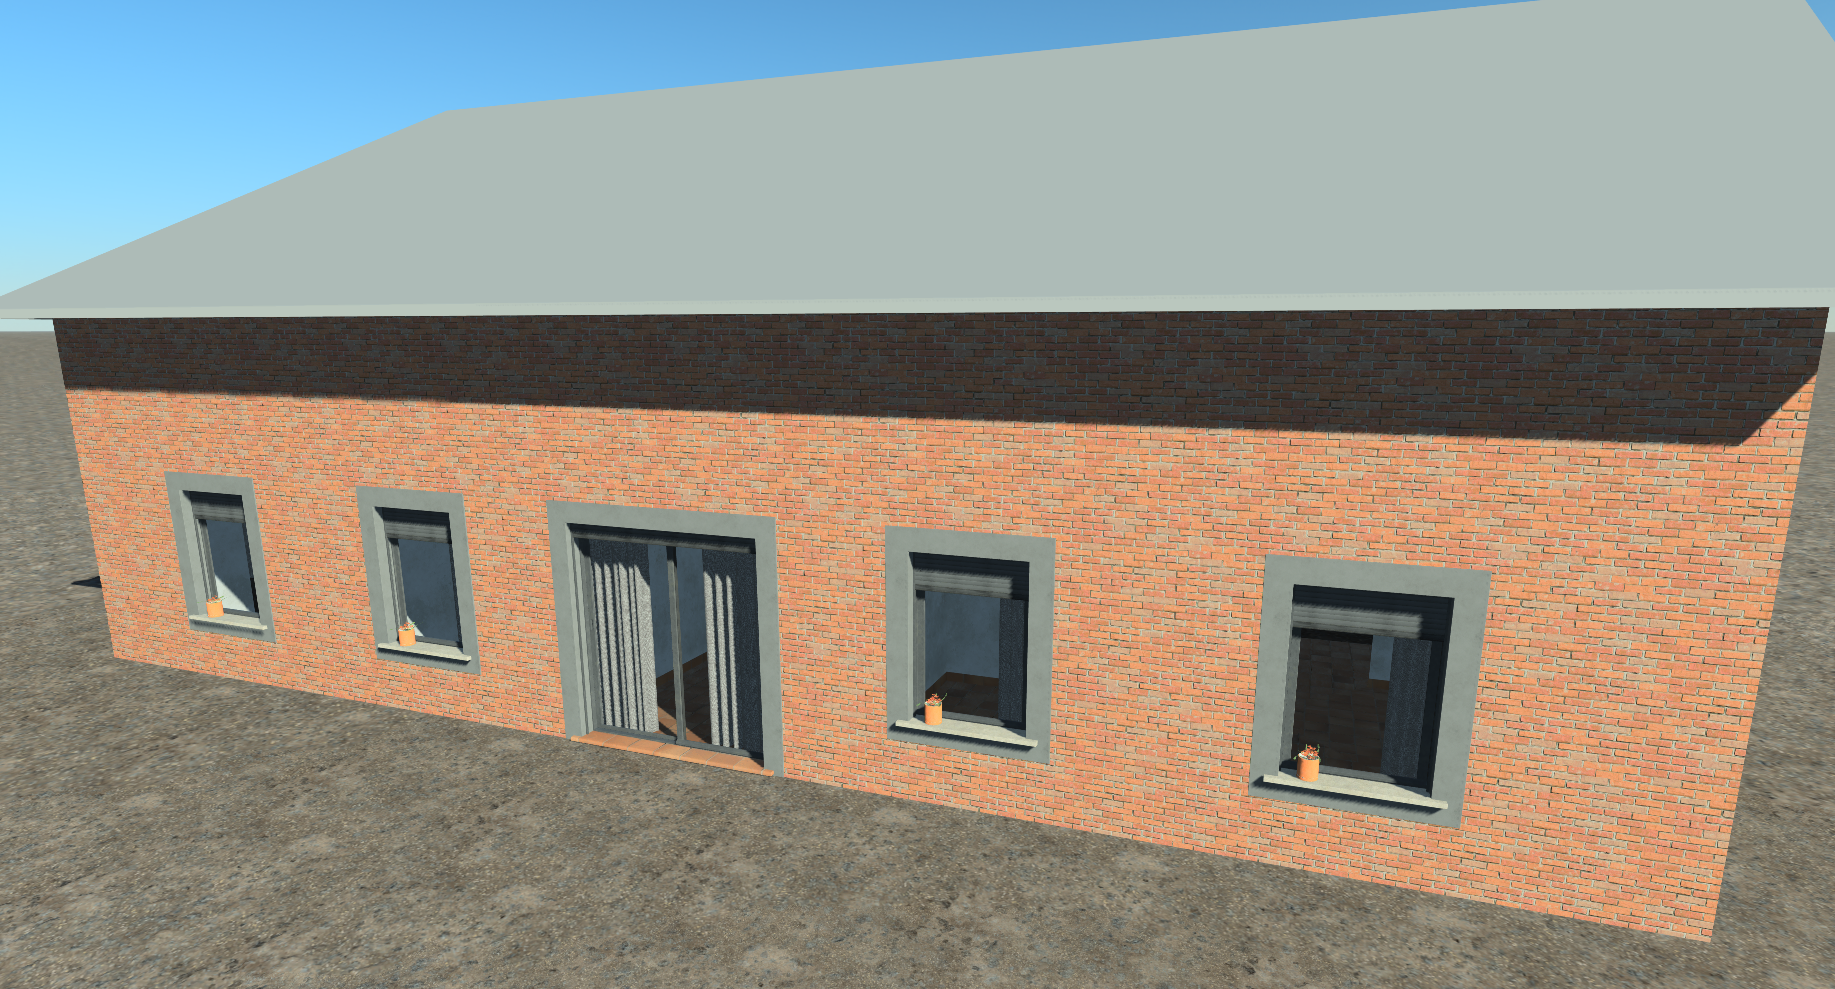
- Horizontal/Vertical repeat: Defines boundaries of the repetition (you'll see the visual feedback when using it). Horizontally, you can specify a border from the edge of the wall, that'll allow you to keep some safe space (for instance think to a gutter running along the wall that you don't want to see overlap a repeated window). Vertically, you find the same parameters plus a control over which floors the repeat occurs (from basement to under roof or just on the upper floors for example). Finally, the "Stretch to fit" option will adjust the number of instances in a repetition to cover the entire wall space.
An example below:

The large window door is dropped lower middle, with no repeat. The repeated windows are also dropped lower middle, with a repetition. The "remove first overlapping drop when repeated" option is checked, so that the window will not override the door. You can also randomize selection and make holes in a repetition by changing the odds of apparition.
Then you can also add a wall. The wall may be a plain geometry with 3D details. It'll be mapped everywhere on the surface which hasn't been sculpted by inlays:
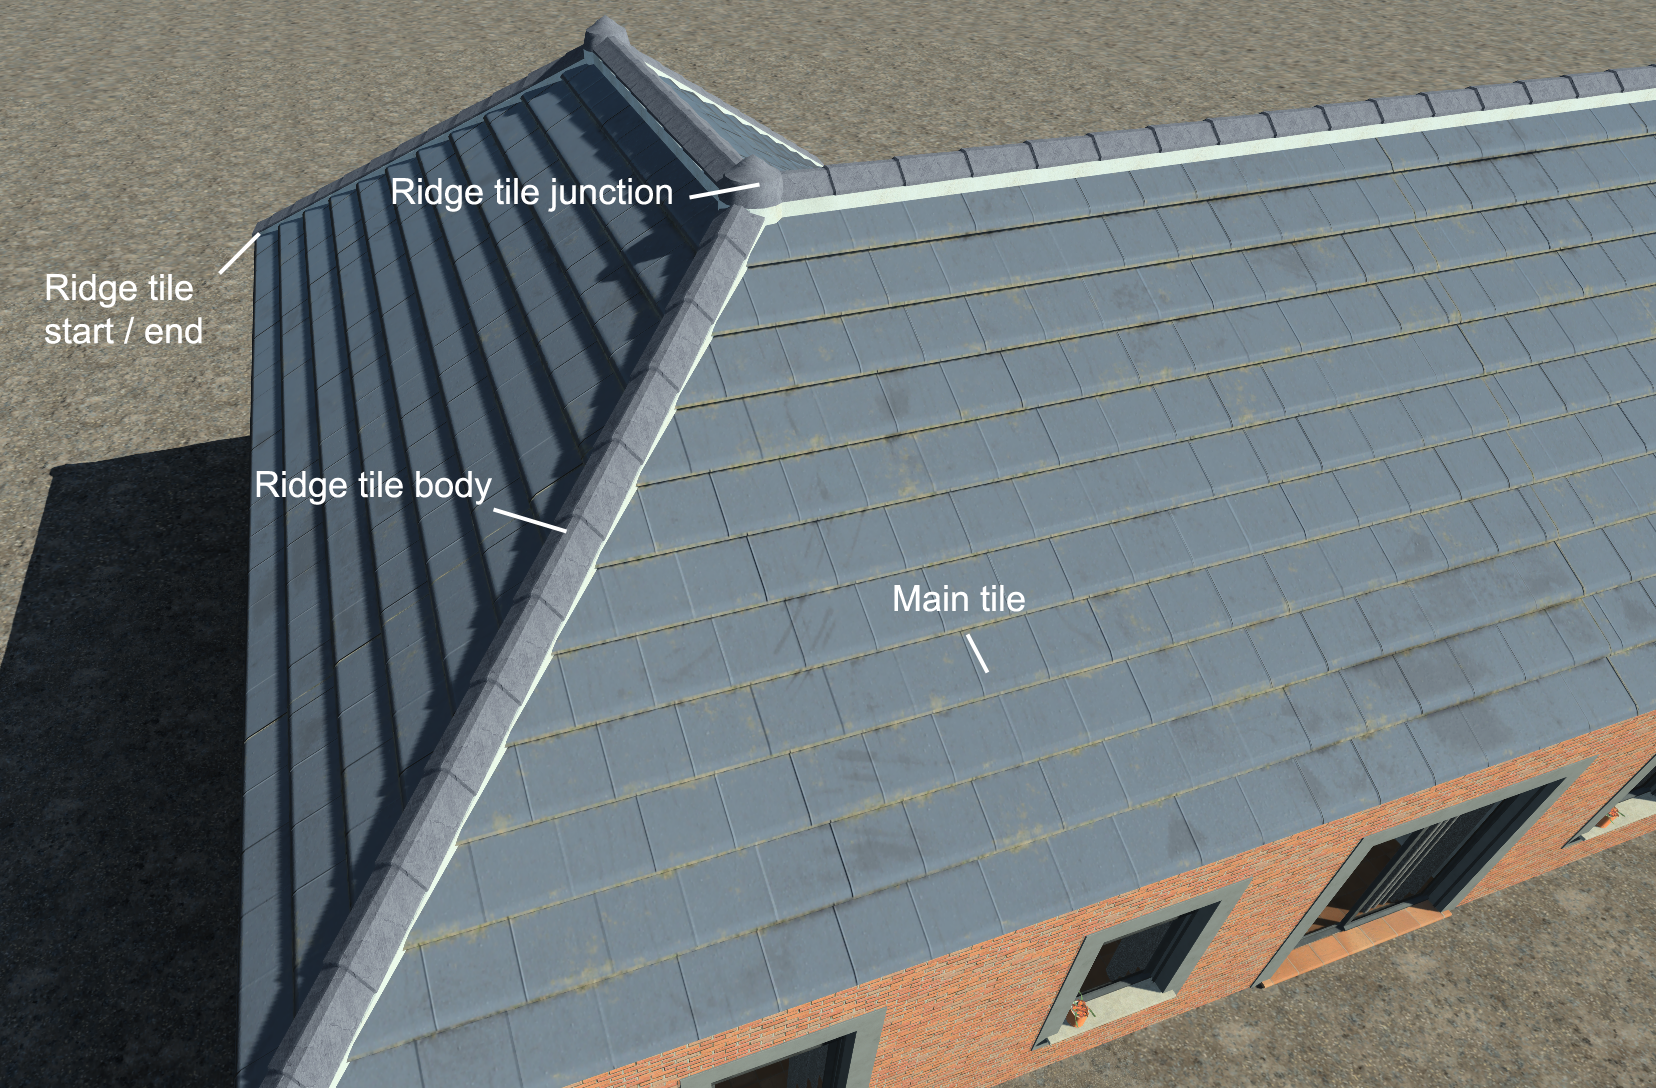
And finally add some roof elements. Among these, we have the "main tile" that'll do most of the roof coverage. Other elements appear only on ridges. This is illustrated below:
 Facades Facades | Roads |
