


Saving an archive of the scene
A scene and all its documents, resource files and data can be exported and reloaded as an external .zip file.
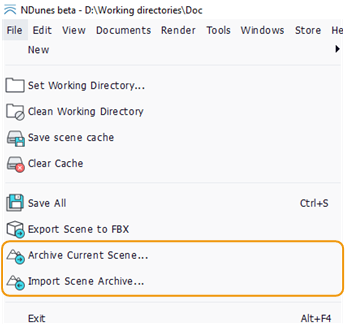
Export scene / Import scene menu buttons
When clicking on the Archive Current Scene button, the current scene and all its content is saved. Clicking the Import Scene Archive button opens a file dialog window allowing to select a .zip file.
This tool is very handy to:
- save project backups
- transmit documents from a working directory to another.
Note:
The default scene can not be archived directly and must be cloned before.
When importing a scene archive, some files contained in the archive may already be present in your working directory. If such a case is detected, NDunes will open a panel to ask for canceling, overwriting or copying.
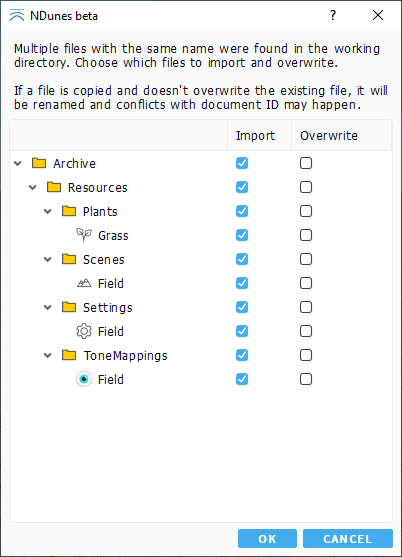
Panel showing file issues at import
The panel shows two columns (Import and Overwrite):
- if no checkbox is clicked, the archive file will not be copied and the file in the working directory will be left unchanged;
- if only the import checkbox is clicked, the archive file will be copied in the working directory and renamed and the file in the working directory will be left unchanged;
- if both checkboxes are clicked, the archive file will replace the one in the working directory.
Clicking the cancel button at the bottom of the view cancels the whole import.
Note:
If a document is imported next to the same document that was already here, a conflict may be detected and the Conflict panel will be raised to select which one to keep.
What happen when a conflict between documents is detected?
After a scene import, a download from the store or a file copy, it may happen that the same document is duplicated in several places of the working directory.
NDunes will automatically detect the conflict and open a dedicated panel.
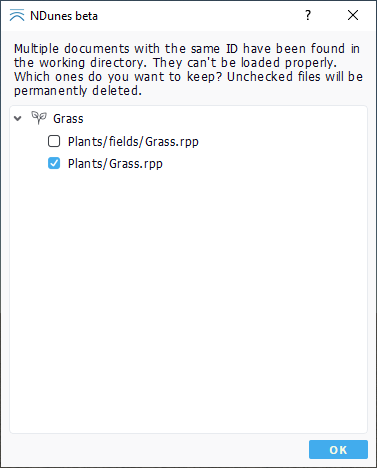
Conflicts panel
This panel asks which file should be kept and which files should be deleted in order to always have one file per document.
 Solar field generator Solar field generator |
