Waterbodies
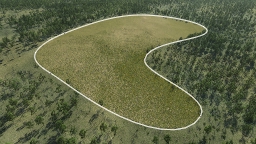
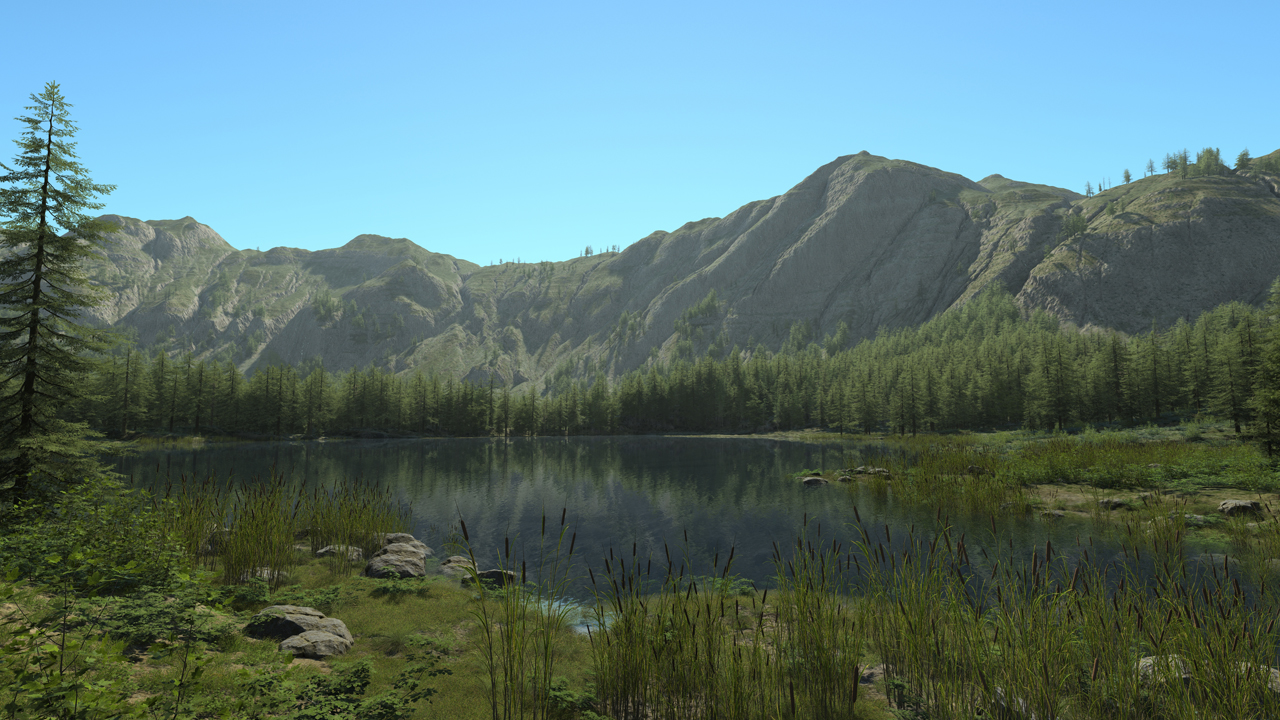
Waterbody documents enable you to create water areas using curve points. You will then be able to control the sculpting of the waterbody, the water rendering effect to apply to the water surface, as well as soil and vegetation specifications for both the seabed and the shoreline of your waterbody.
Creating your waterbody
Create a new waterbody document, drag it in the current scene, and double-click on the document to open it's view.

Select the type of shape your want your waterbody to have.
- Closed loop : a closed smooth bezier curve.
- Polygon : a closed polygon with straight side segments.
- Bezier path : a smooth bezier curve with an associated width expanding on both sides of the spline.
- Straight path : a broken line with an associated width expanding on both sides of each straight segment.
Start by defining the ground zone on which your waterbody will be using the "add point" button and clicking in the viewport to place your points on the ground.

The falloff width defines a border inside the waterbody where all the modifications (sculpting, soil, plant densities..) will be blended smoothly with what was defined outside of the waterbody.
Sculpting the waterbody
Now that your area is well defined, you can adjust the sculpting of your waterbody.
First of all, you can move the water surface using the gizmos. To do this, change the selection mode to "Water surfaces", choose the translation gizmo, and pick a point on your water surface. You can then translate or rotate the water surface, and the terrain sculpting will adapt automatically.
To reset the water surface to its original position, you can use the reset button.

- The "Depth" parameter enables you to define how deep the waterbody is digging the ground under it.
- The "Terrain fitting falloff" defines the width of a falloff area that will be outside the waterbodyn, inside which the terrain will automatically sculpt until reaching the water surface.
- The "Height above water" defines an additional sculpting if you need the terrain to go higher than the water surface. If zero is specified, your terrain should reach exactlythe water surface.

Setting up the water rendering
When creating a waterbody, a default water rendering effect is applied to the water surface, making it a smooth, transparent, reflective surface. However, if you want to customize the rendering of your water and add more effects, you can do so by applying a water material.
If you already have some water materials, you can click on the "Material" field and select one from the list (only the material documents of type "Water" will show in this list). You can also directly drag and drop any water material onto your water surface in the viewport.
To create and setup your own water materials, please refer to Materials. It's in the water material itself that you will be able to define the water tint, the bump effect, the reflection and refraction factors...

The "Reflection mode" parameter will have an impact on the reflections on your water surface. NDunes' water rendering technology is based on true planar reflection pipeline, which gives precise results without ghosting, but can be costly in terms of FPS.
- The "Reflection mode : None" parameter : there will be no reflections at all on your water body, appart from the default skybox which is a plain blue sky. The planar reflection pipeline will not run, and you will regain FPS. Choose this mode for waterbodies that wont be very visible on your renders.
- The "Reflection mode : Automatic" parameter : there will only be one reflection pipeline for all the waterbodies in your scene that are set on automatic mode. The point of view chosen to render the reflections is based on an algorithm defining, at runtime, which waterbodies are the most visibly important, to minimise the error on these ones. Choose this mode if you have several waterbodies visible at the same time on your renders, but want to preserve the performances.
- The "Reflection mode : Exact" parameter : there will be a specific reflection pipeline for this particular waterbody, garanteeing the precision of the reflections on its surface. It will no longer influence the automatic algorithm. Choose this mode if you would rather have exact renders than a good FPS.

The parameter "Texture texel size" lets you adjust the size of a pixel of the material textures onto your waterbody surface, to avoid flickering.
Specifying the seabed
In the next tab of the waterbody document view, you will be able to define the specifications of the seabed. The seabed is the area that is under the water surface. This part is very close to the decal area specifications, so please refer to the Decal book for precise documentation.
You can add a specific soil to your seabed, by selection one in the "Soil" selector or directly drag & dropping a soil document inside the waterbody. As in Decals, you can specify the scaling and UV mapping of the soil, as well as wang tiling and triplanar mapping.
For the plants customization of the seabed, you can add a specific biome to your seabed, by selection one in the "Biome" selector or directly drag & dropping a biome document inside the waterbody. You can add density offsets for each plant category to adjust the quantity of the plants spawning under water, or use the soil densities that were defined in the seabed soil.
Specifying the shoreline
In the next tab of the waterbody document view, you will be able to define the specifications of the shoreline. The shoreline is an optional outside area bordering the waterbody contours.
First, to create a shoreline area, go to the "Shoreline definition" section and set the width value of the shoreline.
You can then setup your shoreline just as you did your seabed : by adding a soil and / or a biome.