Adding reflections
The geometry may contain reflective parts / materials. The default reflection is the sky, like with the landscape. For indoor scene, this may not be suitable. NDunes allows to define custom reflections by using reflection probes. They are objects added to the geometry and defining a bounding volume where environment maps can be computed.
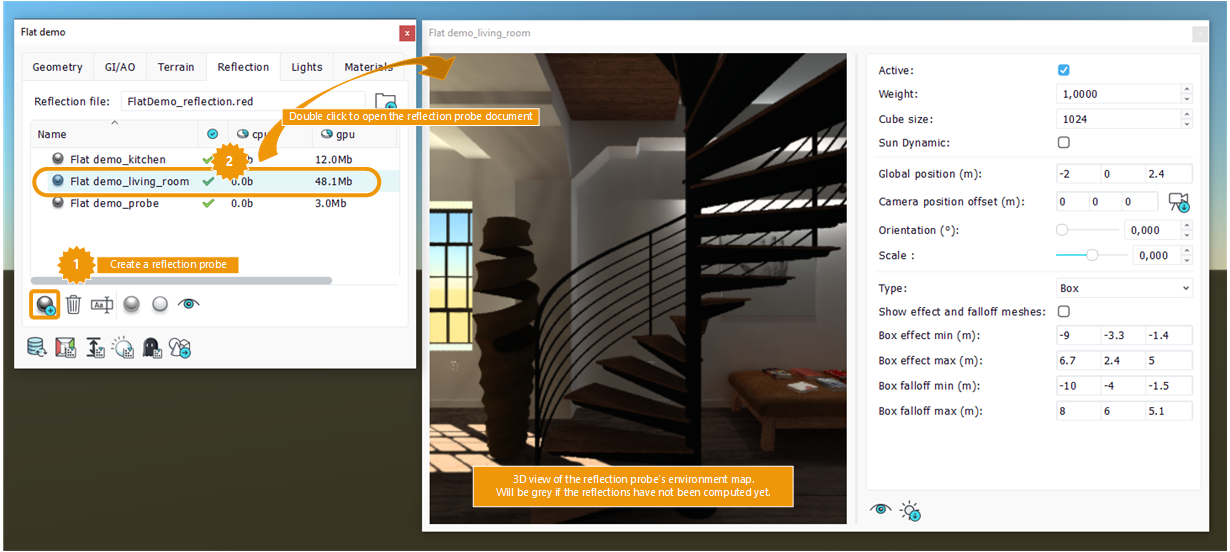
To create a new reflection probe, click on the toolbar button:

Create a new reflection probe
A probe is composed of:
- a center position: center of the reflection probe coordinate system
- a camera position offset: defining the point of view when capturing the spherical view of the probe's surroundings.
- an effect distance: reflections are fully visible inside this influence area.
- a falloff distance: area where the reflections fade out.
There are two types of reflection probe:
- sphere volume: the reflection cubemap is assumed to be at an infinite distance from any object in the influence area. This kind of probes works well for outdoor scenes.
- box volume: this kind of probes uses box projection allowing to create a cubemap at a finite distance from the center. This is better for indoor scenes where the reflections match the surrounding walls. The bounding volume have to match the walls of the room for the effect to be correct.
Sphere vs. box probe reflection on a mirror floor
The reflection probe panel exposes properties like:
- Type of the probe.
- Cubemap size in pixels.
- Active: does the probe has effect ?
- Weight: used to balance the probes blending when overlapping.
- Sun Dynamic: does the reflections change according to the sun direction? If uncheck, the probe is called "static", and you can use the sun button in the toolbar to set the sun position at the moment where the reflections were computed.
- Position, Orientation and Scale of the probe in the geometry.
- Camera position offset to define from where the environment map image will be taken. To center the camera in the middle of the shape, use the button on the right of this line.
- Limits of the bounding volume effect and falloff areas, defined differently depending on the probe type.
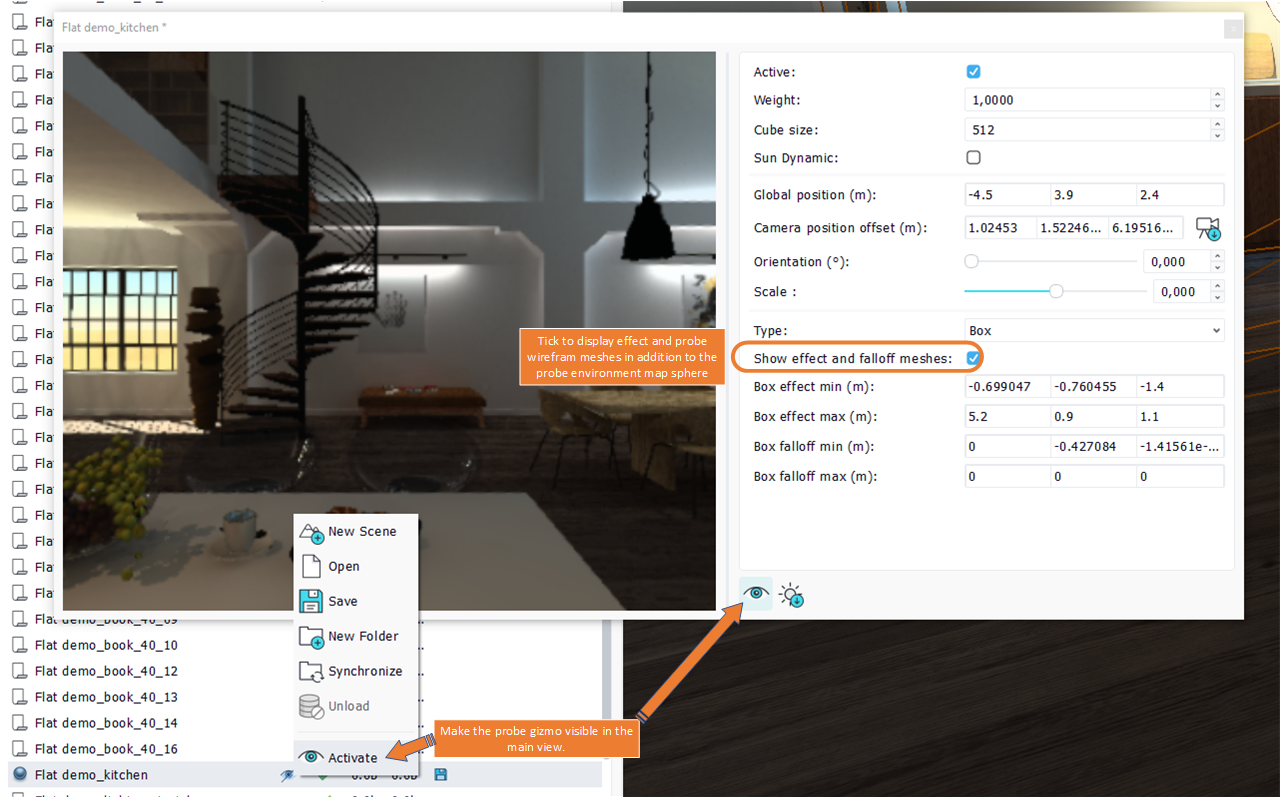
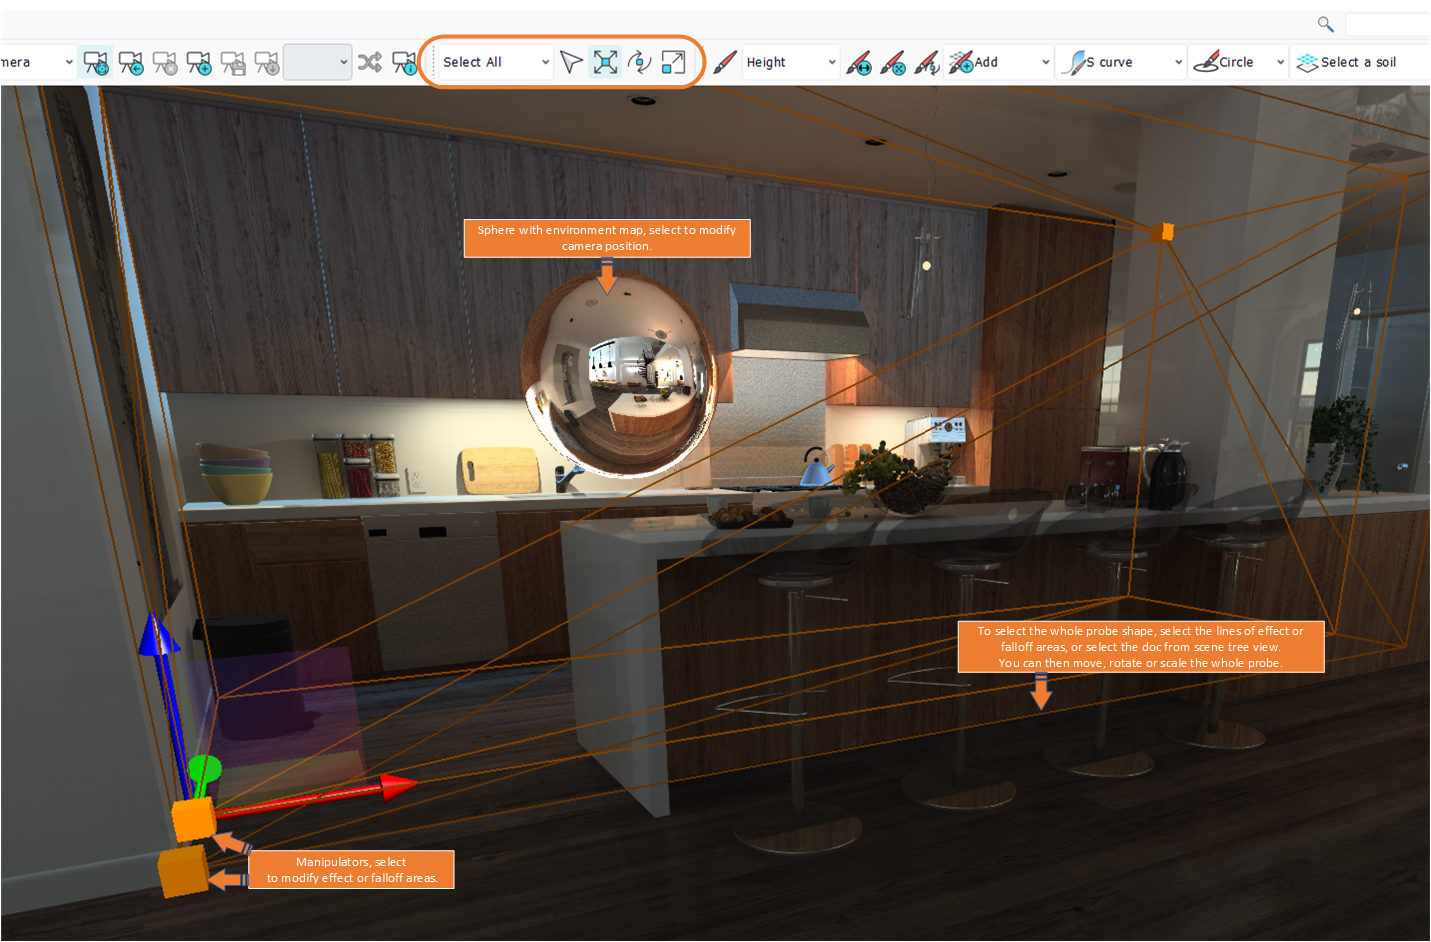
Properties can be edited using either this reflection probe panel or the selection gizmos for some properties like position, effect and falloff areas. To use the selection gizmos, you must first make the probe shape visible and display the extended gizmo showing effect and falloff influence areas, by ticking Show effect and falloff meshes .

Make the reflection probe shape visible in main view
You can then select the probe direclty in the main view or in the tree view, and edit what you need.

Edit the reflection probe using gizmos
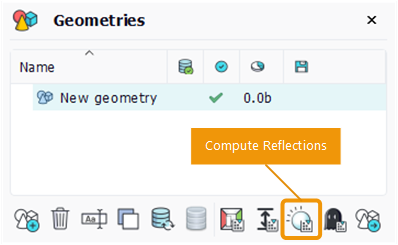
Once all the parameters have been setup correctly, it's time to generate the reflection cubemaps, back in the geometry view.

Compute the reflections
All the generated reflection maps of a geometry are saved in a single .red file. This file can be set in the Reflection file property on top of the geometry panel.
Note:
To simulate multiple reflection bounces, like a mirror looking at another mirror, the cubemap can be generated multiple times in a row.
 Import model as geometry ground decal Import model as geometry ground decal | Lights overview |


