User interface
We'll provide a detailed view of the user interface in this book. For an early stage and quick review of the interface, please follow this link: The user interface at a glance that'll provide you all the basics of the user interface.
A multiple documents application
NDunes is a product that manipulated multiple kinds of documents. Each document type has a dedicated folder in the data organization of a working directory, (details here: Choosing a working directory), to this folder there's a corresponding document view that can be enabled or disabled from the documents menu as illustrated below:
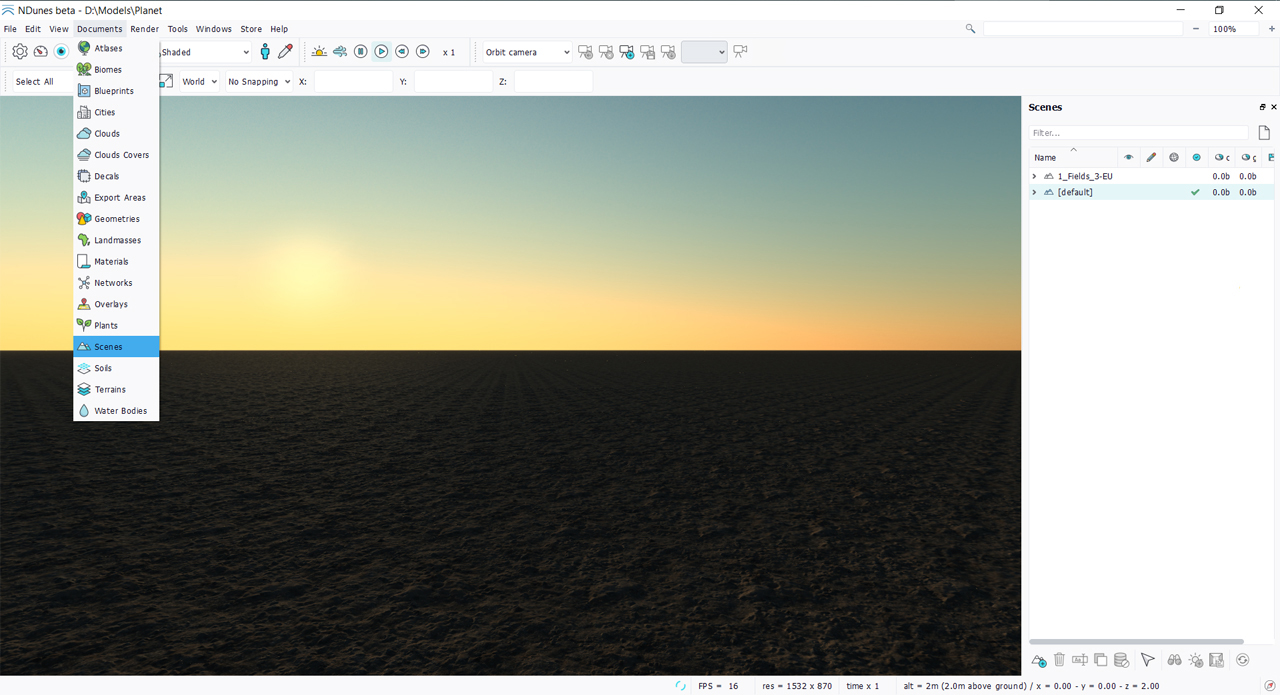
documents menu
For any given view, we can toggle the display of empty folders:
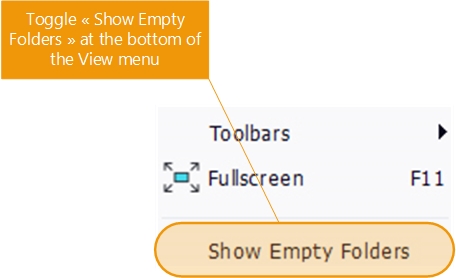
Show empty folders
Activating this option will reveal the file tree structure below the main folder of the documents of the selected kind. Below, for instance, an example for Plants:
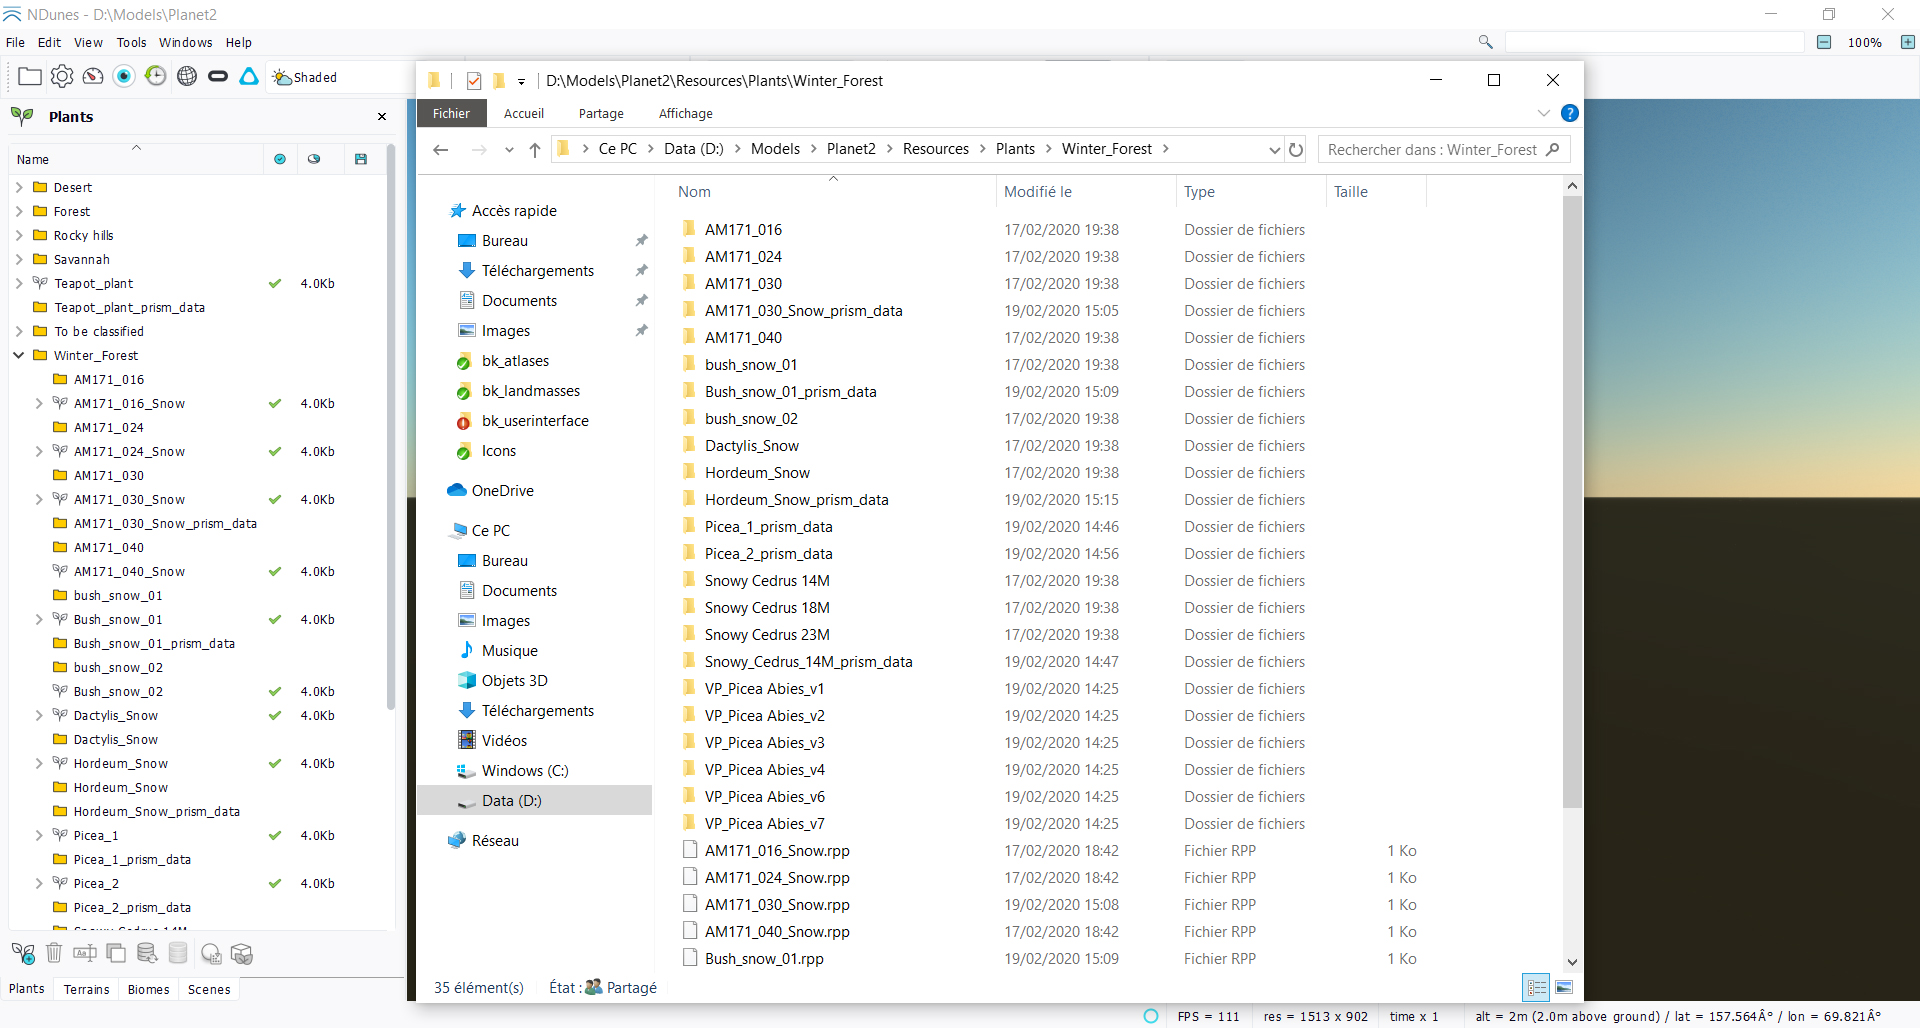
Document folder view
Folders can be created or deleted both sides: from the Windows Explorer or from NDunes. Just right click in the document view and "Synchronize" its contents to reveal any operation made in Windows Explorer in NDunes. By default, NDunes will not check changes in any folder structure:
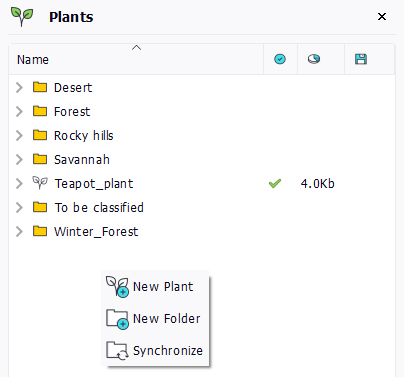
Tree view contextual menu
There's a small tip to know about this system: if you create a folder because you wish to create something in it, at first...it'll disappear right after having been created if the "Show Empty Folders" option is not checked: when you create it in NDunes, it's empty...so unless the "Show Empty Folders" option is checked, it'll disappear immediately. It'll appear only if there's a document in it.
Sub-documents and groups
Some documents may use other documents. Like cities containing buildings and roads or the scene containing all other documents. They are listed in the tree view under their parent item.

Plant documents in a biome document in a scene document in a folder
When expanded, the list of sub-documents may be very long. For conveniency, groups can be created under a document to arrange its sub-documents. The action is available in the contextual menu with the button called "New Group". Once a group has been created, every sub-document can be dragged and dropped onto the group item to place it under.
In the previous image, the "Alpine_Lake" scene has a group called "Waterbodies" containing all the water documents of the scene.
Note:
To remove a sub-document from any group, drag and drop it directly to its parent document.
Groups can be deleted with the "Delete" icon. When doing so, it deletes the group and its content. Make sure to move its content first if only the group has to be removed.
Using scenes
Scenes documents are central documents in NDunes. The main rendering window of NDunes always displays the current scene which is highlighted in blue:
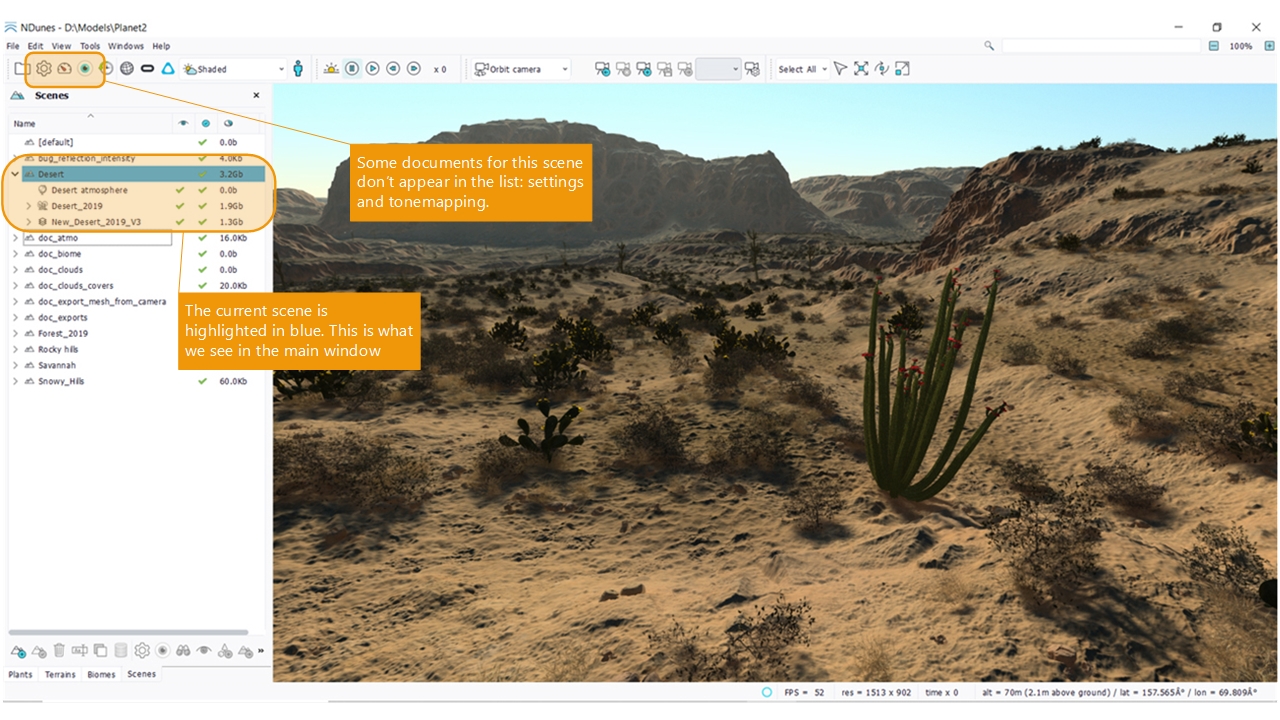
Visualizing the current scene
In that example, we have a desertic landscape, a biome and an atlas. The "Desert" scene is highlighted in blue, telling us that it's the current scene. We also have documents that are unique for every scene and that don't appear in the list: Settings and Tonemapping. Each scene own a separate document for its settings and can have a specific tonemapping. The Performances button opens a view which is common to all scenes. It's more a generic performance information panel, helpful to improve display performances, rather than a document in which we do setup things specifically for a scene.
Note that the default scene is never saved. On exiting NDunes, you'll be prompted on renaming it before quitting the product:

Save the default scene before exiting
If you answer yes, you'll have to rename the default scene into another document for it to be saved. You can change this prompting behavior in the Options of the product. Options are accessible from the Tools / Options menu entry.
Generic commands |


