

Scene Setup
Setting up the Scene will mostly be done through the Blueprint document. If you haven't done already, you can read the Blueprints documentation to learn more.
Create a Blueprint
References : Creating a blueprint
First thing we will need to do is create a Blueprint.
- Click "Document" in the navigation menu.
- Select "Blueprint" in the unfolding menu to open the Blueprint panel.
- Click the "Create a new Blueprint document" button at the bottom of the Blueprint panel.
- Rename your Blueprint with the name of your project (we will call it "Project" in this tutorial).

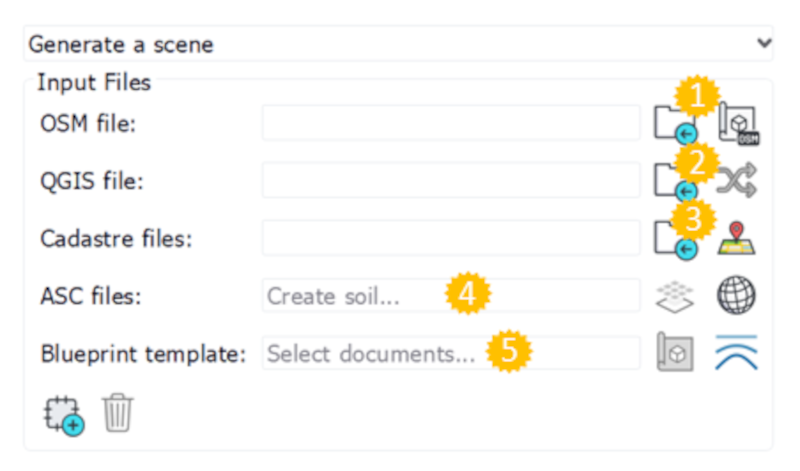
Input data
Documentation reference : Input data
Now that we created a Blueprint we will start to input the data we gathered in it:
- In the "OSM file" line, click on the folder icon and load the OSM file downloaded previously.
- In the "QGIS file" line, load all the necessary QGIS files, you can load multiple files in this section.
- Import the cadastral files downloaded previously.
- Load the ASC files to generate the Primary Soil.
- In the "Blueprint template" select the Stylesheet downloaded from the store. This will automatically fill all the rest of the Blueprints with NDunes data from the stylesheet.
Customize blueprint
References : Scene parameters, Customization of classes
Now that we have input all the data we need in the Blueprint, we can finish to set it up with custom modification.
For example you can apply a Biome to the different classes in the "Land Use" tab :
- Go to the "Land Use" tab in the Blueprint
- Click on the class you want to modify
- In the pop up window select a Biome
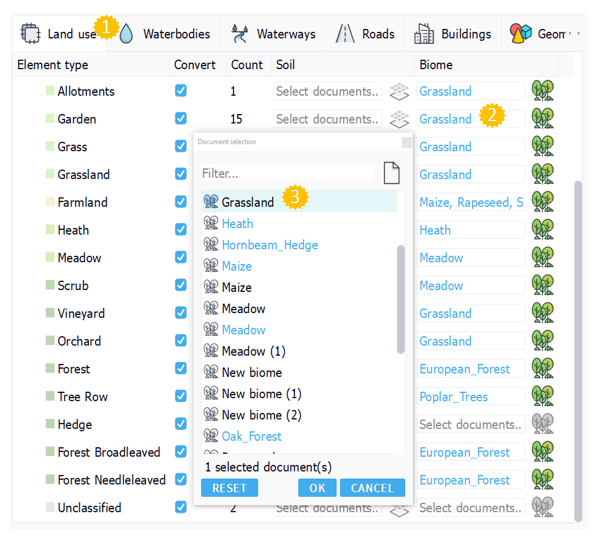
This same step can be redone in the different tabs in the Blueprint (Land use, Waterbodies, Waterways, Roads, Buildings, Geometries)
Note:
You can also drag and drop a biome from a textbox to another to assign them faster.
Additionally you can reduce the size of the generated area by using the area button at the bottom of the "Input files" section.
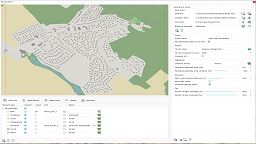
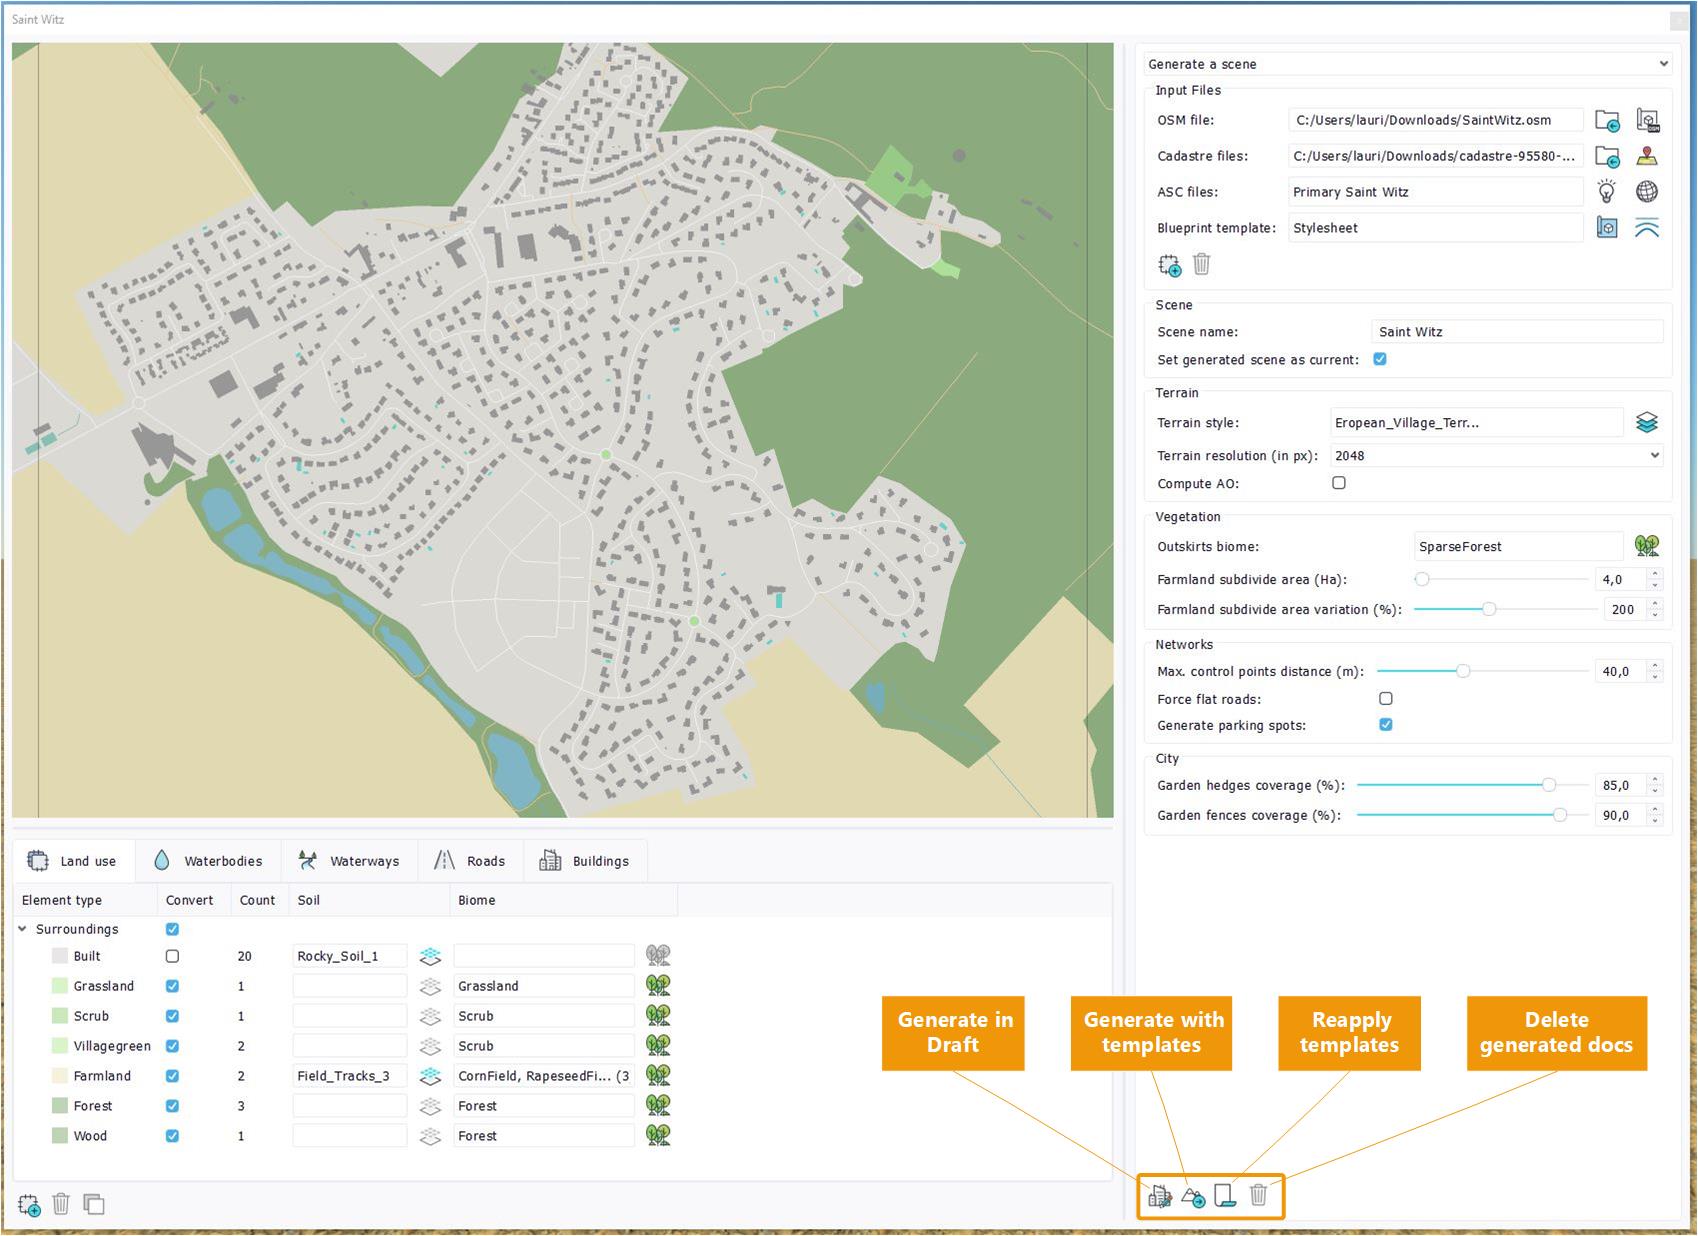
Generating the scene
References : Generating the scene
Once you are all done, you can click on the "Generate Scene in draft mode" at the bottom of the Blueprint view.
 External data External data | Creating overlays |
