

Tonemapping
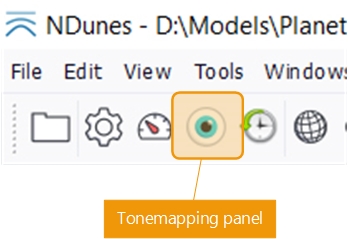
The tonemapping panel is raised from the top toolbar of the application:
On clicking the tonemapping button, a 4 tabs panel shows up:
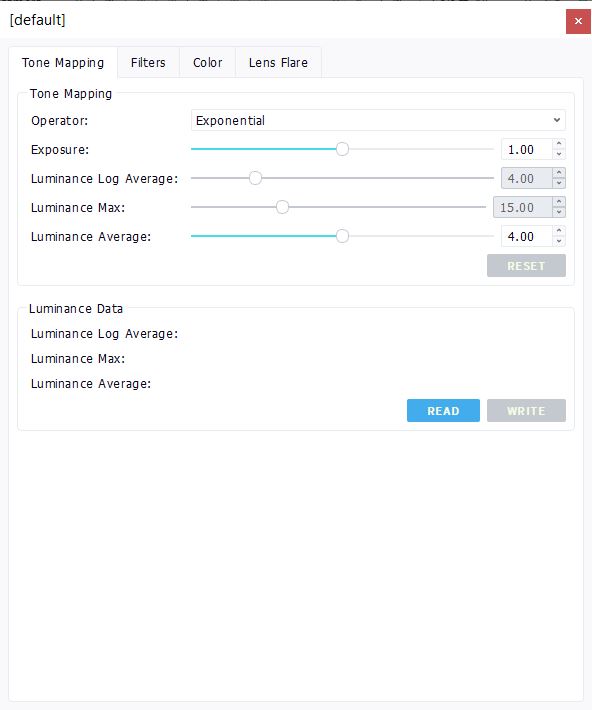
The tonemapping panel wears the name of the scene it belongs to. Each scene has it's own tonemapping values.
Each tab of the panel covers a dedicated part in the image post-processing:
- The "Tone mapping" tab: this is the HDR to LDR image conversion. NDunes rendering pipeline is done using High Dynamic Range values (HDR) and gets converted back to Low Dynamic Range (LDR) values that can be displayed by common screens. The HDR to LDR conversion, also known as tonemapping, is ruled by parameters in this panel tab.
- The "Filters" tab: A number of post processing effects can be found there, such as glow, sharpen, depth-of-field, etc...
- The "Color" tab: This tab contains all color correction tools: color curve, gamma, white balance, LUT, etc...
- The "Lens Flare" tab: This tab enables you to add and customize a lens flare post-process effect on the sun, to improve the scene's photorealism.
Tonemapping modes
We'll detail all tonemapping modes available in this section, and how to change the resulting image. First let's have a look at the tonemapping modes available:

We have 4 distinct tonemapping modes, each of which uses some parameters of the panel. We also have 4 tonemapping parameters: "Exposure", "Luminance log average", "Luminance max" and "Luminance average".
Each tonemapping mode may use one or more of these parameters. Let's review each of them:
- Neutral: This mode does not do anything to the image if activated. This is a no tonemapping mode, where the incoming HDR image is clamped to [ 0, 1 ] so that it can be displayed on common LDR displays monitors. Therefore this mode has no parameters that apply to it. A typical image generated by NDunes will appear all white when this mode is activated because absolute color values produced by NDunes when illuminated by a sun and sky are fairly above 1.
- Exposure: This tonemapping mode uses the "Exposure" factor of the parameters. The HDR incoming image is multiplied by the value in "Exposure" to produce the final LDR image. Under a bright sky, a typical exposure around 0.1 produces a correct image. Note that the exposure mode does not flatten contrasts in the image so a bright sky may be burned quite easily while dark areas will get darker.
Exposure set to 10% on the left and 100% on the right
- Exponential: This tonemapping mode is the default. It uses the "Exposure" and "Luminance average" parameters. It produces images with quite a strong contrast and is easy to modify, as just changing the value of the "Luminance average" will change the overall look of the resulting image.
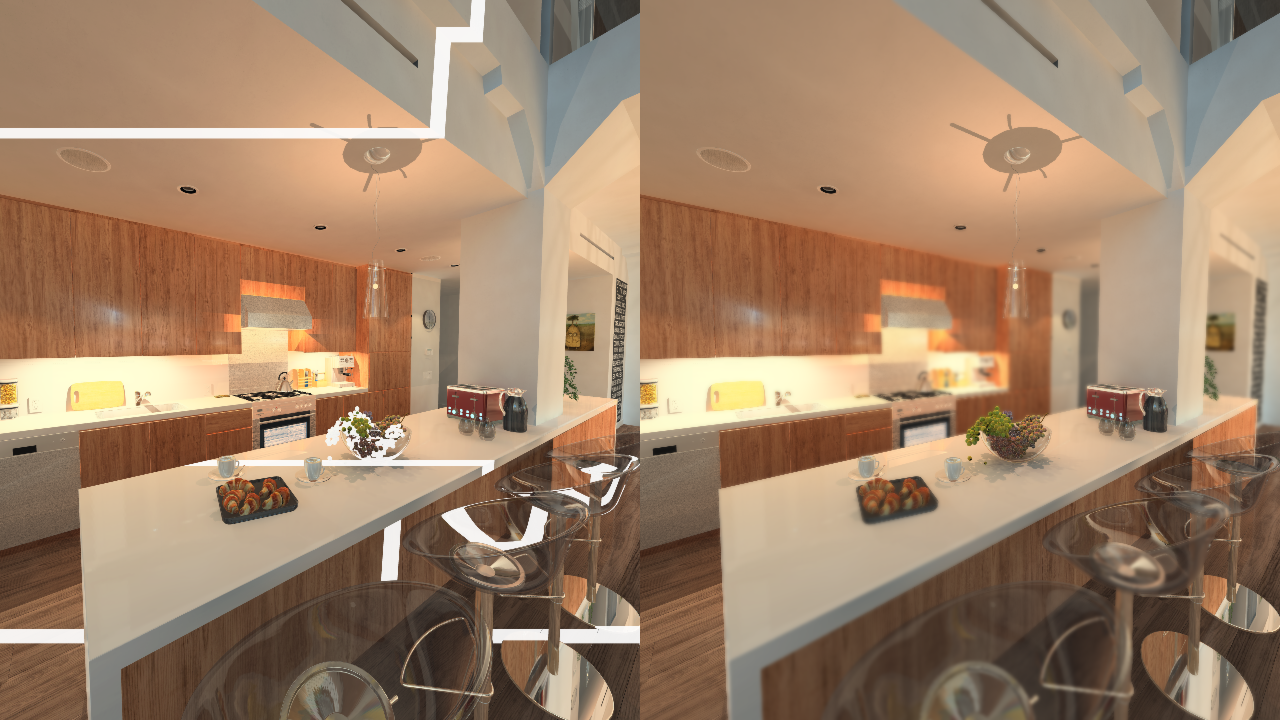
- Photographic: This tonemapping mode is the default of the REDsdk rendering engine that powers NDunes (www.redway3d.com). It generates slightly less contrasted images and is very useful to enhance dark areas to get them back visible. It's controlled usin the "Exposure", "Luminance max" and "Luminance log average", so it's slightly harder to control.
A comparison between exponential tonemapping (left) and photographic tonemapping (right)
Note that the image above uses a quite turbid sky with a thick atmosphere so its whiteness is rather normal.
Measuring image luminance
It may not be easy to guess luminance values in an image to define values to use for a given tonemapping mode. The next section of the tonemapping panel has a luminance measurement tool, so on clicking on the "Read" button, luminance values of the current image are measured. By pressing "Write" these are applied to the current tonemapping settings (also press Ctrl+L by default to perform a read + write in one click):
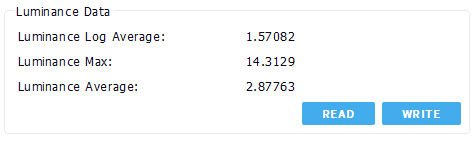
The image comparison above was performed with measured luminance values applied. This can be very convenient to setup a given tonemapping suitable for different lighting conditions or to adjust the tonemapping for a given need.
Tonemapping filters

Here are available a bunch of pretty standard effects:
- Typical sharpen, glow, blur effects.
- A Depth-Of-Field (DOF) and a DOF line effect. The DOF is a fake DOF obviously, based on the depth map produced by the renderer. The DOF line is used to setup DOF values, so the fade distances before the accurate area of viewing and fade distances after. The depth line shows where the DOF effect will concentrate.
- A quite standard too, vignetting effect.
Tonemapping color correction
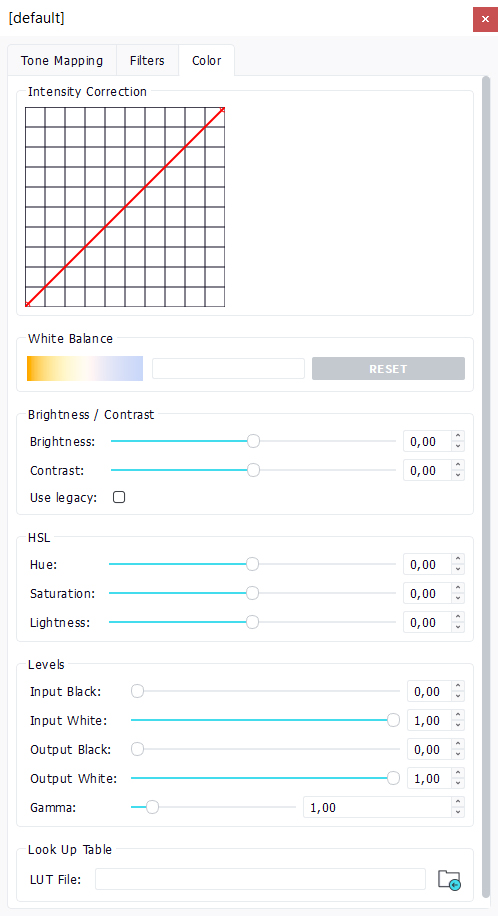
Again, we'll find here a set of typical color correction tools:
- A color curve intensity correction. By clicking on the graph, points are added, press the keyboard "Delete" when hovering a point to delete it.
- A white balance control,
- Typical brightness, contrast, HLS, levels, gamma controls,
- And a LUT specification using .cube files.
Adding Lens Flare effects
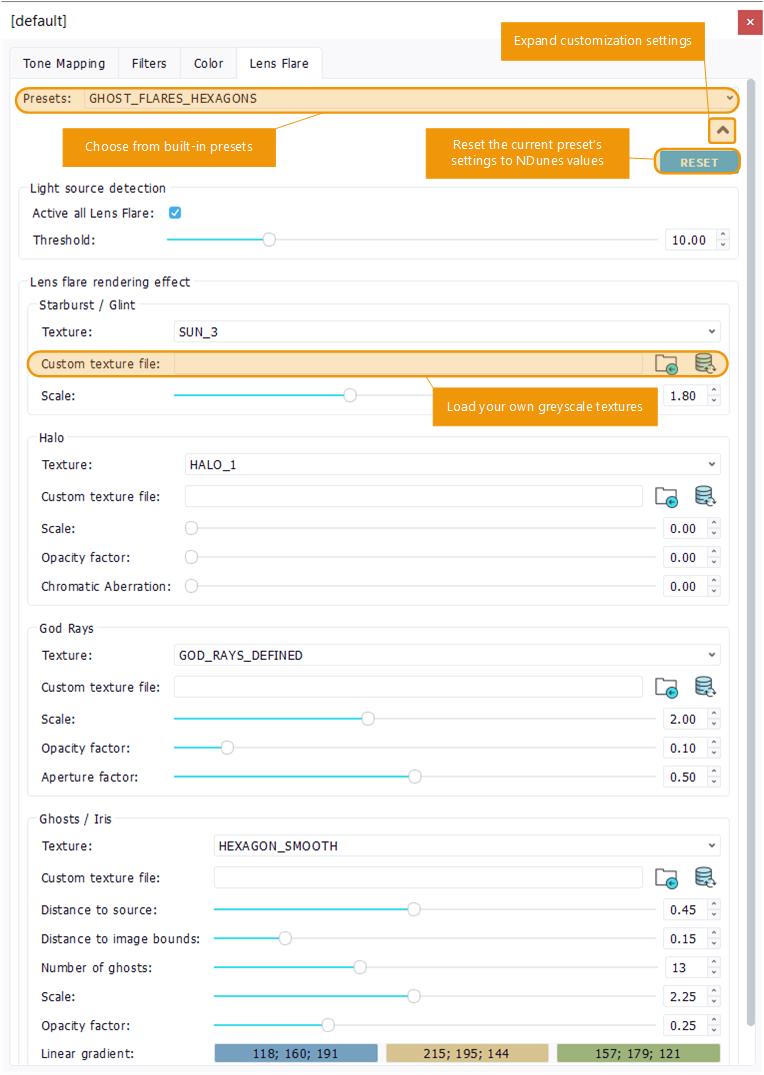
To add a post-process lens flare effect on the sun, you can choose from one of the built-in presets.
If you want to modify a built-in preset, expand the panel's customization settings and tune it with the sliders.
If you want to make your own preset, choose "Custom" from the preset's list, and define you own lens flare set of effects using the sliders. You can choose from the included flare textures or load your own for each effect (they must be greyscale textures).
If you click on the Reset button, all customization values of the current preset will be resetted to the default NDunes values for this preset. Be carefull as this cannot be undone.
 Display modes Display modes | Performances |
