

Using the selection toolbar
The selection toolbar is by default on the top of the main user interface. It allows you to select elements present in a scene and to manipulate them. Below is an example of a plant selection:
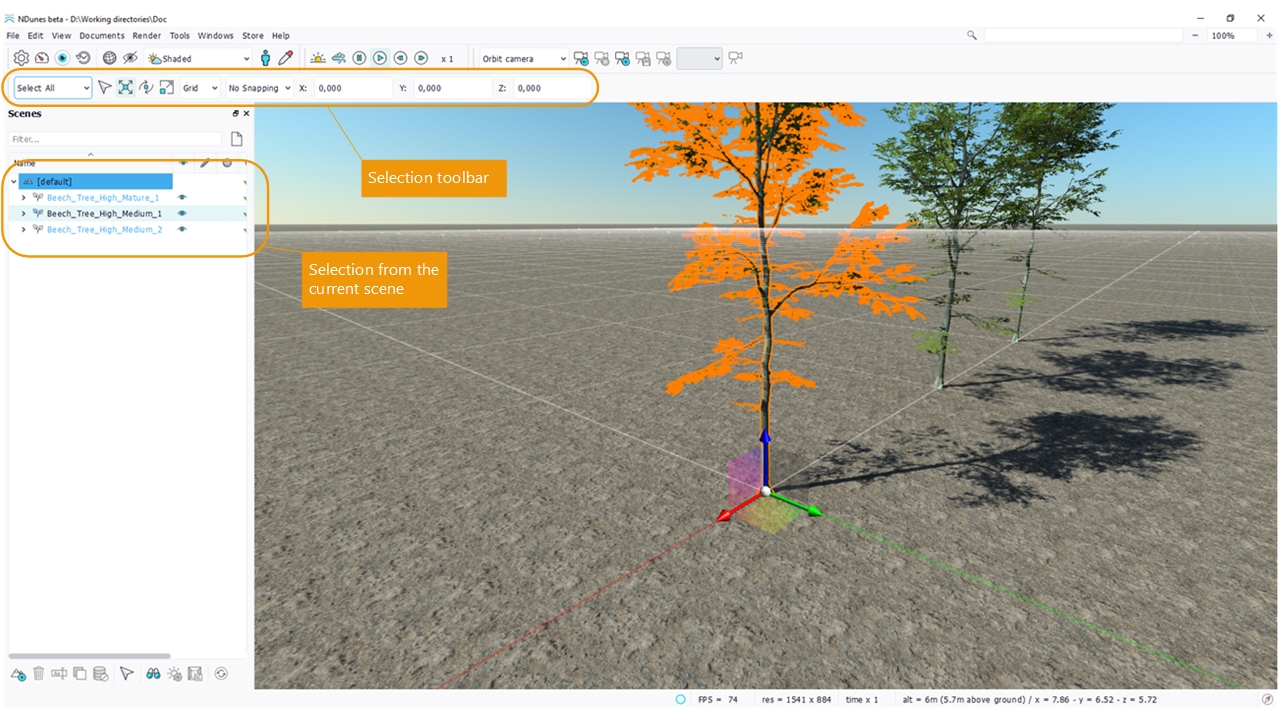
Plant selection
Selection
On double clicking the selected item in the main view, the corresponding document will be opened. This mimics the double click behavior that can be triggered from any document tree view.
There are two visual feedbacks of the current selection:
- It's highlighted in light blue in the current scene contents.
- Contours of the selection are highlighted in orange in the main view.
Note:
Selection has to be enabled by pressing one of the selection actions of the toolbar.
Due to the nature of the scattering system in NDunes, some elements can be selected and some others can't:
- The terrain is unique in a scene and it can't be selected in the main view. However, it can be selected in the scene view and if you right click it, you can "Find" it back (whenever you get lost in orbit ;))
- The biome is unique in a scene too and it can't be selected in the main view. So plants scattered by biomes can't be selected either. Individual spawned plants can be selected and manipulated as illustrated above, but this isn't the case for automatically scattered plants through biomes.
The first item in the toolbar is a combo box providing specific objects selection that can hardly be picked otherwise: materials, curve points, etc.
Manipulators and gizmos

The selection toolbar
The selection toolbar has a left side combo that allows you to choose the kind of elements that can be selected. This is useful to filter elements according to your working needs at a time. This is shown below:

The selection toolbar combo
The "curve & points" item covers all the decals and cities documents (buildings shapes, fields shapes, etc...)
Like in every 3D software, the three types of manipulators are accessible from the toolbar:
- Translation;
- Rotation;
- Scaling.
The manipulator object in the viewport can be picked and dragged to move the selected objects.
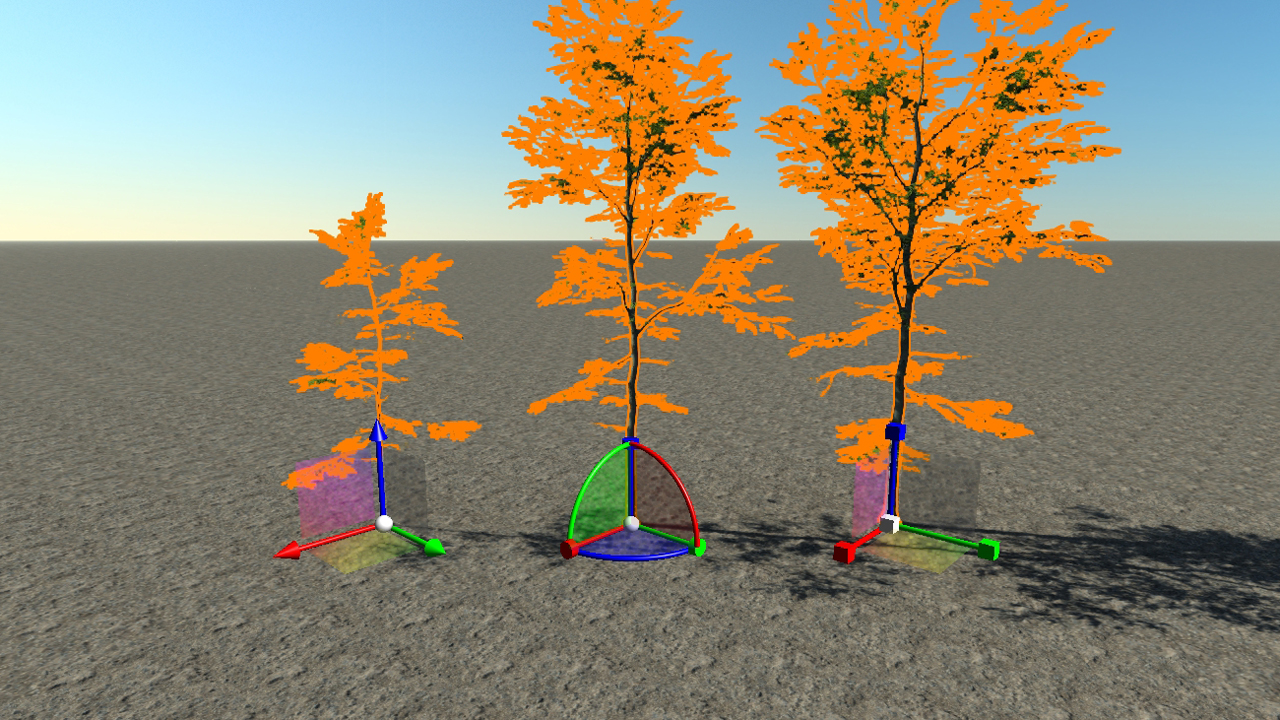
The translation, rotation and scaling manipulators
Transform references
In addition to these tools, the choice of the transform reference can be done among several options:
- World: the tangent space at the gizmo position on the planet;
- Grid: the grid space (the grid can be enabled or disabled in the settings panel: Settings );
- Local: selected object local space.
Manipulator position
When an object is selected, the manipulator is placed at its pivot position. When several objects are picked, the manipulator is placed at their average positions. Except in local mode where the manipulator is placed at the pivot of the first selected object. Local mode transforms objects independently from each others.
Snapping
The next combo box contains the snapping modes:
- No snapping: free moves.
- Grid snapping: the selected objects positions are snapped on the grid points. The snapping depends on the grid step size.
- Curve points snapping: the selected objects are snapped to the nearest curve point in the scene. This is particularly useful when creating road networks.
- Ground snapping: the selected objects are snapped to the ground position.
- Ground Normal snapping: the selected objects are snapped to the ground position and normal.
Two snapping buttons can be found at the right of the toolbar: the first button snaps the selected objects to the ground position and up direction, the second button snaps the selected objects to the ground position and ground normal direction.
Entering values
Last but no least, the three coordinates fields are convenient to precisely translate, rotate or scale the selected objects. The coordinates units are meters for translation, degrees for rotation and percents for scaling.
- In World mode, the entered values are relative to the current selection position, orientation and scale in the planet tangent space.
- In Grid mode, the fields show the absolute values of position, orientation and scaling in the grid space.
- In Local mode, the entered values are relative to the current selection position, orientation and scaling.
Note:
the scaling tool is only available in local mode to avoid objects shearing.
When manipulating the translation, rotation and scaling gizmos, the displacement values are visible in the coordinates fields.
Note:
Pressing the Ctrl key when moving the manipulator will translate, rotate or scale by unit steps.
Duplication
Pressing the Shift key when moving the manipulator will duplicate the objects that are manipulated for objects that can be duplicated.
Repositioning the gizmo
Pressing the Ctrl key and right clicking somewhere in the scene will reposition the gizmo of the selected objects to the clicked point. This can be very handy to move items that are far away or whose gizmos pivot points are far away. To reset its default position, simply click with the mouse right button.
 Generic commands Generic commands | Using the camera toolbar |
