

Brushes
Brushes are painting tools in NDunes. A landscape brush can be used to manually do some extra sculpting on a soil or on a complete terrain. Unwanted landscape cracks can be eliminated, height, masks and all other channels can be modified. In addition, full terrains can be used to sculpt other terrains, providing a way to do complex landscape compositions that would not be possible otherwise.
Overview of landscape brushes
Landscape brushes are quite easy to use. A terrain needs to be present in the current scene and they can be used. If not, a warning will pop up to tell you to add a terrain first.
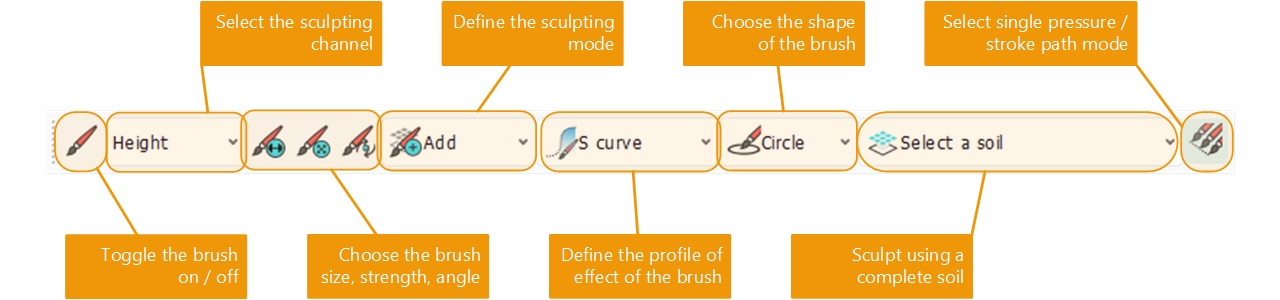
Brushes are used through the brush toolbar that can be shown from the main interface of NDunes:
Press 'space' or the other key shortcut you've assigned to trigger brush sculpting on and off. Note that when brushes are turned on, camera movement is disabled and vice-versa, so assigning an easy shortcut to play with brushes is something really helpful. See Options for more details on shortcuts definition.
When turned on by pressing space or pressing the brush toggle button, and then using the left mouse button with a drag operation, a brush sculpting operation occurs over the current terrain:
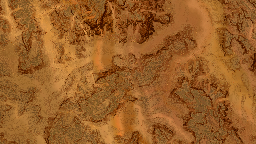
I was trying to paint the NDunes logo and...Ok, I'm not an artist. I'm sure of that now ;). The default painted channel is "Height" as we can see, and the brush mode is "Add". So we add elevation to the current terrain.
Sculpting the first soil
Getting further down the details of the brush operation, we can see that The first level soil is the only one modified by the brush application. Since this is the one that defines the landscape relief, this is the one that gets sculpted. Secondary soils are applied over the primary soil and are generally using repeated textures that can't be modified here using brushes.
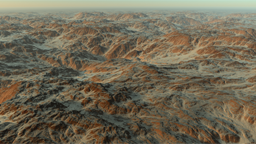
However, depending on the design of the terrain, modifying the height of the primary soil will cause all slope based masks to be modified, as illustrated in the example below:
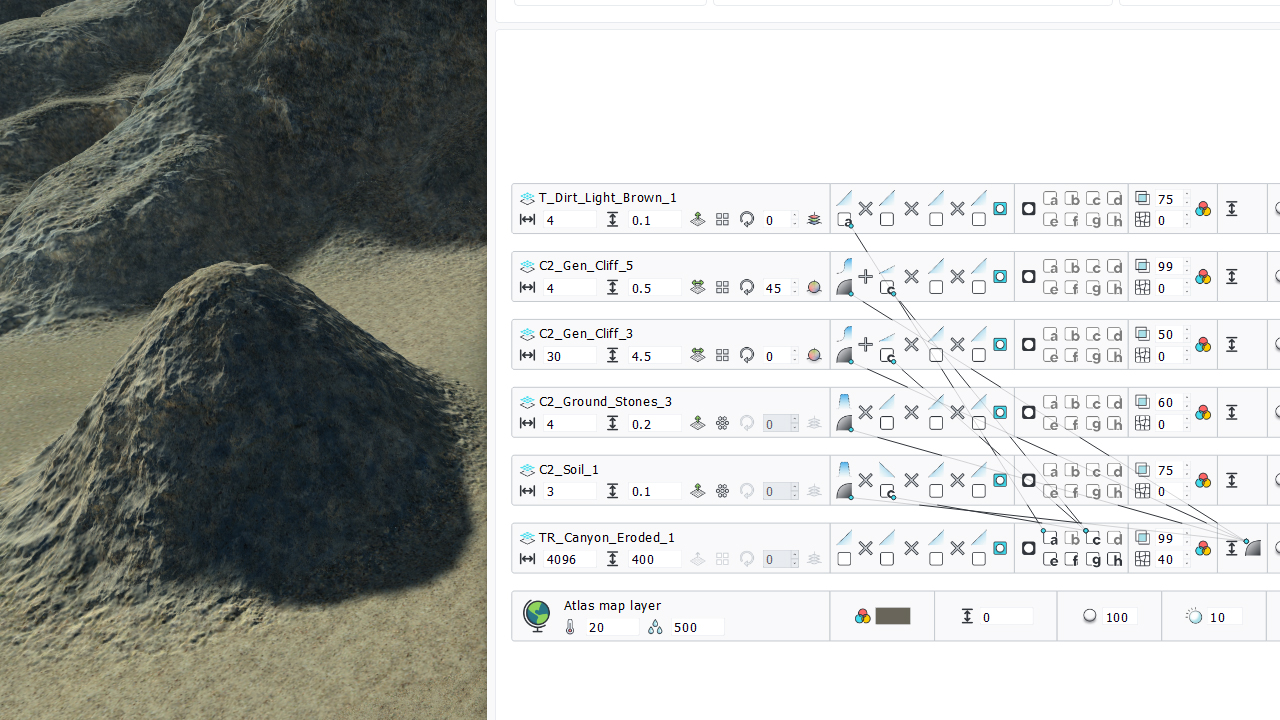
The terrain being sculpted here uses 5 secondary soils, most of which are using a slope based mask. The "C2_Gen_Cliff_5" soil is mapped onto high slopy areas, which gets automatically generated by raising the elevation with our brush.
Brush strength, size and angle
By pressing the corresponding toolbar buttons, several panels can be raised to control the effect of the brush: its strength, size and angle can be controllable. Below the raised dialogs (that can be kept opened):
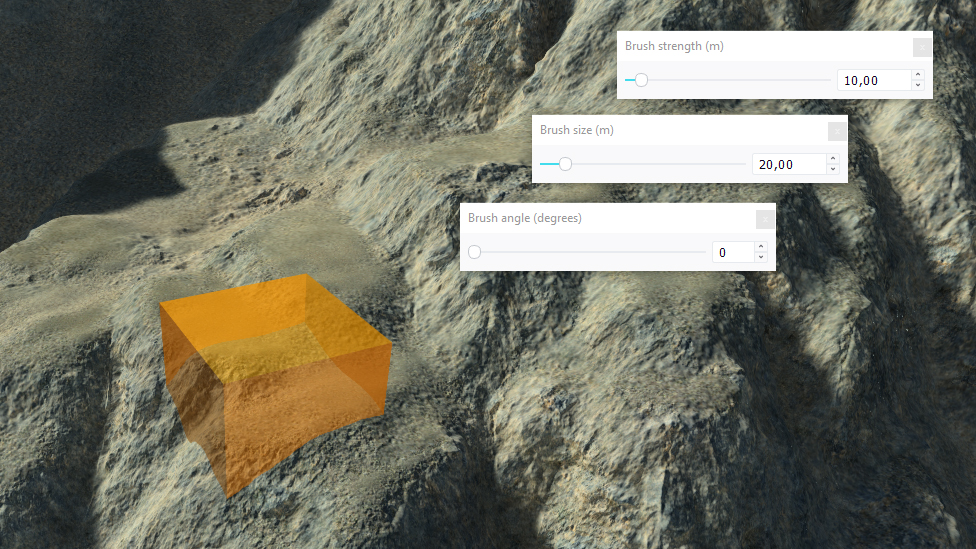
Note that depending on the sculpted channel, the brush strength is either a value in meters (when the height is sculpted) or in percentage (when other channels are sculpted).
Sculpting a soil with another soil
See here: Sculpting soils with other soils for all details on sculpting using complete soils, that paint all channels at once. This is a convenient way to define entire terrains with a full control over the relief.
Name of saved sculpted channels
On painting a channel with a brush, the corresponding first level soil of the current scene terrain is modified. The name of the file used for the terrain is changed, as illustrated below:
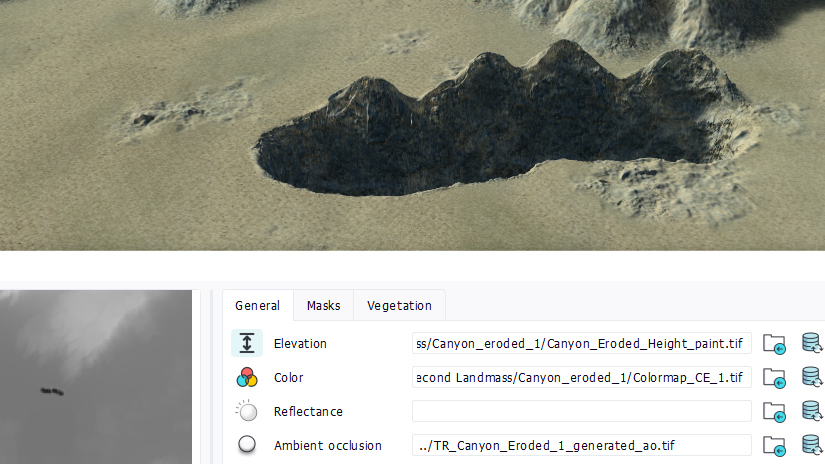
As we can see, the name of the elevation channel file has been modified and a '_paint' suffix has been added to it. Note that node graphs for that channel are still present. Regenerating the node graph for the channel will overwrite the brush paint, so please be careful on that.
Brush application mode and profile
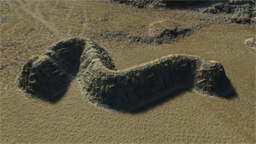
A brush currently has three application modes: "Add", "Subtract" and "Flatten". Names are quite self-explanatory: "Add" adds the brush contribution to the current channel at the painted location, "Removes" does the opposite and "Flatten" can be used to remove cracks or bumps as illustrated below:
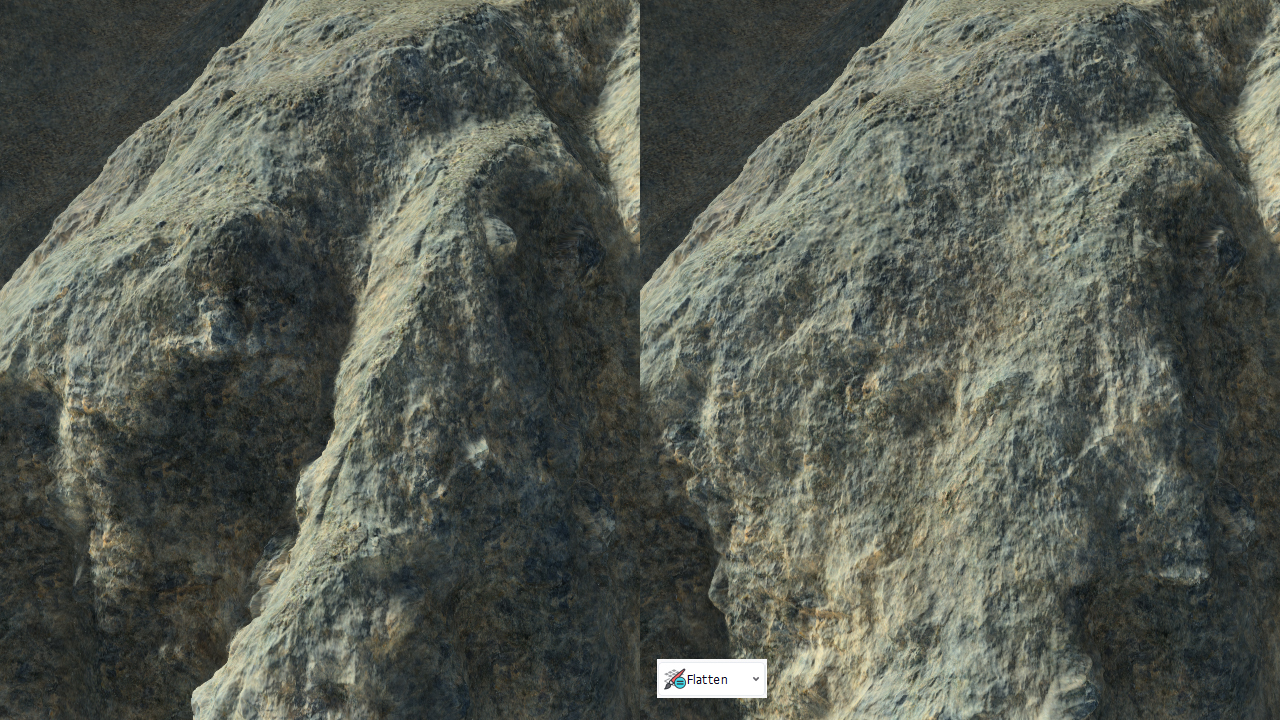
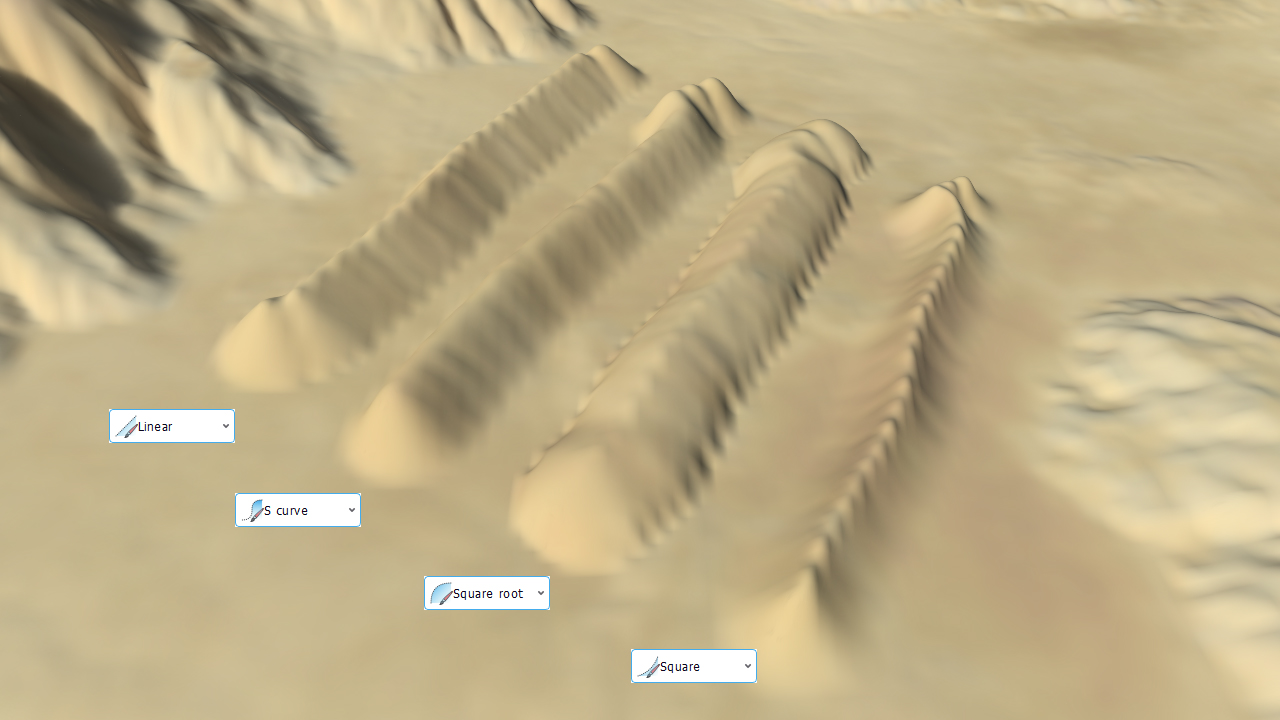
The elevation channel of the right side of the image has been flattened. Then, the radial strength of the brush can be also modified using the profile of the brush:
Sculpting soils with other soils |
