


Clouds
Clouds are another important part in the setup of a scene in NDunes. Like Plants that are part of Biomes, clouds are part of Clouds covers. Clouds are individually created (see below) and then aggregated together into clouds covers to form complex skies.
Creating a cloud
A cloud is a VDB file, that can be created using a 3rd party software dedicated to that task.
- Click on the clouds creation button.
- Open the cloud document.
- Specify the input VDB file of the cloud. Additionnally, change the vertical direction of the cloud, depending on the software that was used to create the VDB.
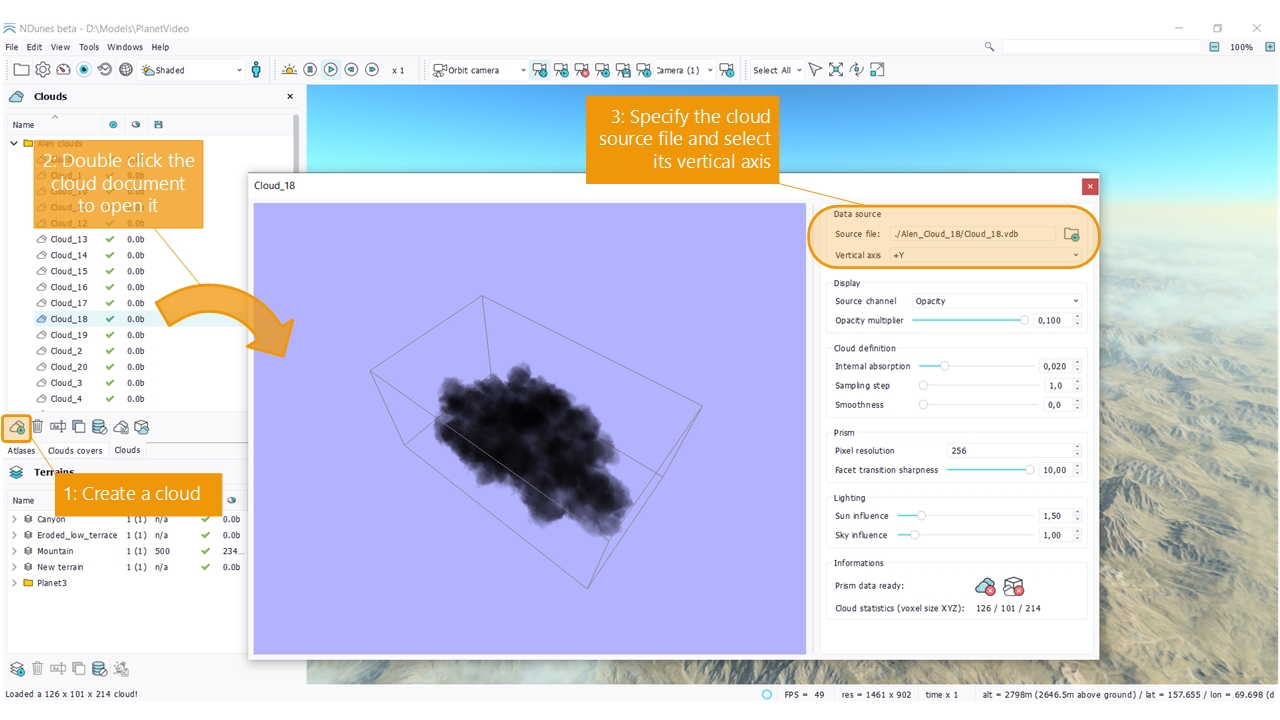
NDunes will display a message on the first time, indicating that the source VDB file is being converted into a RED format used by NDunes. During this phase, clouds that are too large to be handled by NDunes may be downsized to fit NDunes memory constraints. The vertical axis of the cloud can be changed only after the initial conversion of the VDB into a RED file format.
Prepare the cloud for display
As with plants, clouds are rendered using impostors. The lighting model used to render clouds in real-time is guaranteed to be 100% non physical. While it follows general lighting propagation rules, there are a lot of approximations made to have it look the best we can in real-time. So, in order to be able to proceed with the impostor calculation, two steps of pre-calculations must be performed:
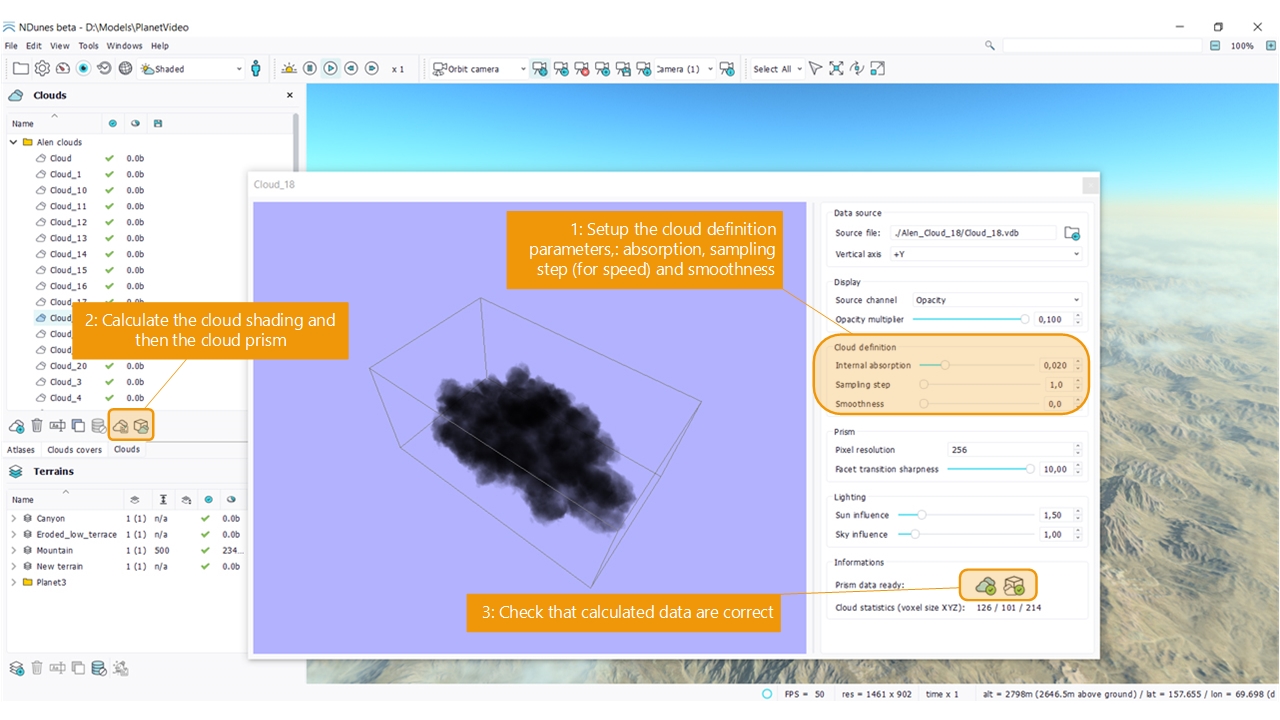
- Choose the cloud definition parameters. The internal absorption factor is a multiplicative term applied to the cloud VDB density field when calculating the scattering and gathering of the light inside the cloud. Increasing the absorption factor will strengthen the contrast inside the cloud, while reducing it will make the cloud look smoother and less uniform in tint. Increasing the sampling step decreases the quality of all calculations and vice-versa. This parameter is mostly here for speed. Don't hesitate to raise the sampling step to 2 or even to 4 with large VDB files if you notice that calculations are too long. Finally, the smoothness term will blur the resulting cloud impostor, making the cloud internal lighting look smoother.
- Then, trigger the calculations. The cloud shading has to be calculated first, then the cloud prism. Several prisms calculations parameters can be considered: the resolution of the prism, and the facet transition sharpness that will change how sharply the facets of the cloud will replace each other.
- Check then that the cloud is ready for the display.
Add the cloud to a clouds covers
A cloud can't be seen standalone. So a cloud cover (see here: Clouds covers) must be setup to visualize the cloud. Follow the steps detailed in the clouds covers book to create a cover (Creating a clouds covers), drag a cloud in its list and then visualize the results:
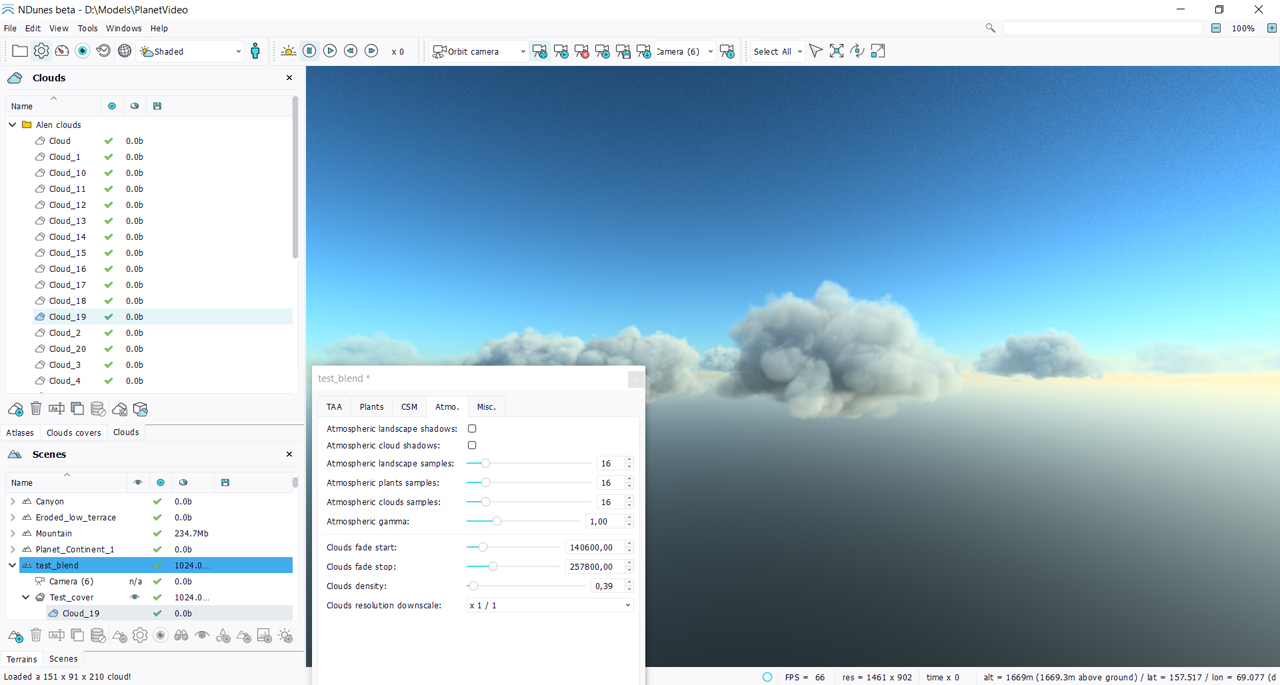
Then open the Settings panel, and locate the clouds density multiplier. Set it to a low value to isolate the cloud. Once there, you can easily change the clouds parameters, sun direction and recalculate the cloud to make it fit your needs. Note that each time the cloud gets invalidated (due to a change in its internal absorption, smoothness or prism definition parameters), it'll be removed from the cover until it gets recalculated.
Clouds cover opacity modifier
An important point to quote in the clouds display system is that the opacity of clouds is adjusted automatically to match the needs of the cover at the position of the clouds. So for instance if a very dark and opaque cloud is selected and scattered in the cover at a position where the cover is fully opaque, that cloud will appear opaque. Now if the same cloud is scattered at a position in the cover where the opacity of the cover is weak, the opacity of the cloud will be lowered automatically to match the cover requirements. This is illustrated below:
In that image, we can see that the cover itself is almost transparent (this is even barely visible) in the center of the image. But it's not 100% transparent, so all clouds that are selected to be created there will have their opacity lowered a lot.
