

External Data
References : Input data
When creating a project in NDunes, it is usually necessary to use external data to input in NDunes. This data will help generate and edit the scene to resemble as close as possible to reality.
A good starting point is to organize the files that we will be using, thankfully NDunes uses a pretty clear folder architecture that we can use.
The external data that we will need can be separated in 3 groups :
NDunes data
First we will start with the data that is produced by NDunes. This data is available in the Store and contains different assets made by 3D artists working for NDunes. In this example we will be using the following stylesheets: BDTOPO stylesheet. RPG stylesheet. City Draft stylesheet.
Clicking on Download will launch NDunes and the assets will be downloaded there automatically. You will then be able to find the Stylesheets and all the other assets in the different Document tree views in NDunes.
Note:
These files are located in a separate working directory called Store that is accessible from any NDunes working directory.
In this workflow we will also need a sample scene that you can download here. This scene has all the data necessary to follow along.
Project data
Project data refers to all the project specific information such as :
- Project layout, you can place these documents in the "Overlay" folder in your NDunes working directory.
- Optionnal 3D models of particular elements of your project in FBX, DAE or OBJ/MTL format that we will place in the Geometries folder.
Public data
Public data is data that is publically available in different sources. Usually what will be needed is :
- OpenStreetMap File (.OSM), you can export .osm files from OpenStreetMap by following the steps to Download OpenStreetMap files. Your web browser will download an .osm file that you can move to the "Blueprint" folder in your NDunes working directory.
- GIS File(s), which is a much more precise source using GeoJSON files. You can find the documentation to import QGIS data in NDunes here : GIS File(s). Once done you can also add this file to the "Blueprint" folder.
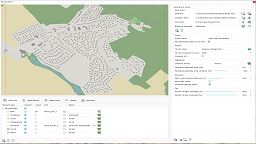
- Satellite images of the area. These are very important for our workflow. They will help our City Wizard to adjust buildings height and textures. You can also use satellite images to adjust the position of some Decals, Plants and Geometries in the generated scene as well as adjust the color of the fields and forests if you want to.
 Introduction & examples Introduction & examples | Automatic generation of the scene |
