

Animation
The next step of the base workflow is animating objects and cameras in the scene using "Scene curves".
At this point we already have:
- The scene fully generated automatically.
- Project integrated into the scene.
Here is how this part looks like:
- You create cameras in the scene for each situation/track.
- Create scene curves that you will assign later to each camera.
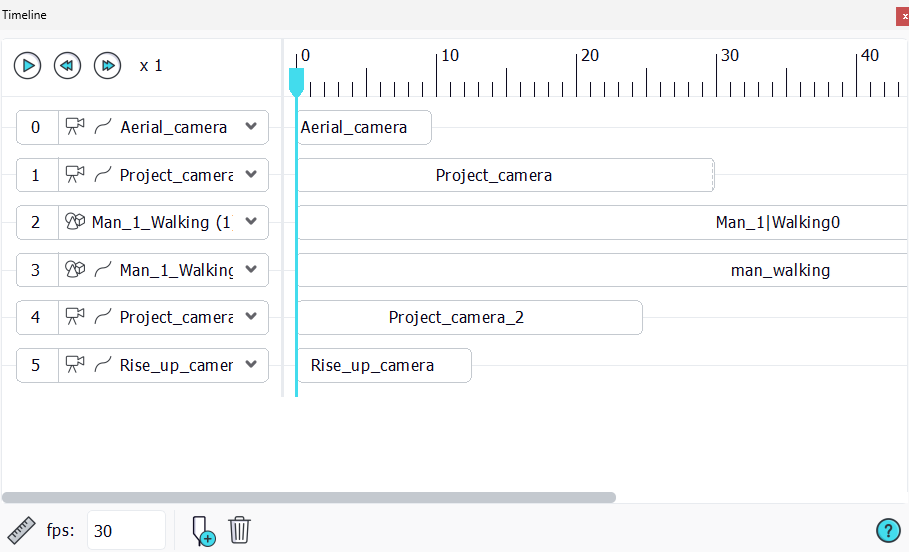
- Use the Timeline to put everything together like in a typical video editing software timeline, with tracks and specific parameters.
Note:
You can refer to the Animating objects along a curve path page for the Scene curves and animations and the documentation Animation page for more info about the Timeline.
In the sample scene, you can select any camera from the list on the top toolbar. Then click on the "Play the camera track" to place yourself in the camera view and play the animation track associated with it.
You can open the Timeline to see what is going on in the background.
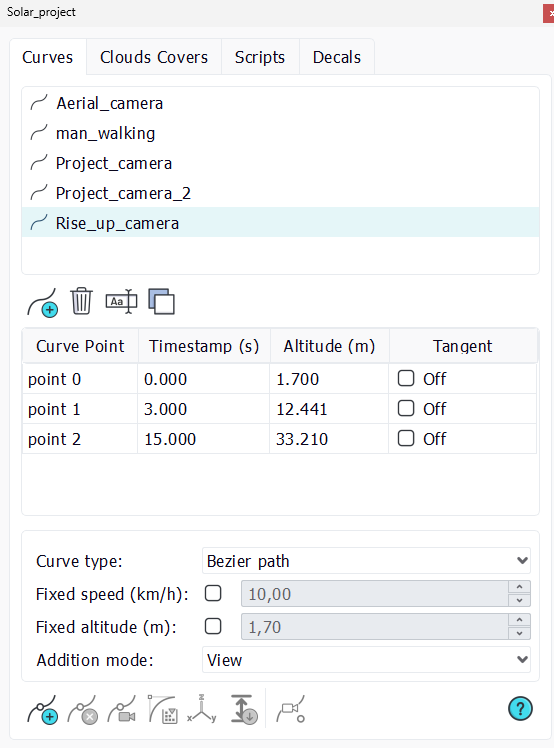
Also, if you open the Scene document you will see which curves were used and in which instances (geometries, cameras, etc...).
 Automatic generation of the scene Automatic generation of the scene | Exporting deliverables |
