

Create cameras
To create videos and images of your scene you will need to create cameras.
To create a camera simply click on the "Create camera" button in the camera toolbar. The camera will be created on your point of view in the viewport. You can then move and turn it like any object in NDunes using the translation and rotation gizmos.
Cameras can also follow a curve path, this is what allows to make videos in NDunes.
- Create a Camera
- Open the camera document from the Scene panel
- Go to the "Animation" tab
- Create a curve point, it will be added at the position of the camera
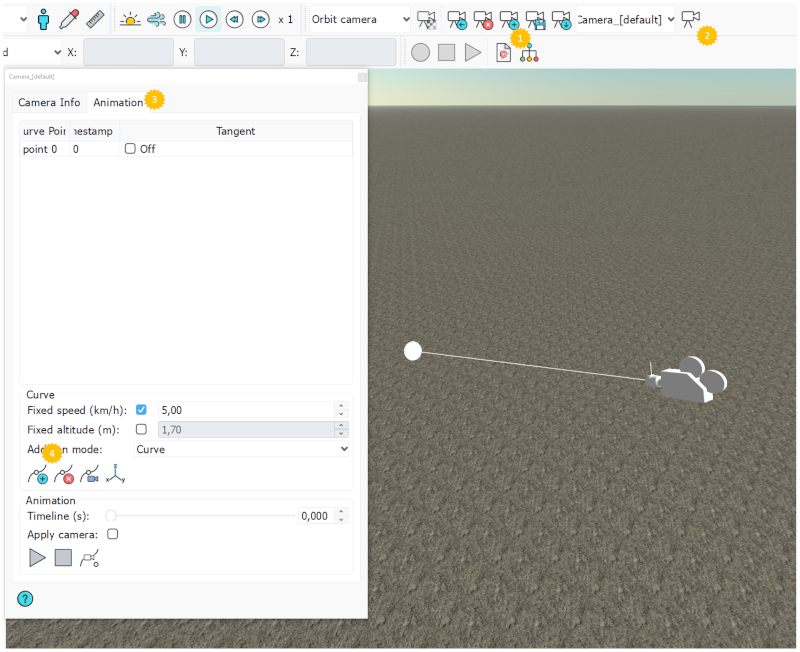
The next curve points will be added to a distance from the first curve point unless you change the Curve point addition mode :
- Curve : adds a curve point to a constant distance from the first curve point.
- Add from observer : The curve point is added at the position of the observer in the view point.
- Pick : The curve point will be added where you click in the viewport.
Note:
You can also place the curve points manually by unchecking "Add from observer", the curve points are then added from the camera position in a straight line with a constant interval between them.
There is now a curve path between the 2 points you created. The camera will now follow this curve when the animation is started.
If you start the animation you will notice that the camera is always looking at the curve. To change this and rotate the camera as you wish follow these steps :
- Uncheck the "Tangent" checkbox in the Camera view for the curve points that you want to orient manually
- Select the "Look At" component of the Camera by clicking on the Arrow of the camera or selecting it in the Scene tree view under Camera>Curve Point>Look At
- Select the Translation mode in the toolbar
- Move the Look At where you wish.
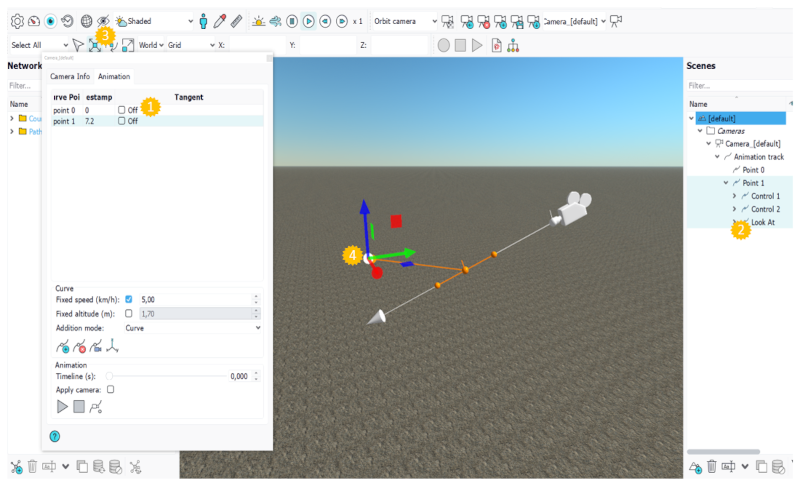
Each curve point of an animation contains a Look At component, which means the camera will reach the rotation you have set with the Look At exactly when it reaches the corresponding curve point.
You might also want to see what the camera sees, to do so, check the "Apply camera" option. This will move your point of view to the camera.
You can also change the camera speed. If you want to have different speed in the same animation, you can uncheck "Auto timestamps" and manually change the time intervals in the "Timestamps" column to indicate at what time you want the camera to reach a specific Curve point.
Note:
If the camera tilts on the forward axis during the animation you can use the "Align the curve point with the up direction" button which will reset the matrix of the camera so that its Z axis points upward.
 Scene edition Scene edition | Global Illumination and Tone Mapping |
