

Project integration
Integrating your project is probably the part of the process where you will have to be the most active in NDunes. The idea is to use the 3D model of your project inside a Scene generated by Blueprints.
Note:
If you need help to export a 3D file from your CAD software you can refer to the tutorials on how to Convert 3D files from CAD softwares, where we try to cover as many CAD software as possible.
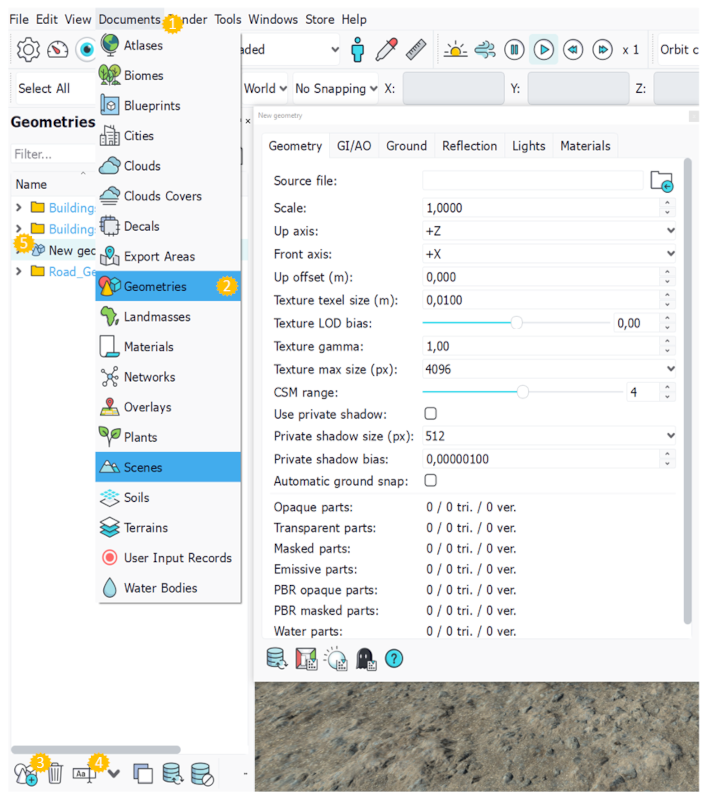
To integrate your project, you will first need to create a Geometries document :
Import Geometry document
- Click the "Document" menu in the navigation menu.
- Select "Geometry" in the unfolding menu to open the Geometry panel.
- Click the "Create a new Geometry document" button at the bottom of the Geometry panel.
- Rename the Geometry
- Double click the new Geometry to open its view.
Note:
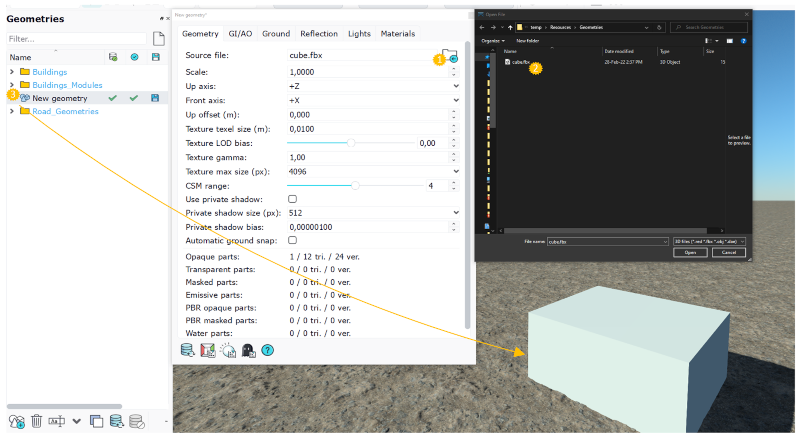
To make things easier you can place your model in the "Geometry" folder in your NDunes working directory.
A Geometry is a document that places 3D models in the Scene. To import a 3D model :
- In the Geometry view click on the folder icon
- Select your model in the Windows explorer
- Drag & Drop the document from the Geometry panel to the viewport
The model is now visible in the Scene.
Place Geometry in the Scene
Using the overlay you imported previously, you can now place the geometry in the Scene. To do so we will need to use the tranlsation and rotation gizmos.
To move the Geometry:
- Click on the Translation button in the toolbar
- Click on the Geometry
- Click on the arrows or the planes to move the geometry
The Rotation and scale gizmo works in a similar way.
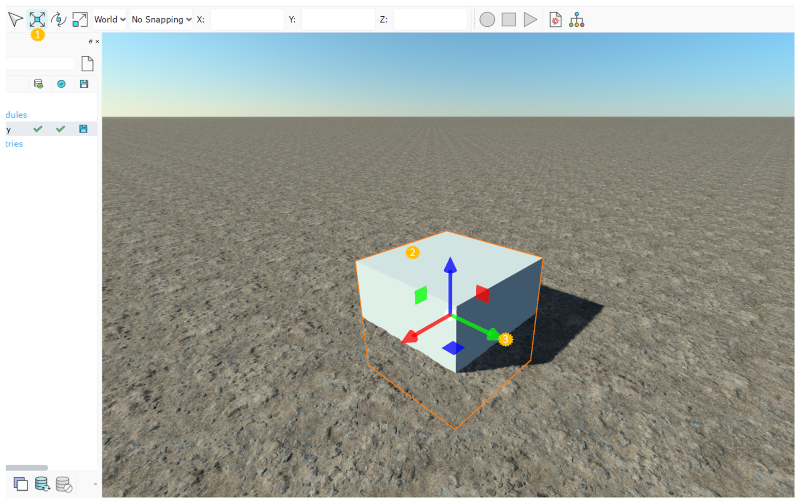
Note:
You can use the Top Down view to have a better sense of the position of the Geometry relative to the overlay.
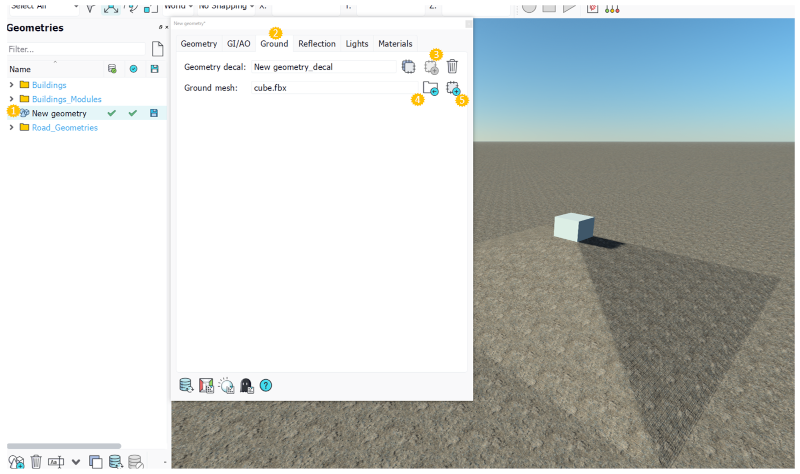
Create ground decal
In some cases the ground around your project will be part of the model you want to import. To integrate the ground of your model you can use the Import model as geometry ground decal feature that will allow you to use the mesh of the ground as part of the Terrain in NDunes.
First of all you will need to separate the "ground" part of your model from the actual geometry you want to use. For example if you have a house with a terrain, you need to use a CAD software to separate the ground (that will be loaded in the ground decal document) from the house (that will be loaded in the Geometry document) in 2 distinct models. You can then follow these steps :
- Open the geometry of the model you imported previously
- Go to the "Ground" tab
- Create a Decal
- Load in the ground mesh
- Generate the ground decal
Adjust materials and add texture
Sometimes you might need to change a material or adjust its colors. To do so you can use the Materials and Nodegraphs document in NDunes.
To change a material on a geometry you can simply drag & drop a material from the Material panel to a geometry in the viewport. Be careful as the material will be applied to the part where it is dropped. Alternatively you can use the Material tab in the Geometry document to visualize the different geometry parts.
If you want to edit a Material you can create a Nodegraphs that will allow you to change different component of the material such as its color, its brightness, etc...
Note:
You can refer to the Materials and Graph editor documentation to learn how to use them.
 Creating overlays Creating overlays | Scene edition |
