


Annotations
We call "annotations" panels displayed in the scene viewport containing image or text informations.
An annotation panel is placed in the scene and always face the camera.
Creating annotations
Annotation is a type of document. Like any other document, it can be created like this:
- Clicking the menu: File/New/New Annotation.
Or:
- Opening the "Annotation" document tree view;
- Clicking the "Create" button in the toolbar.
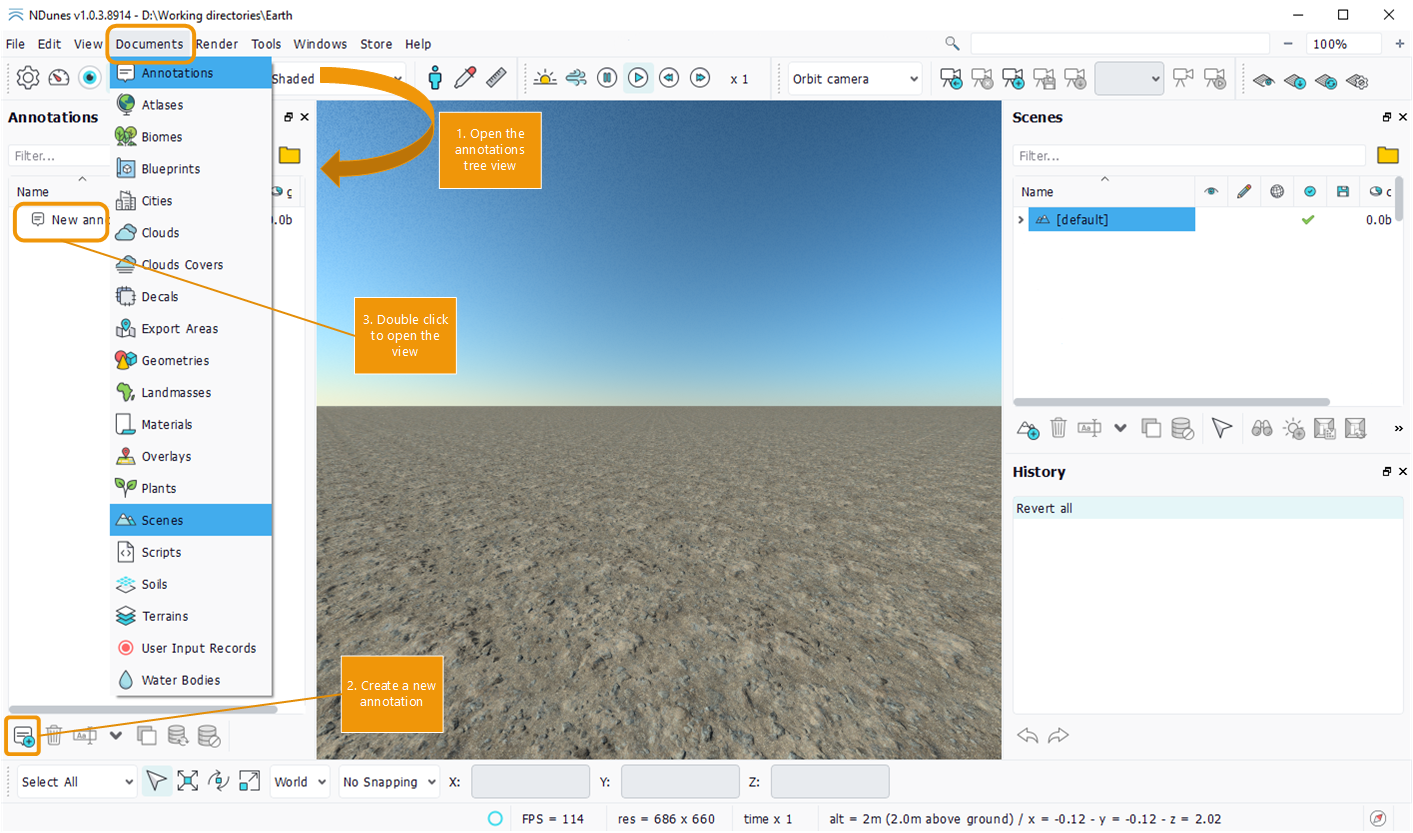
Creating a new annotation
Once the annotation is created, we can rename it and open its view and drop it in the viewport. When dropped in the viewport, the annotation is added into the scene (visible in the scene tree view).
The first property of the view allows to select the type of annotation. There are two types of annotation: image and text.
Image annotations
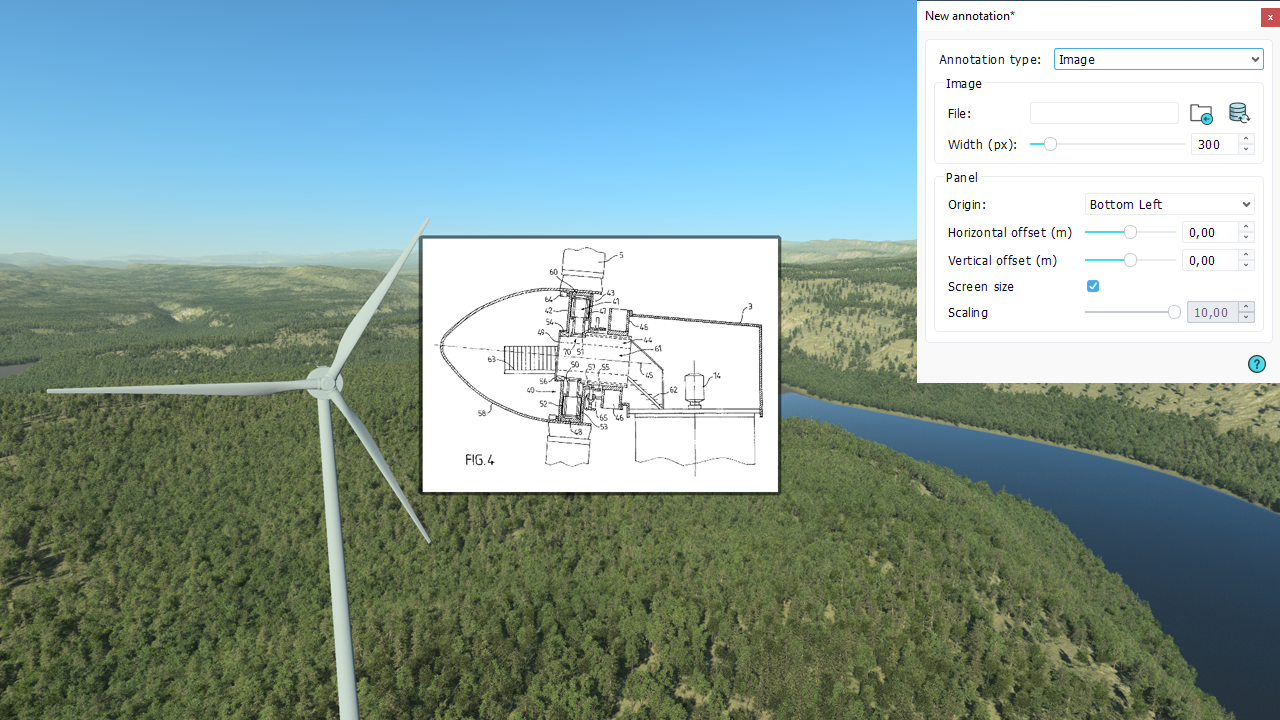
Image annotation and its view
When selecting the "Image" type on top of the view, the "Image" properties appear:
- File: select an image file from the user directories.
- Width: size of the image in pixels when screen size is enabled.
The next group named "Panel" allows to tweak properties related to the panel in the scene viewport:
- Origin: where is the panel center of rotation.
- Horizontal and vertical offsets: the distance gap between the panel and its center of rotation.
- Screen size: when enabled, the panel size stays the same on screen, whereas if disabled, the panel keep its size in the 3D scene.
- Scaling: when screen size is disabled, allows to increase the size of the panel in the 3D scene.
Text annotations
When selecting the "Text" type on top of the view, the "Text" properties appear:
- The text property allows to edit the text that will be written on the panel.
- Font size to change the size of the text.
The "Panel" properties are the same for "Image" and "Text" types.
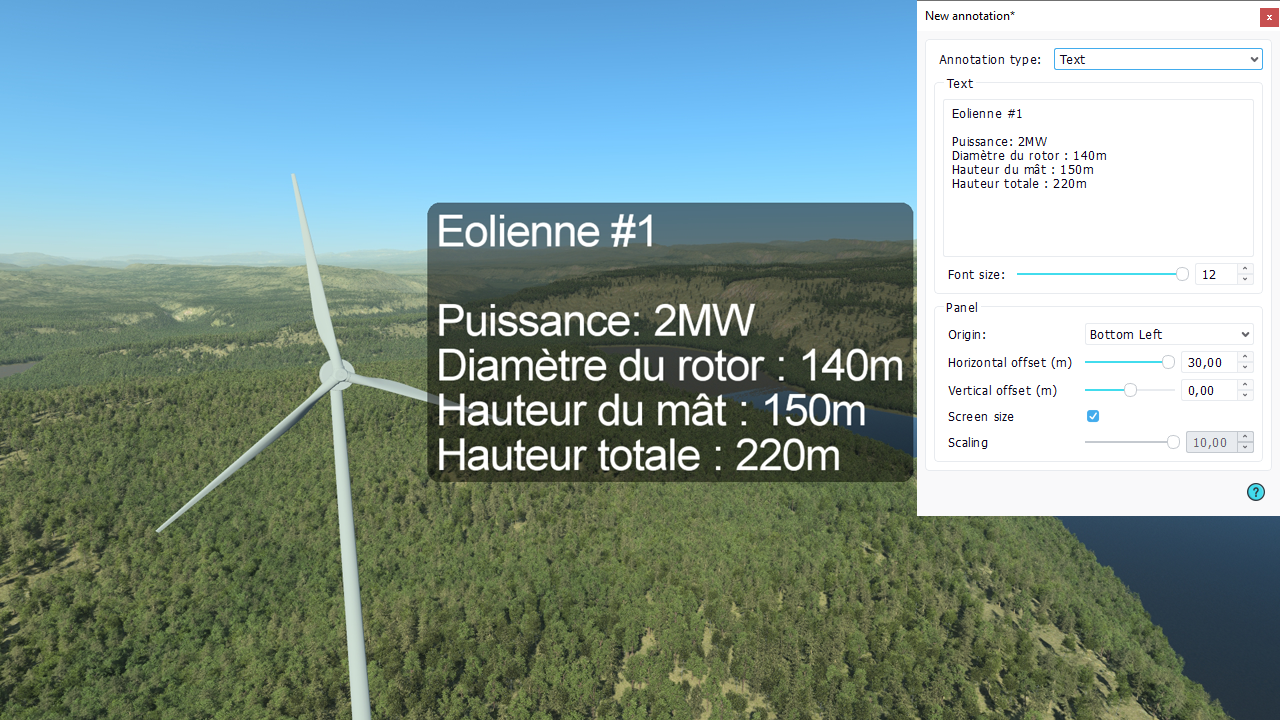
Text annotation and its view
